1. Notes
The notes section for Chapter 5 - Advanced Identities and Federation
Need to break this out from Notes/Demos
AWS SAML 2.0 Identity Federation
Security Assertion Markup Language v2.0 Allows you to INDIRECTLY use on premise IDs with AWS- you cannot use any credentials but AWS Credentials.
- Open Standard used with many IDp's - MS ADFS for example.
- Enterprise Identity Provider AND SAML 2.0 Compatible - is NOT Facebook, Google, etc.
- More than 5000 users
Application Access
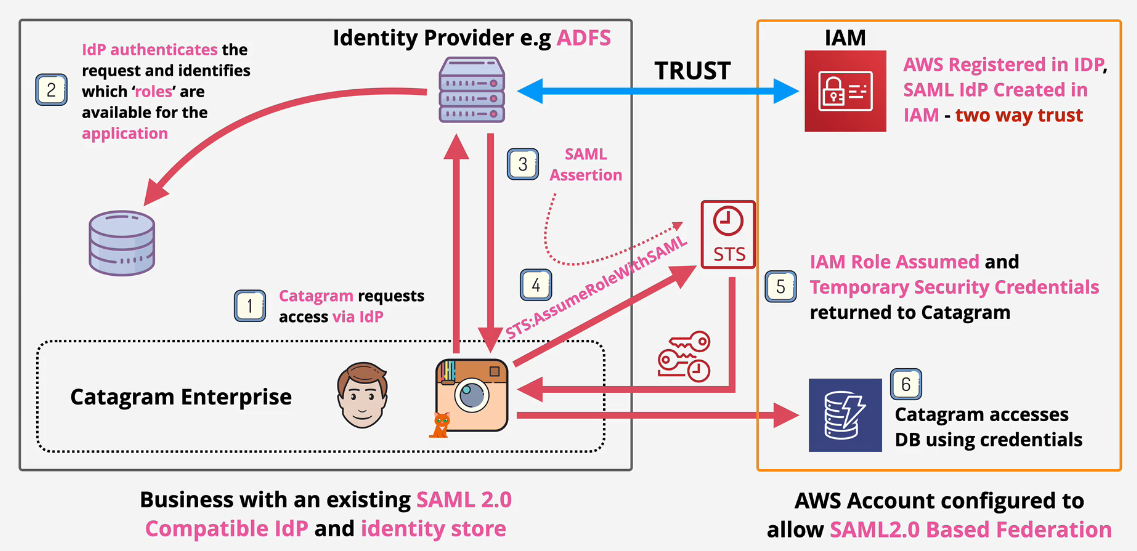 This is also considered Legacy infrastructure
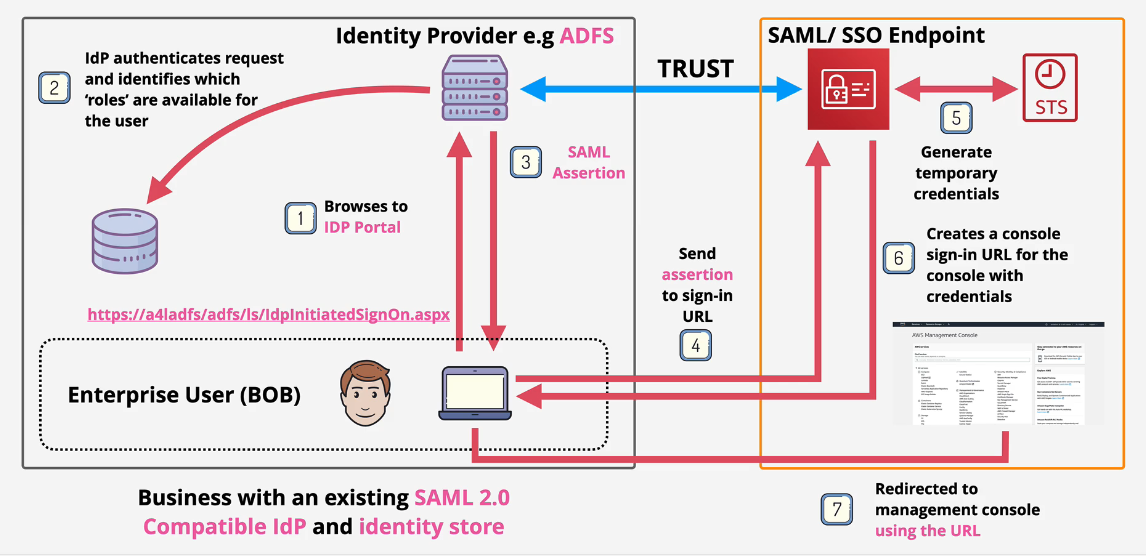
Console Access
Can also implement access to the Console via Portal
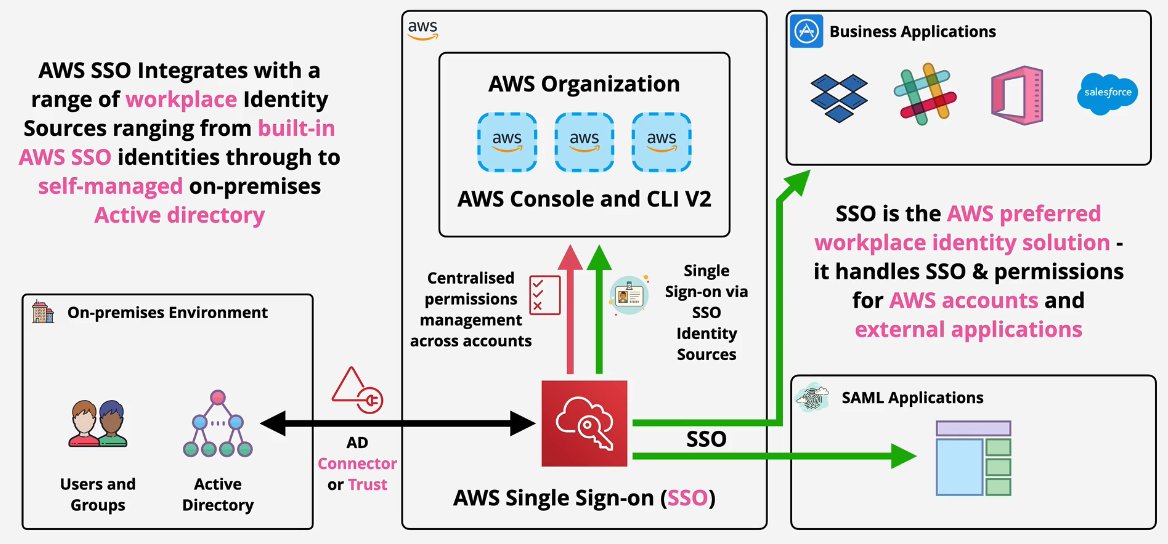
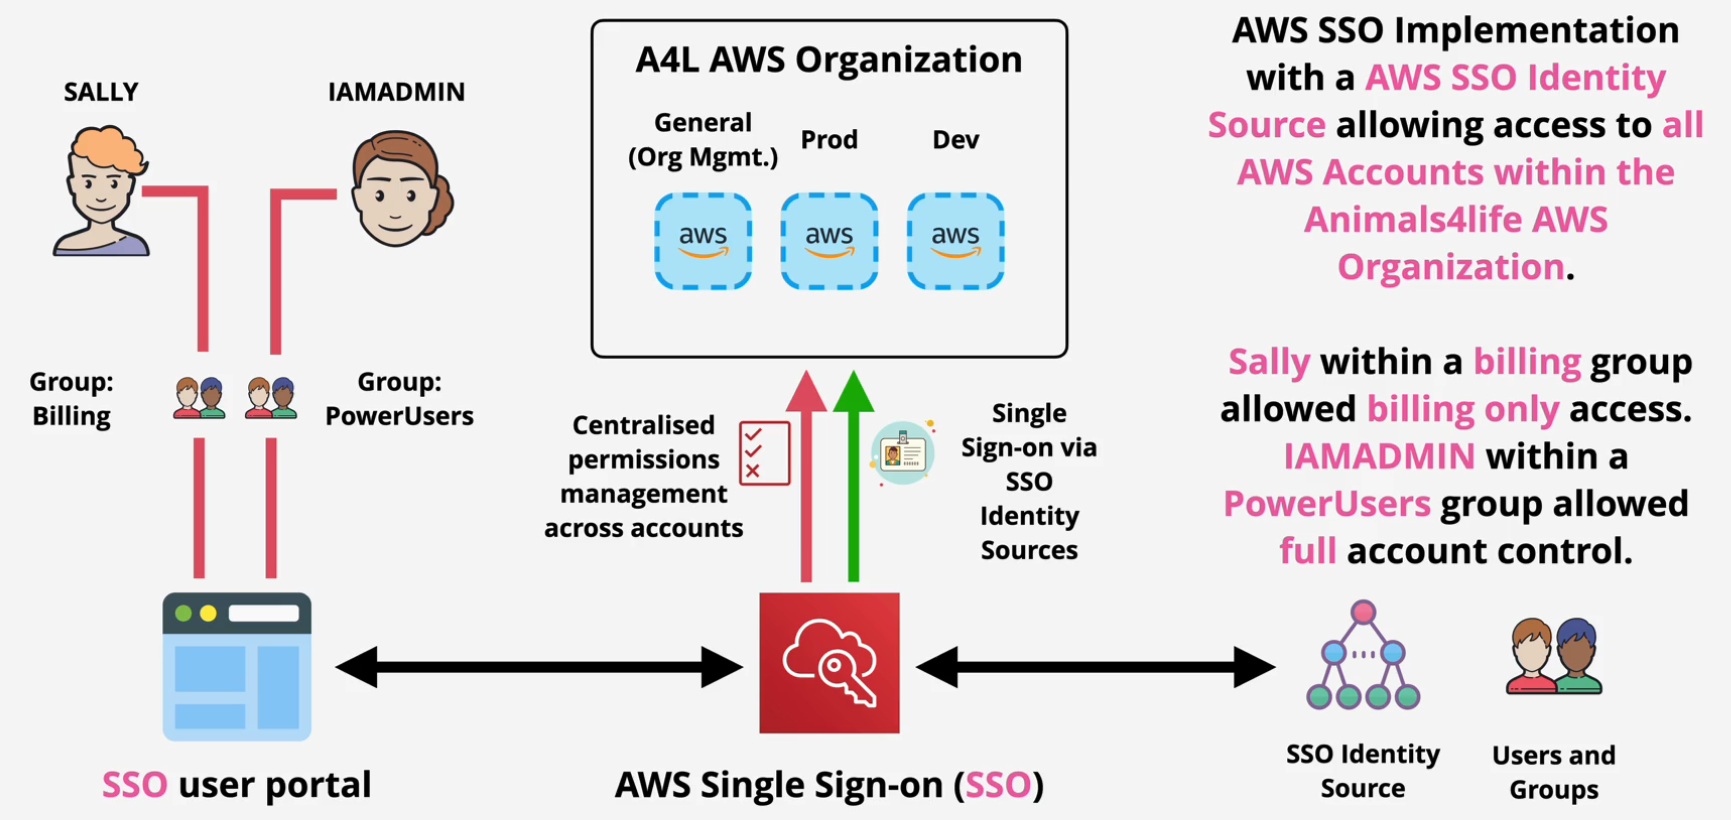
AWS Single Sign On (SSO)
Manage SSO for AWS Accounts and External Applications
- Flexible Identity Source
- AWS SSO - Built in identity store
- AWS Managed Microsoft AD
- On Prem AD
- External Identity Provider - SAML 2.0
Note: This is preferred by AWS vs any other workforce identity federation
Demo: AWS SSO
- Navigate to the SSO console in the Management account.
- Click enable SSO
a. I got a rate exceeded so I refreshed and tried again.
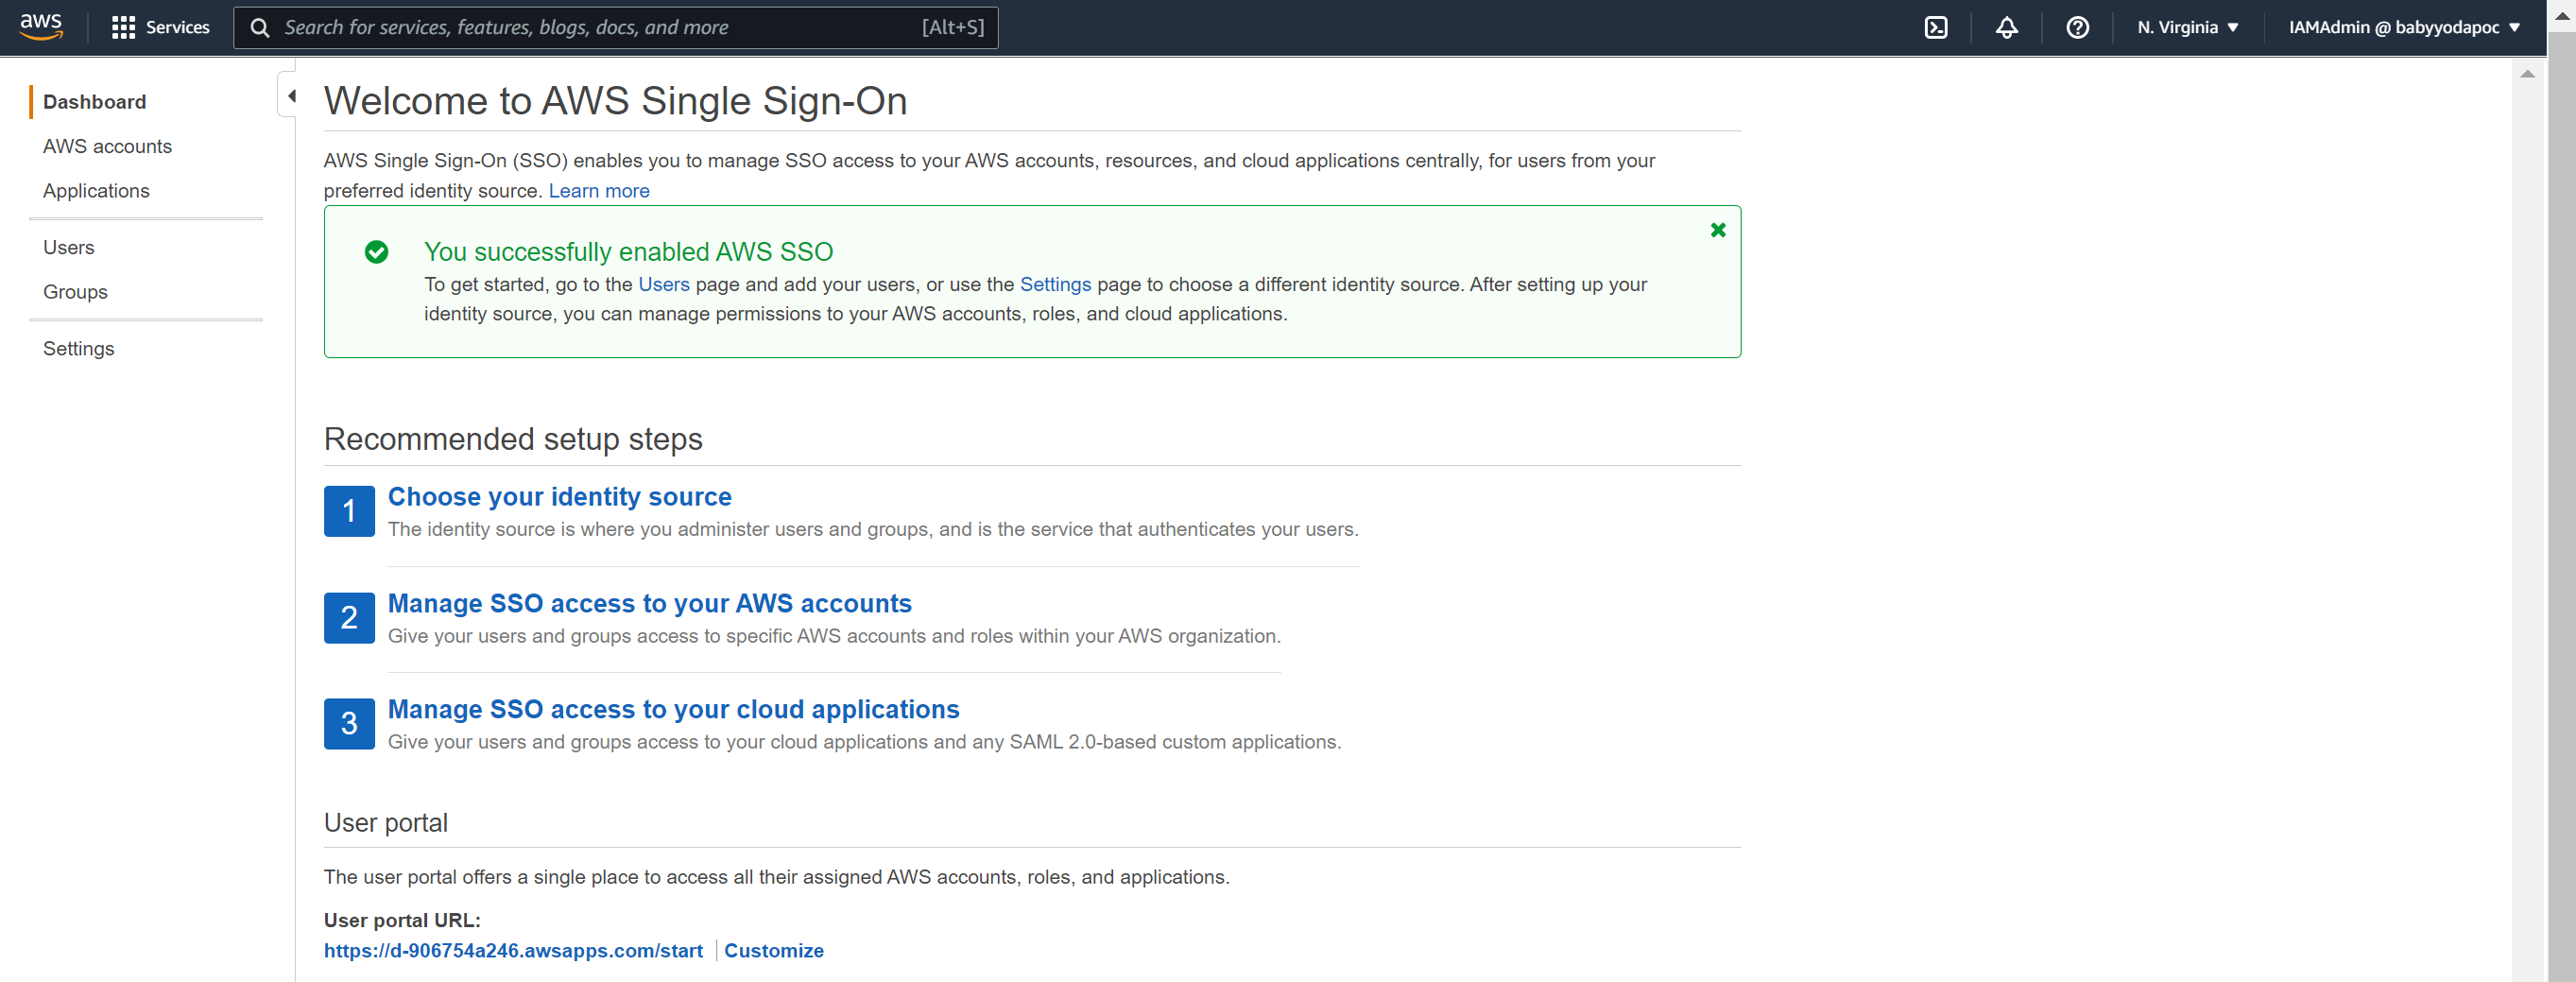
- You can change the portal URL to something more useful.
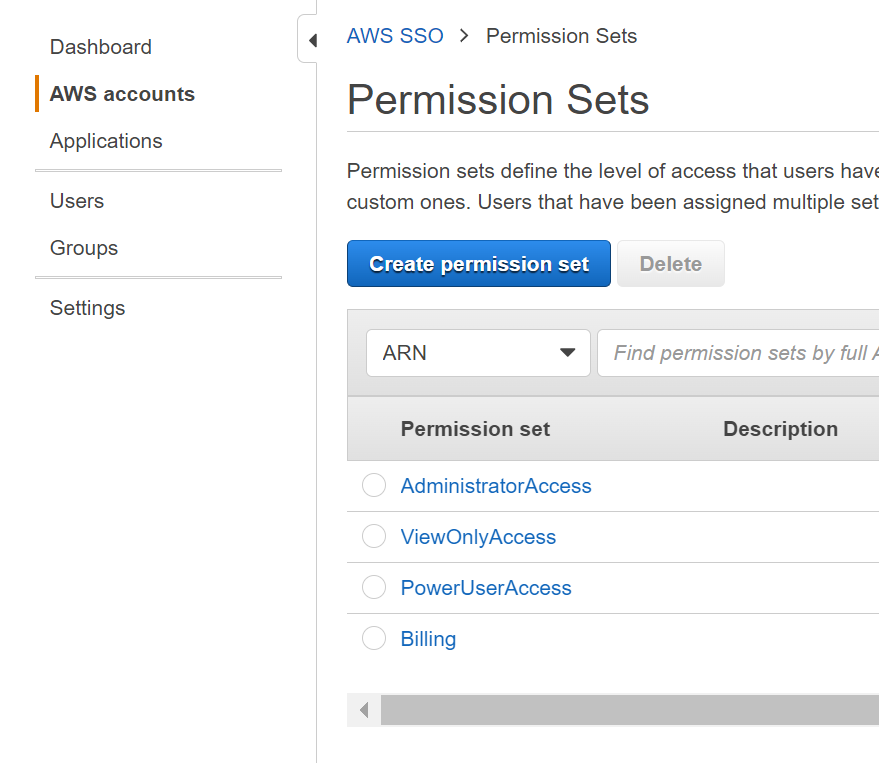
- Under the AWS SSO page, click permission sets.
- Click Create permission set, then select administrator access and then select next, add some tags, and then click create permission set.
Repeat until you have the 4 permission sets below:
You can also pick the signed in duration time - I chose 12 hours.
Create a User
- Click on Users on the left and then click New User
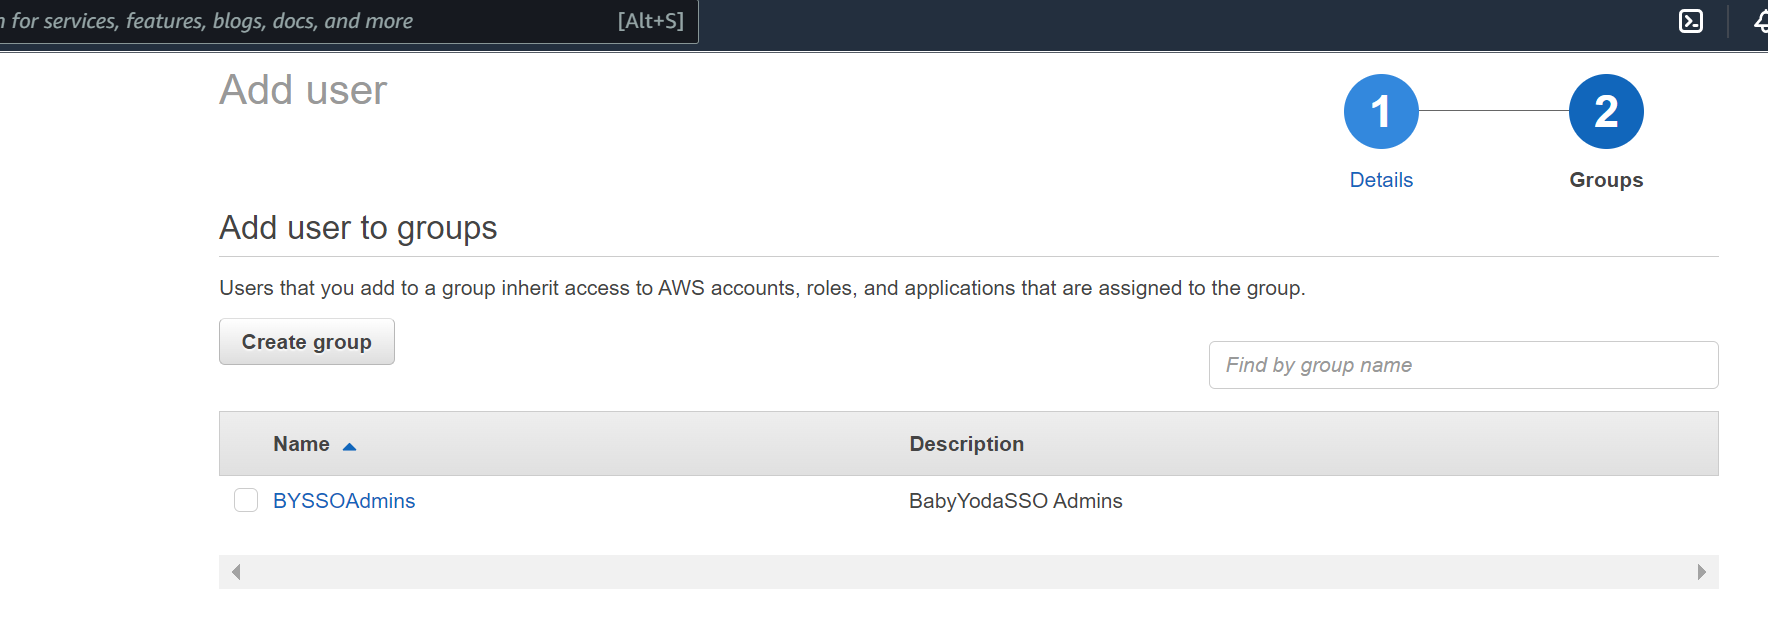
- Enter in the information here and then click next.
- We don't have any groups, so click New Group.
- Once the user is created, they will get sent the following email:

Assigning Permissions
- Click on AWS Accounts and then Select all of the accounts that you want this user to have access to
- Click Assign Users
- Click on the groups tab and then select the appropriate group
- Click next and then select the permission set for that group.
Testing Access
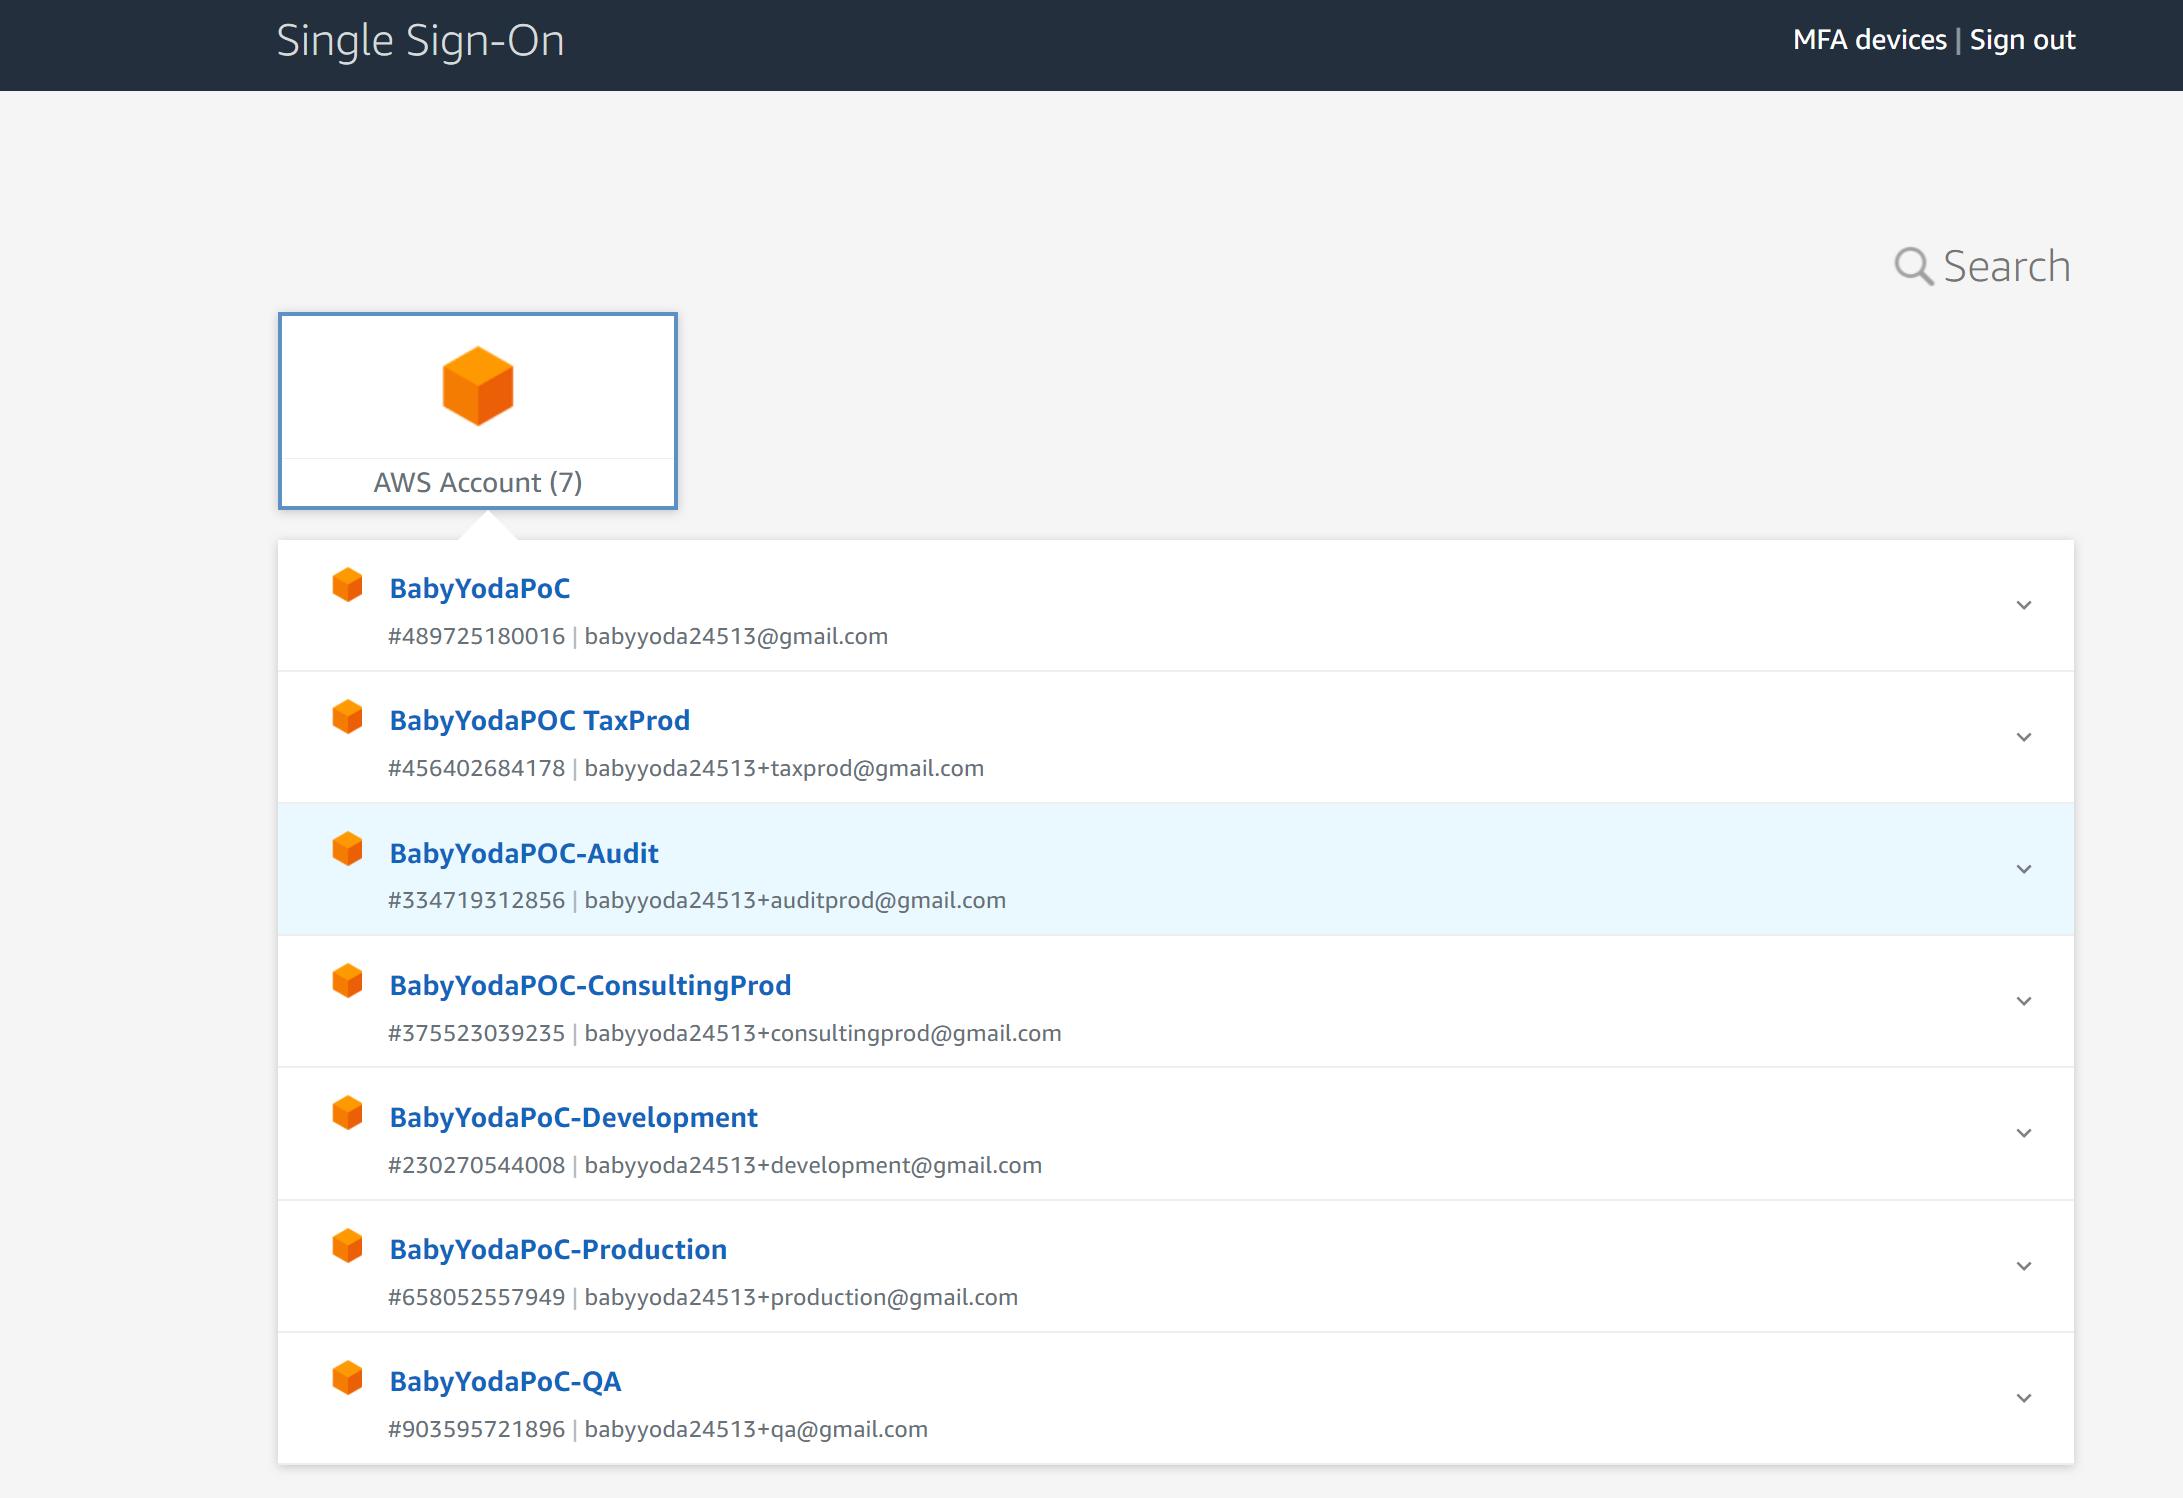
- Click on the SSO Url and then log in as the user.
- You should see that user having access to the accounts in your AWS Organization.
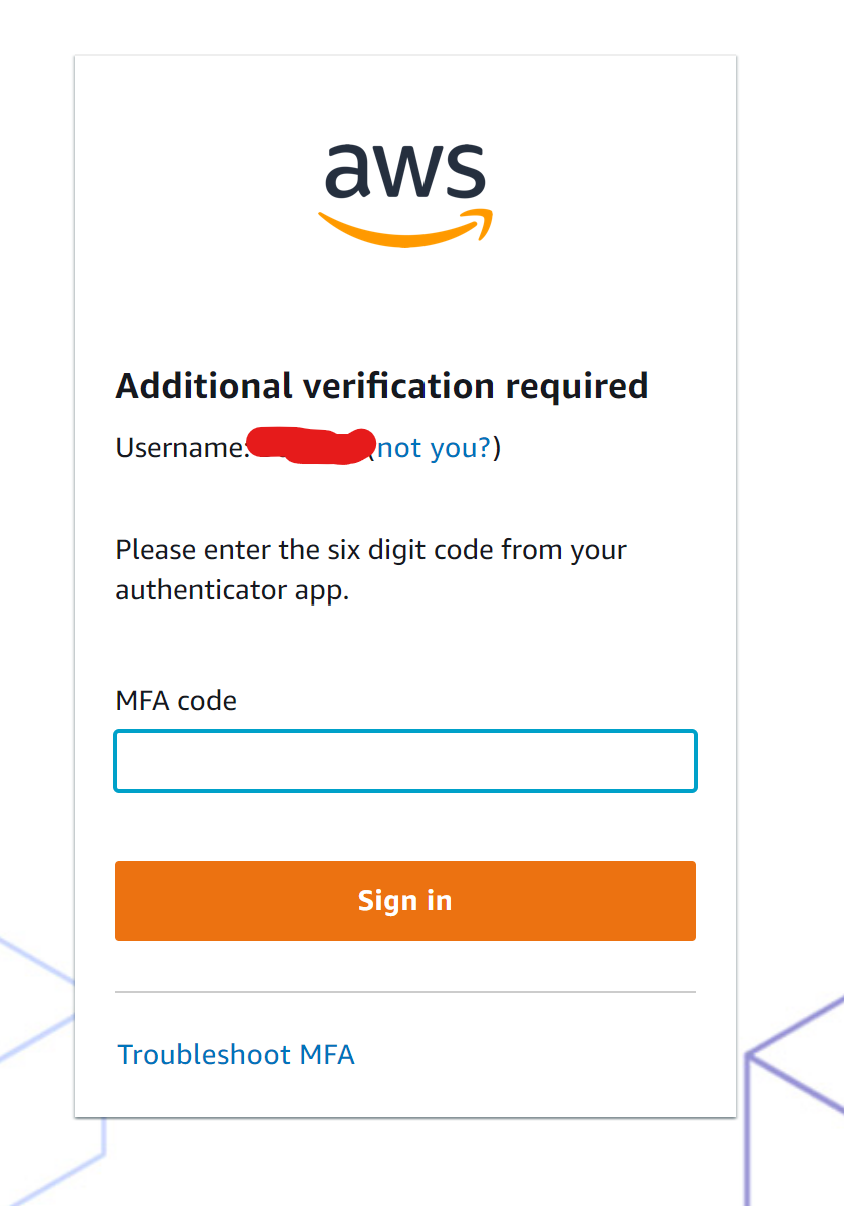
Set Up MFA
- Click MFA Devices at the top
- Click the type of registration
- Scan the QR code
- Finish setting up MFA.
- Sign out and sign back in to test.
Congrats, you've built this:
AWS Cognito User and Identity Pools
Cognito is a terrible name - as it is with a lot of AWS Services. AWS Cognito is Authentication, Authorization and User management for web/mobile apps.
Two parts: User pools and identity pools
- User pools - a user directory within Amazon Cognito
- sign in and get a JSON Web Tokens, however, AWS resources don't use JWT's That's all it does.
- Identity pools allow you to offer the access to temporary AWS credentials.
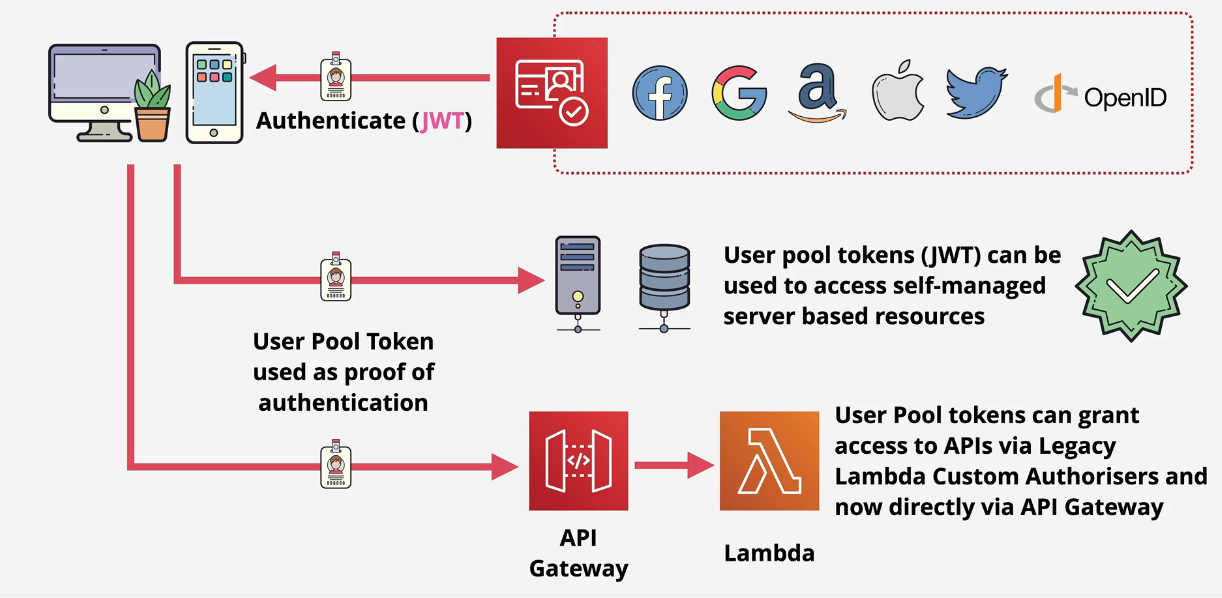
User Pool
Sign in and get a JSON Web token (JWT) - These tokens cannot be used for AWS Resources.
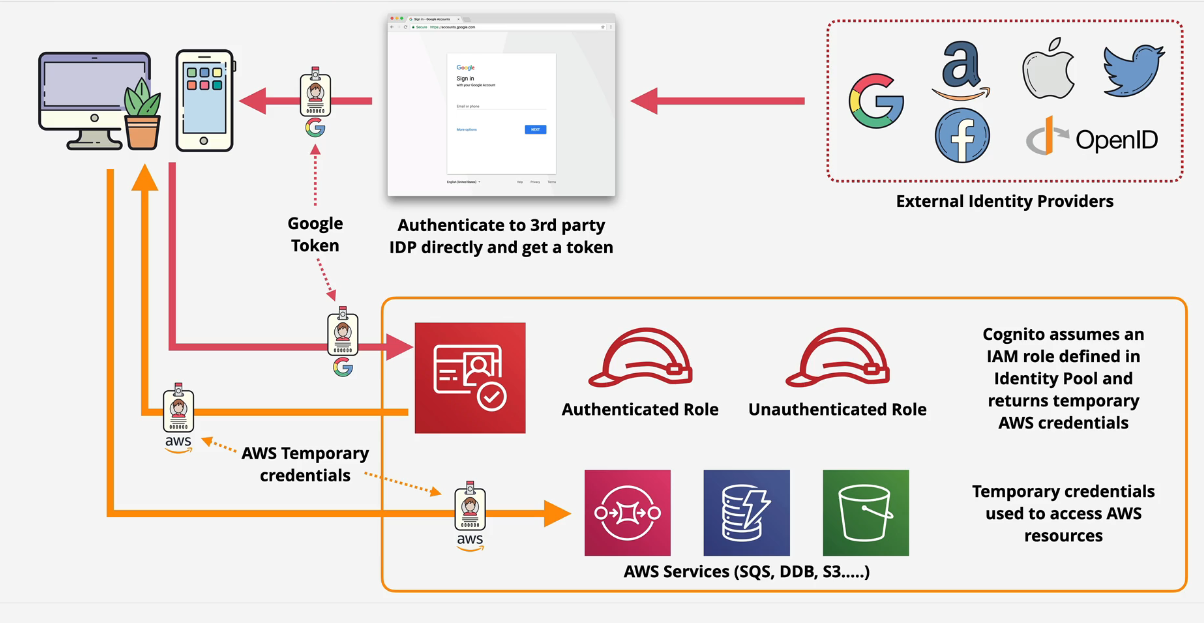
Identity Pool
You use Facebook, Google, Apple, Twitter or another type of External Identity Provider to sign into AWS and generate a user in the User Pool. This then creates a JWT that it passes into an identity pool in Cognito. Cognito will either assign an authenticated role or an unauthenticated role and pass appropriate credentials back to the application. The application can then use those tokens to access AWS resources such as SQS or S3.
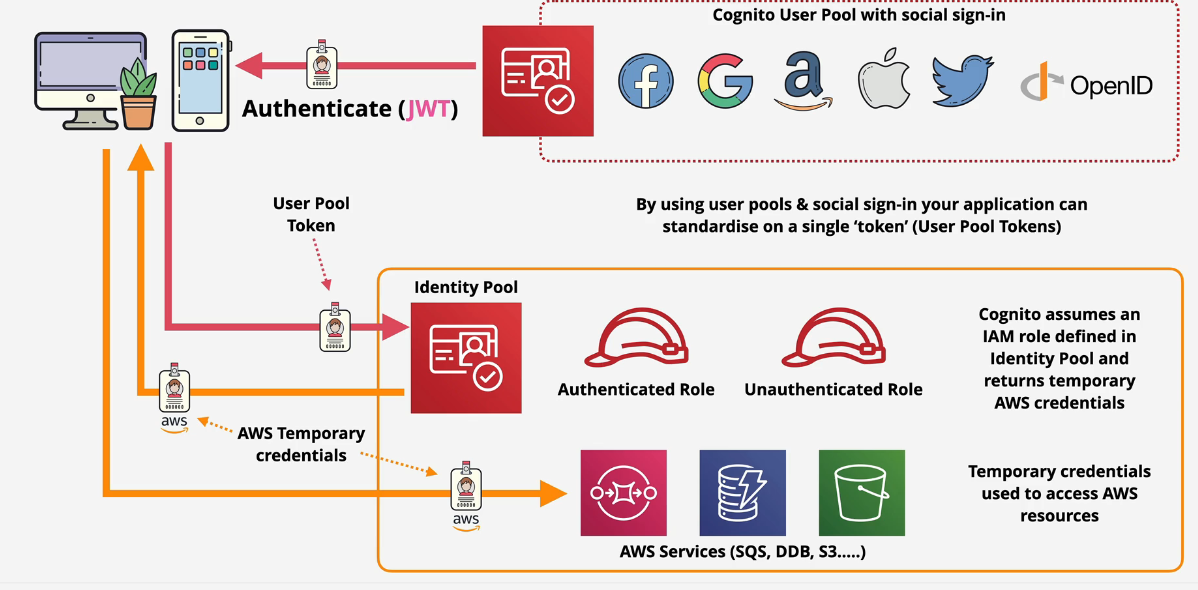
Using them together
You can use user pools and identity pools together to swap JWTs for AWS credentials.
Demo: Using WEB IDF:
You will build this:
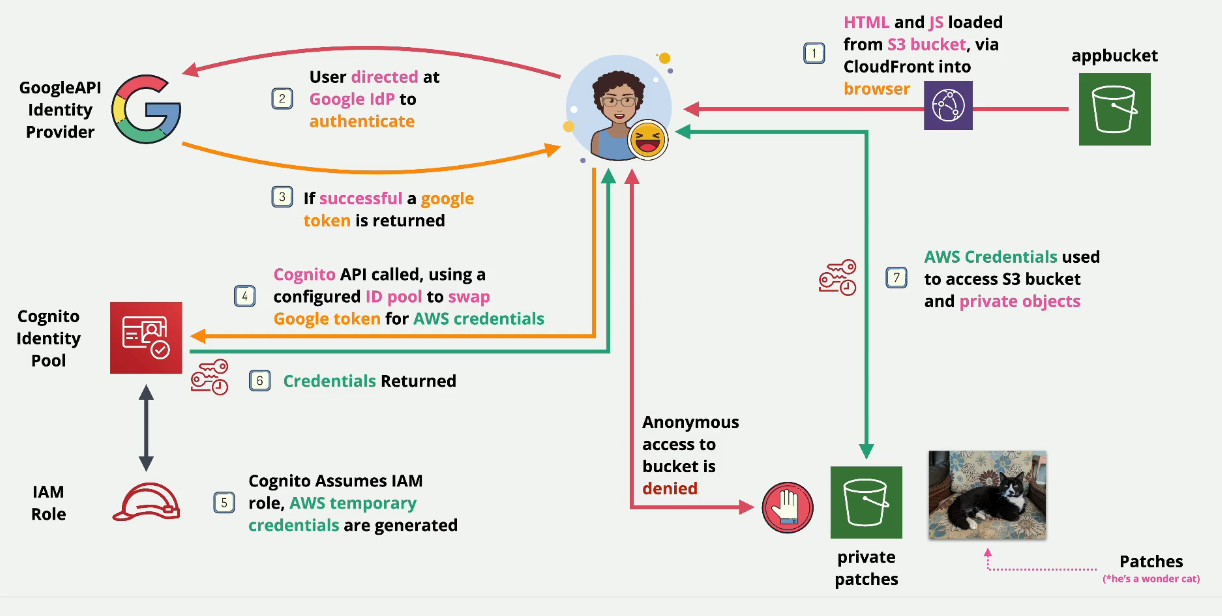
- STAGE 1 : Provision the environment - STAGE 2 : Create Google API Project & Client ID - STAGE 3 : Create Cognito Identity Pool - STAGE 4 : Update App Bucket & Test Application - STAGE 5 : Cleanup the account
Stage 1: Provision the environment
-
Log into the Development account
-
Create a CloudFormation Stack from this link: https://learn-cantrill-labs.s3.amazonaws.com/aws-cognito-web-identity-federation/WEBIDF.yaml
-
Navigate to the S3 bucket called webidf-appbucket
-
Copy the bucket website endpoint from the bucket.
-
If you paste that in your browser, you should get a Google Sign in link, but you haven't actually implemented anything so this won't work.
-
At this point, you should have your html and your javascript loaded into the browser. That's it.
Stage 2: Setup Google Project
- Navigate to this link: https://console.developers.google.com/apis/credentials
- Click Create Project.
- I named mine
duposidfbut you can name it whatever you'd like. - Click on Configure Consent Screen
- Choose whether this is an internal app or an external app. Ours is external for now, so check the external box and click Create.
- Enter your name of the project and email and hit Save and Continue.
- On the scopes screen, click Save and Continue
- On the Test Users screen, click Save and continue and then on the summary screen, click Back to Dashboard.
Google API Credentials
- Click Credentials on the left
- Click Create Credentials and select OAuth Client ID.
- Select Web Application and rename the app.
- Navigate back to the S3 Bucket and copy that Bucket Website Endpoint or the CloudFront distribution domain name.
- Paste it into the URL here
- Click Create
- Copy the Client ID and Secret somewhere safe
Stage 3: Configure AWS Cognito
- Navigate to the Cognito Console in AWS
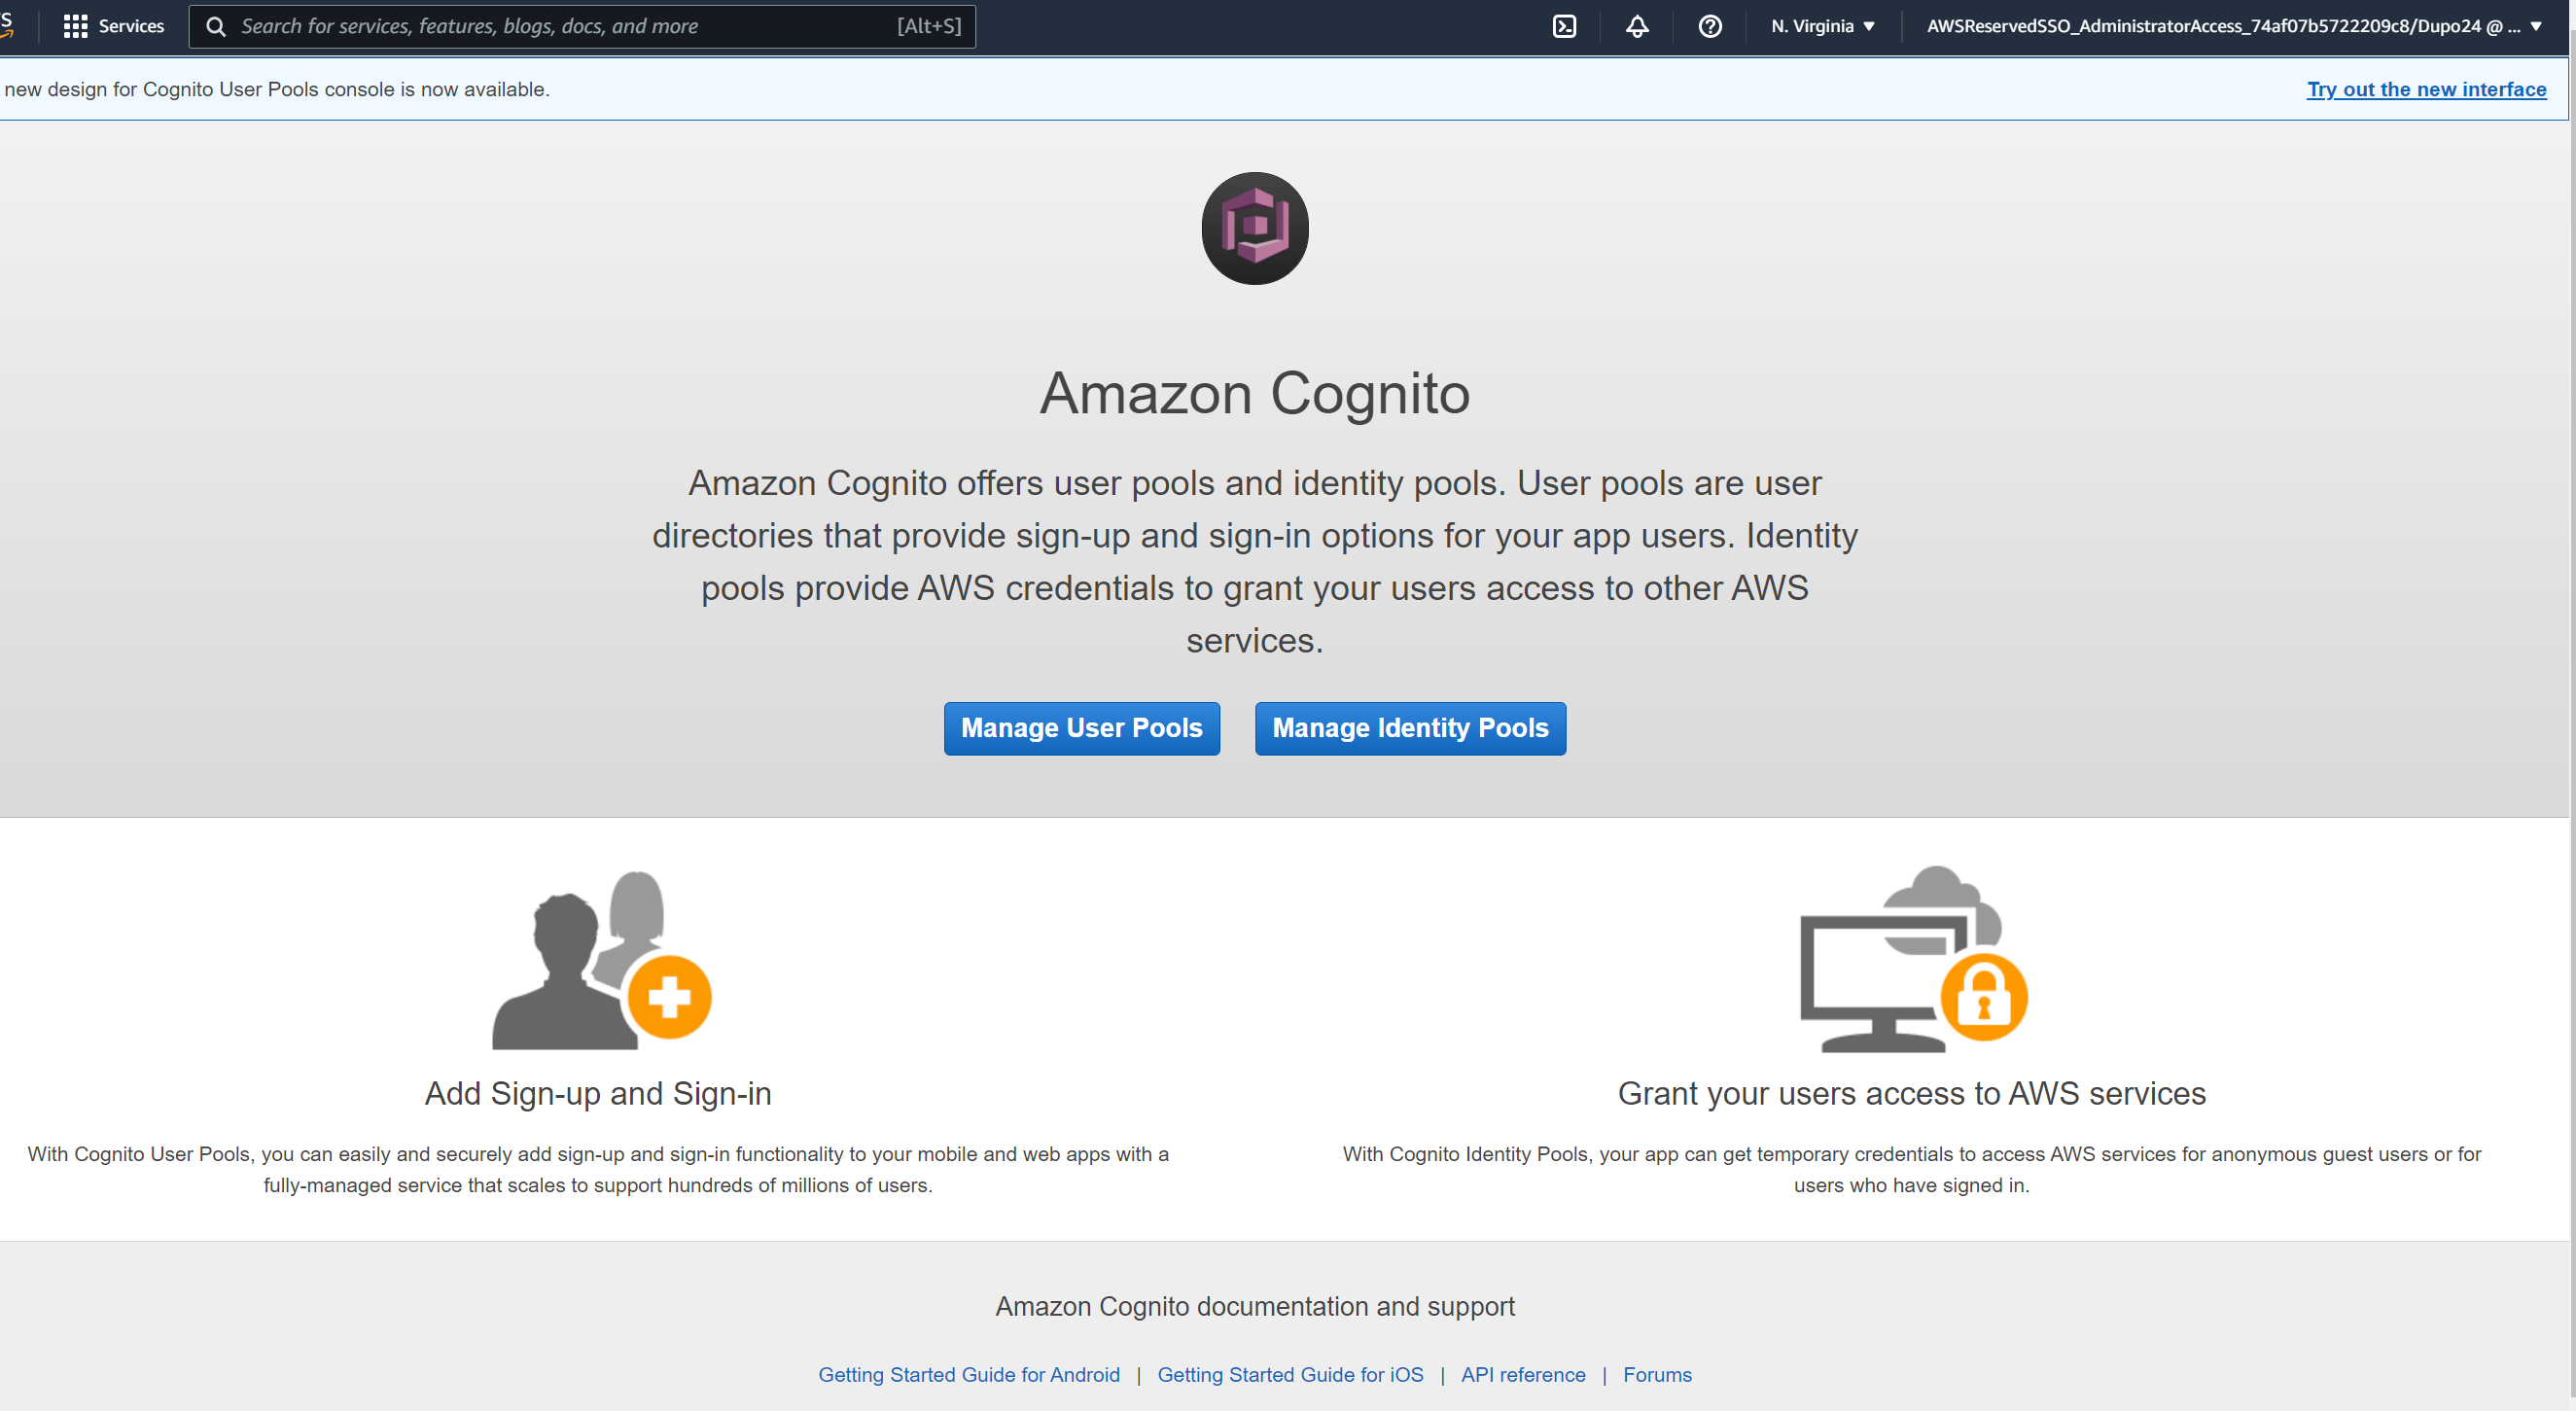
- Click Manage Identity Pools
- Click New Pool
- Name this pool
- Scroll to the bottom and paste in your Google Client ID that you saved earlier.
- Click Create
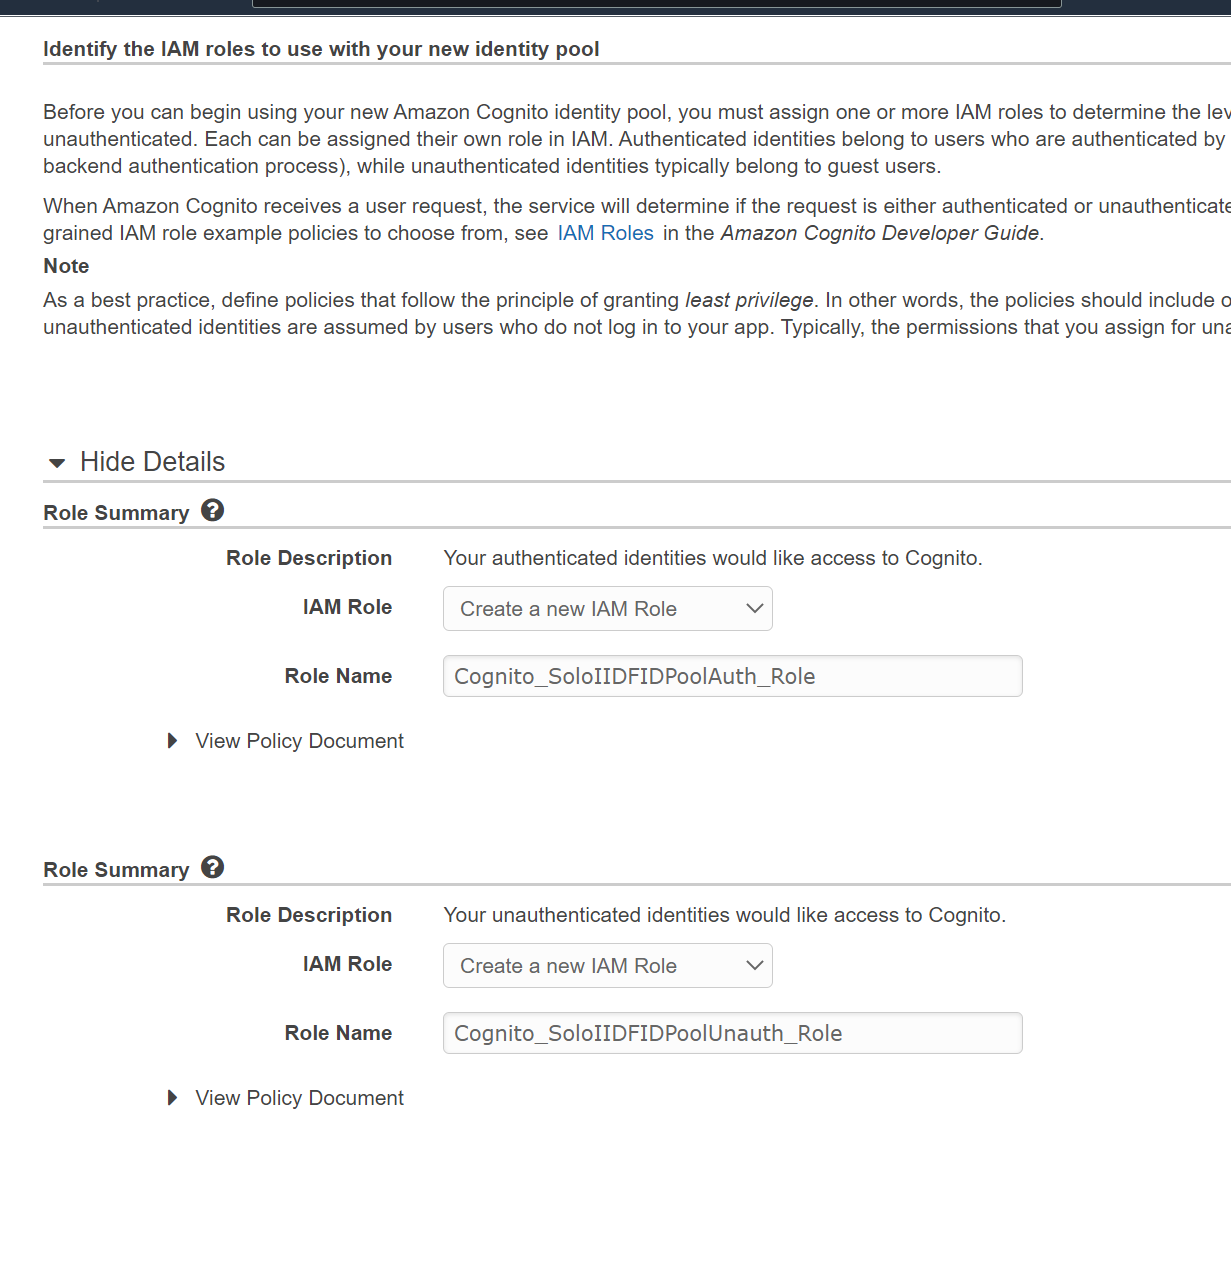
- Note the fields here, we are going to create a new role and call it whatever it autopopulated
- Click Allow
- Copy the AWS credentials that are highlighted in red on the next screen.
- Click Create Identity pool
- Grab the identity pool ID and move over to the next step.
Configure IAM Role
- Navigate back to the IAM console and go to Roles.
- You should have two new roles:

- Click on the Auth_Role
- Click on the Trust Relationships tab
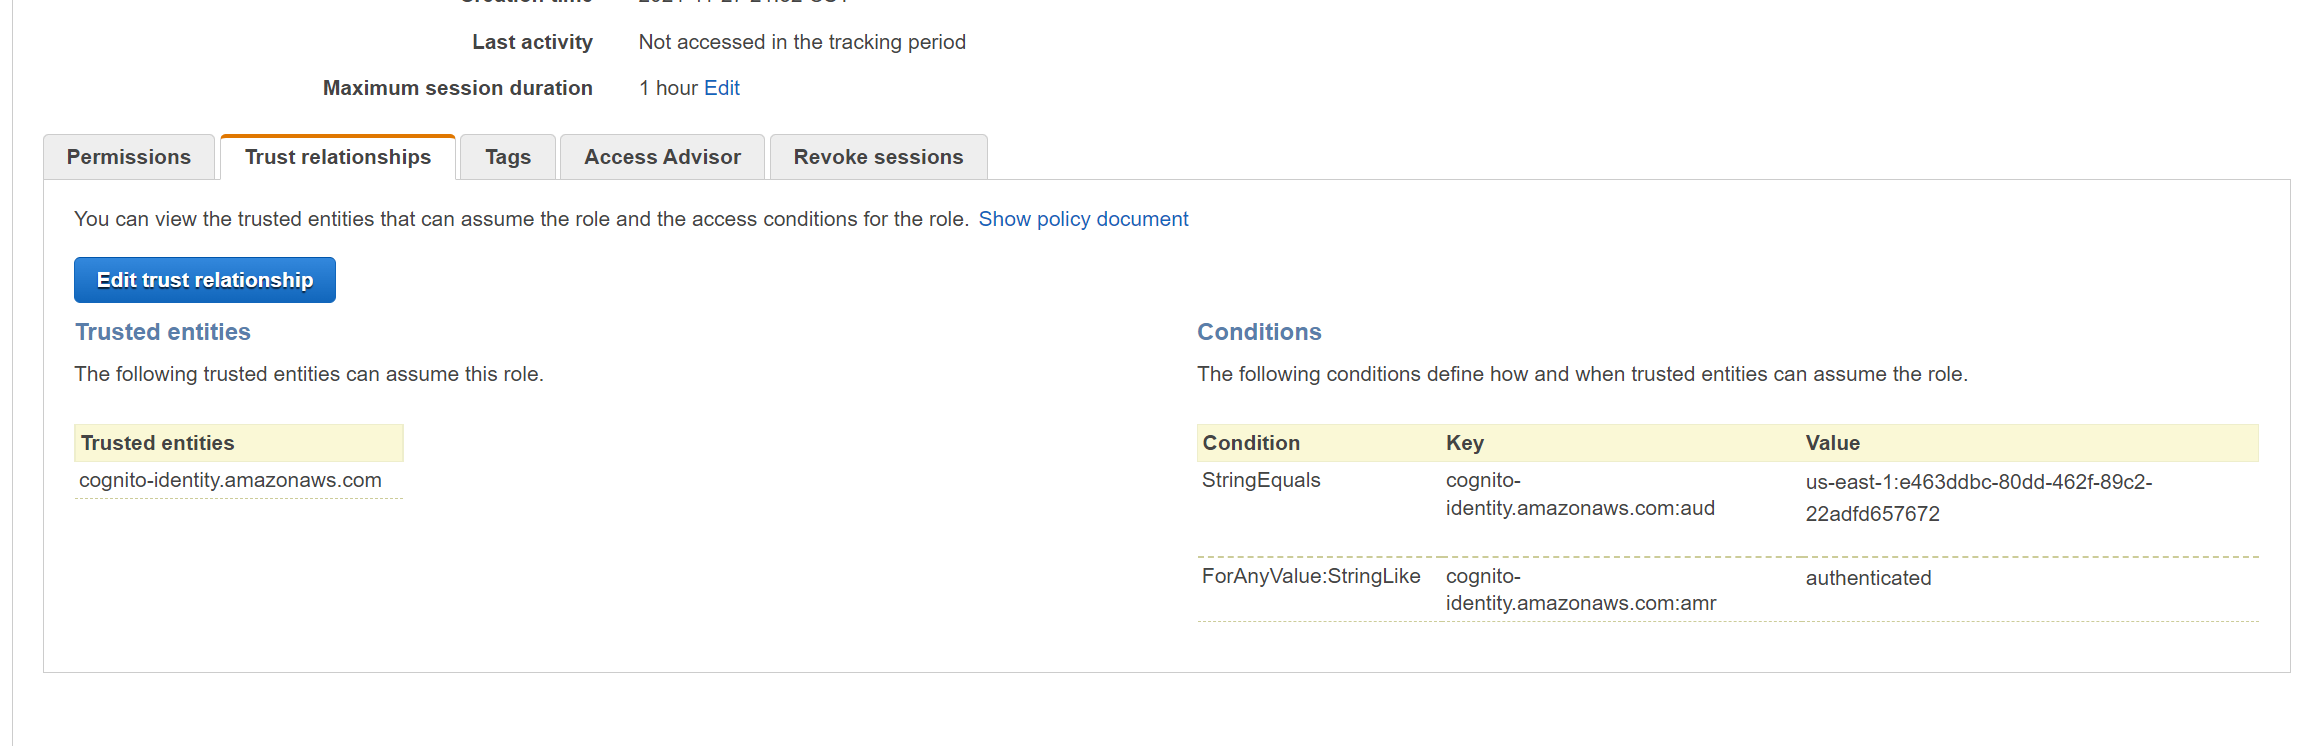
- What you see here is that the role is trusted by Cognito AND the string must match the value that we were given earlier. Remember what we copied in red?
- On the Permissions tab, notice you have a default policy attached.
- Attach the private permissions policy that was originally created by the stack.
Stage 4: Update the HTML and JavaScript
- Navigate to the webidf-appbucket s3 bucket
- Download the two files and open them in your text editor of choice
- Replace the 3 lines in those files and then save them and reupload them to the S3 bucket.
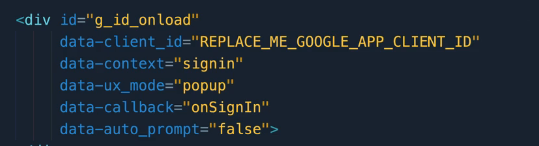
- Update the Google Sign In Client ID
- Grab the bucket website endpoint from the static website hosting section.
Test this thing out
- Paste the CloudFront URL into an incognito browser session
- Click Sign in
- Enter your credentials for your google account
- Click sign in
- You should be taken to a page that shows you are signed in and should show the images from the private S3 bucket.
- Open up the developer console in Chrome or Edge and you'll see the program actually working with some prompts in the console.
Stage 5: Clean Up
- Go to google and delete the project
- Navigate back to Cognito and delete the identity pool
- Navigate to IAM and delete the two roles that were created
- Delete the stack.
AWS Workspaces
- Desktop as a Service - DaaS
- Similar to Citrix/Remote Desktop VDIs
- Windows and Linux VM's
- Monthly or hourly pricing
- Use a Directory service (AD or AD connector that integrates with your on prem AD)
- Uses AWS Managed, not customer hosted VPC and ENI in that VPC
- Susceptible to Availability Zone Failure.
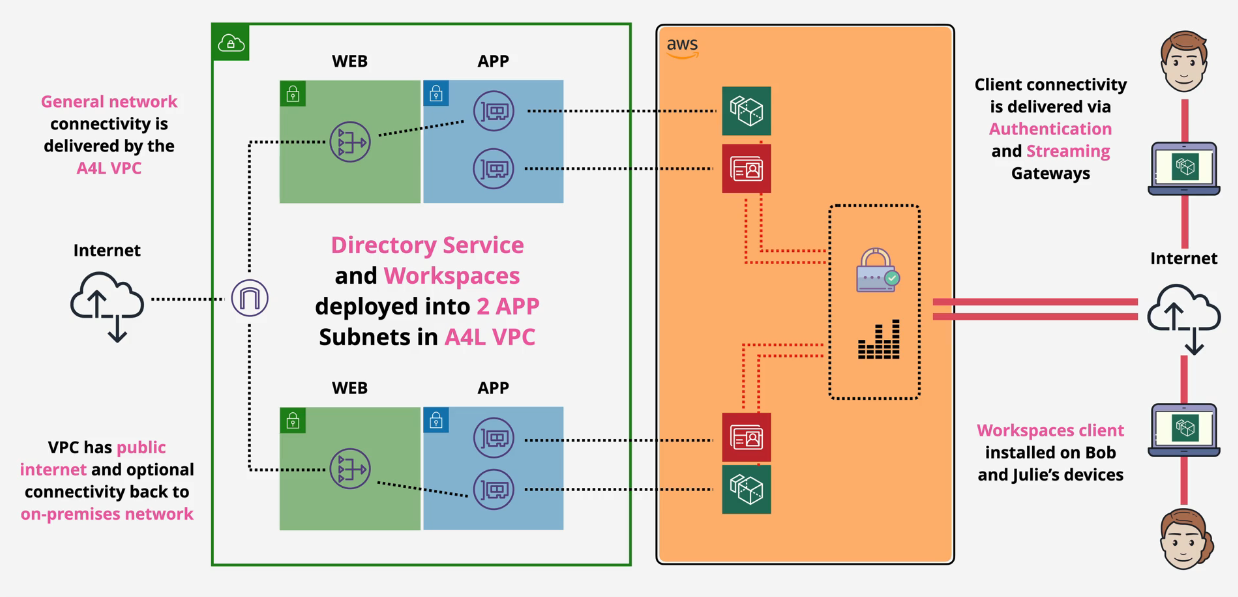
Demo: AWS Workspaces with a Directory Service
This is what you will build:
Part 1: Setup and Directory Creation
- In your development account, create a new stack from the yaml located here:
04-AdvancedIdentitiesAndFederation\03_Workspaces_with_DirectoryServices\DEMOSETUP - Once that is completed, go to the Workspaces service console
- Click Get Started and then click Launch next to Advanced Setup.
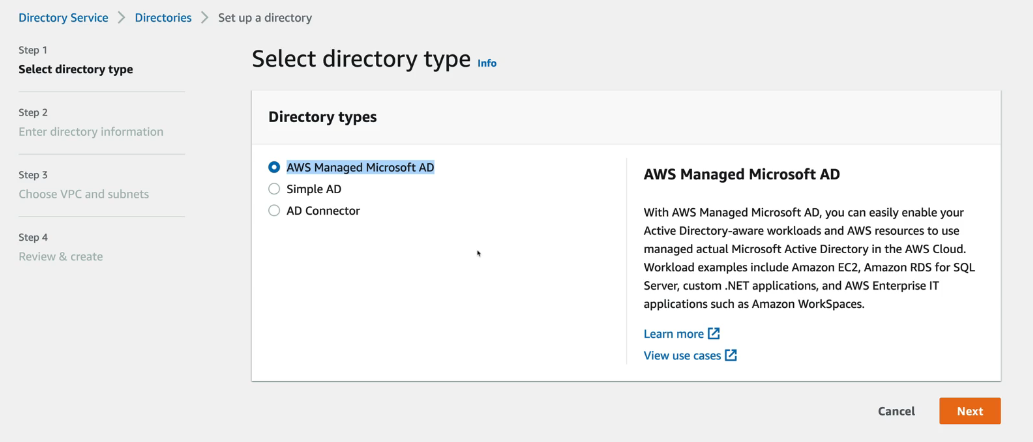
- Click Simple AD as we don't want to spin up an entire AD service for this demo.
- Click Small as we'll only set up a couple users
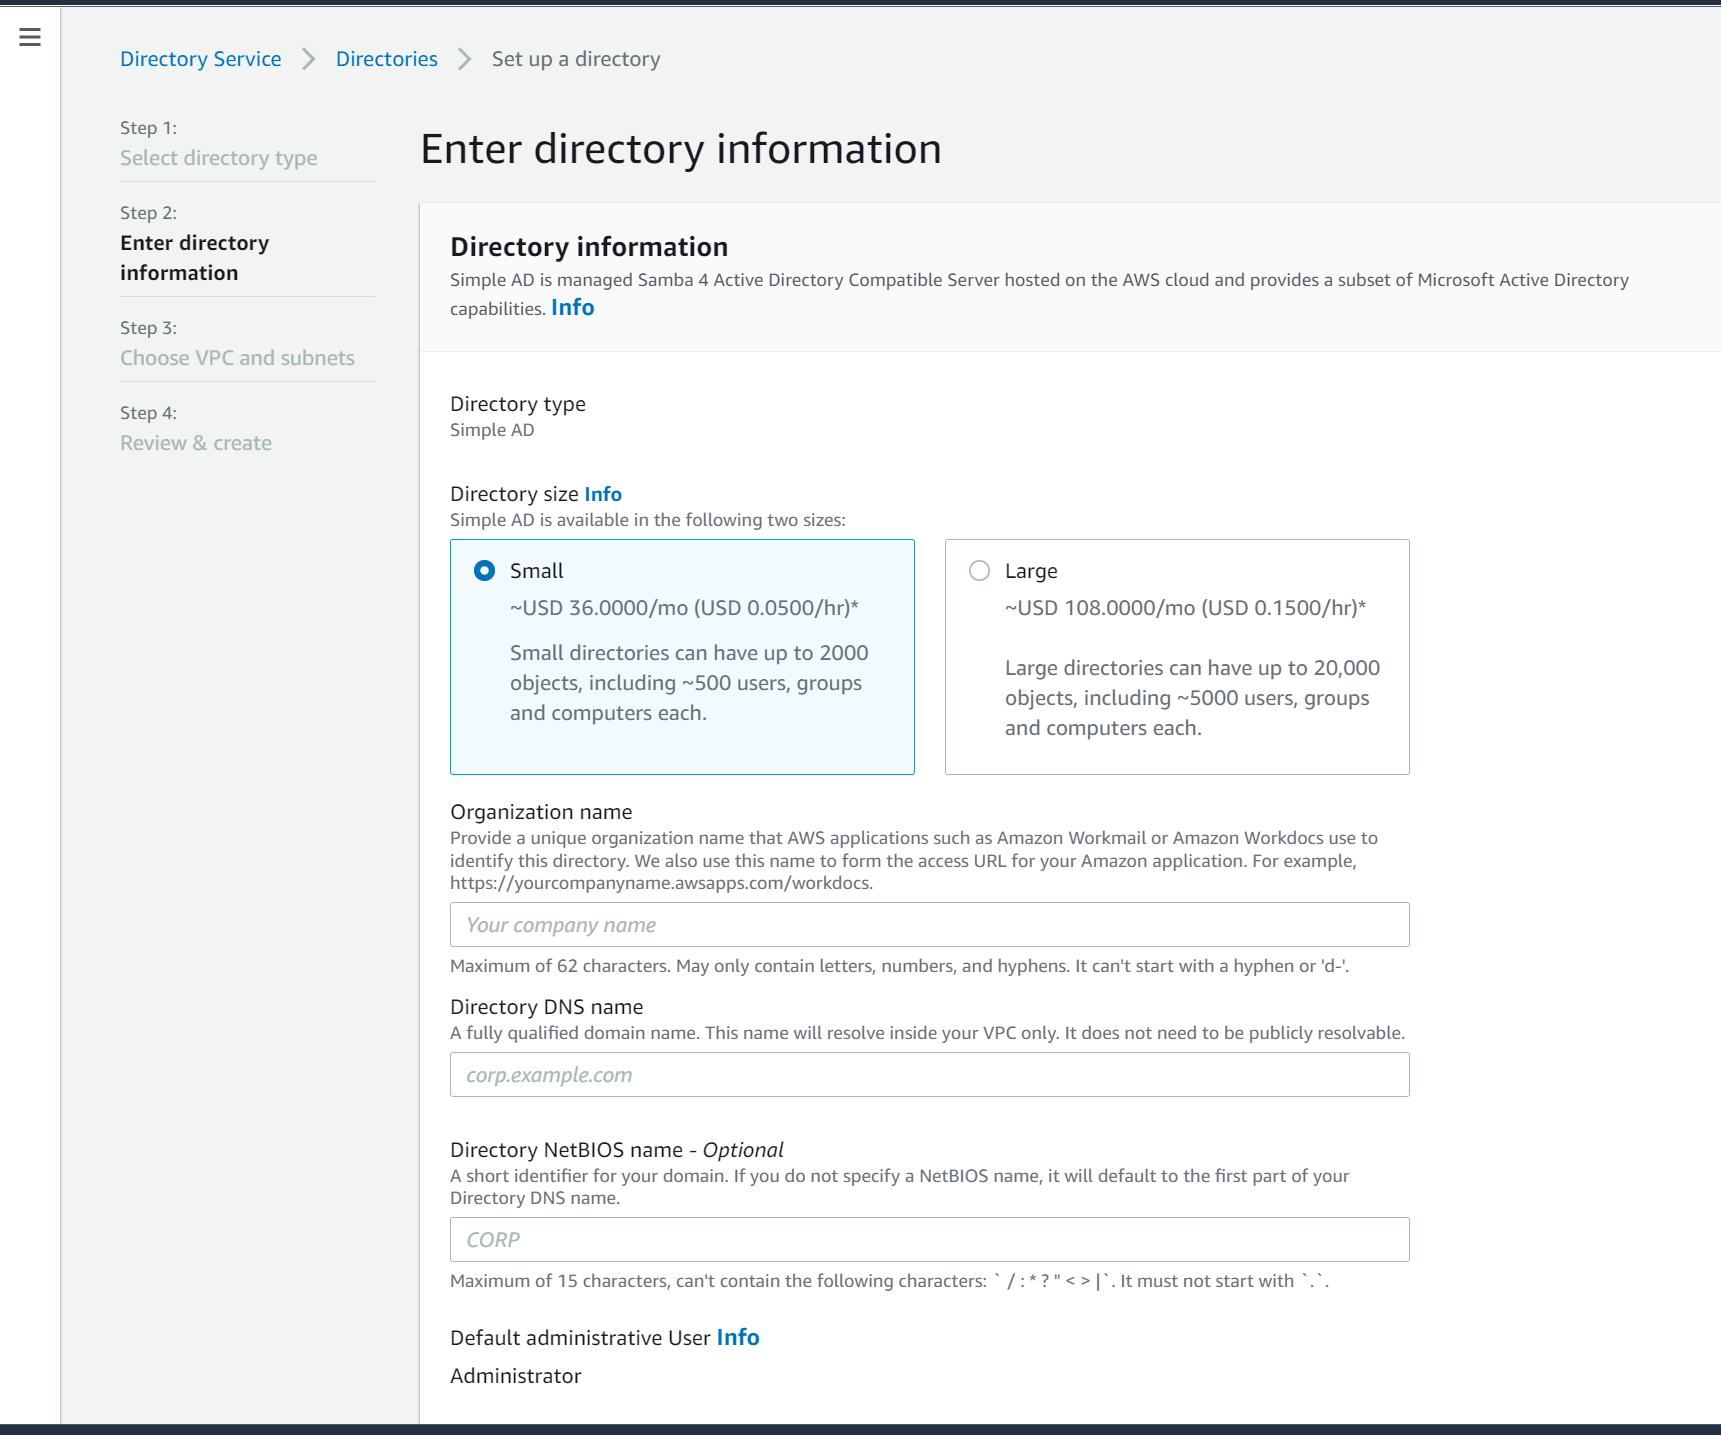
- Enter the name and the Admin password for this directory. Click Next
- Select the appA and AppB subnets and then click next to review and then Create. This might take ~30 minutes.
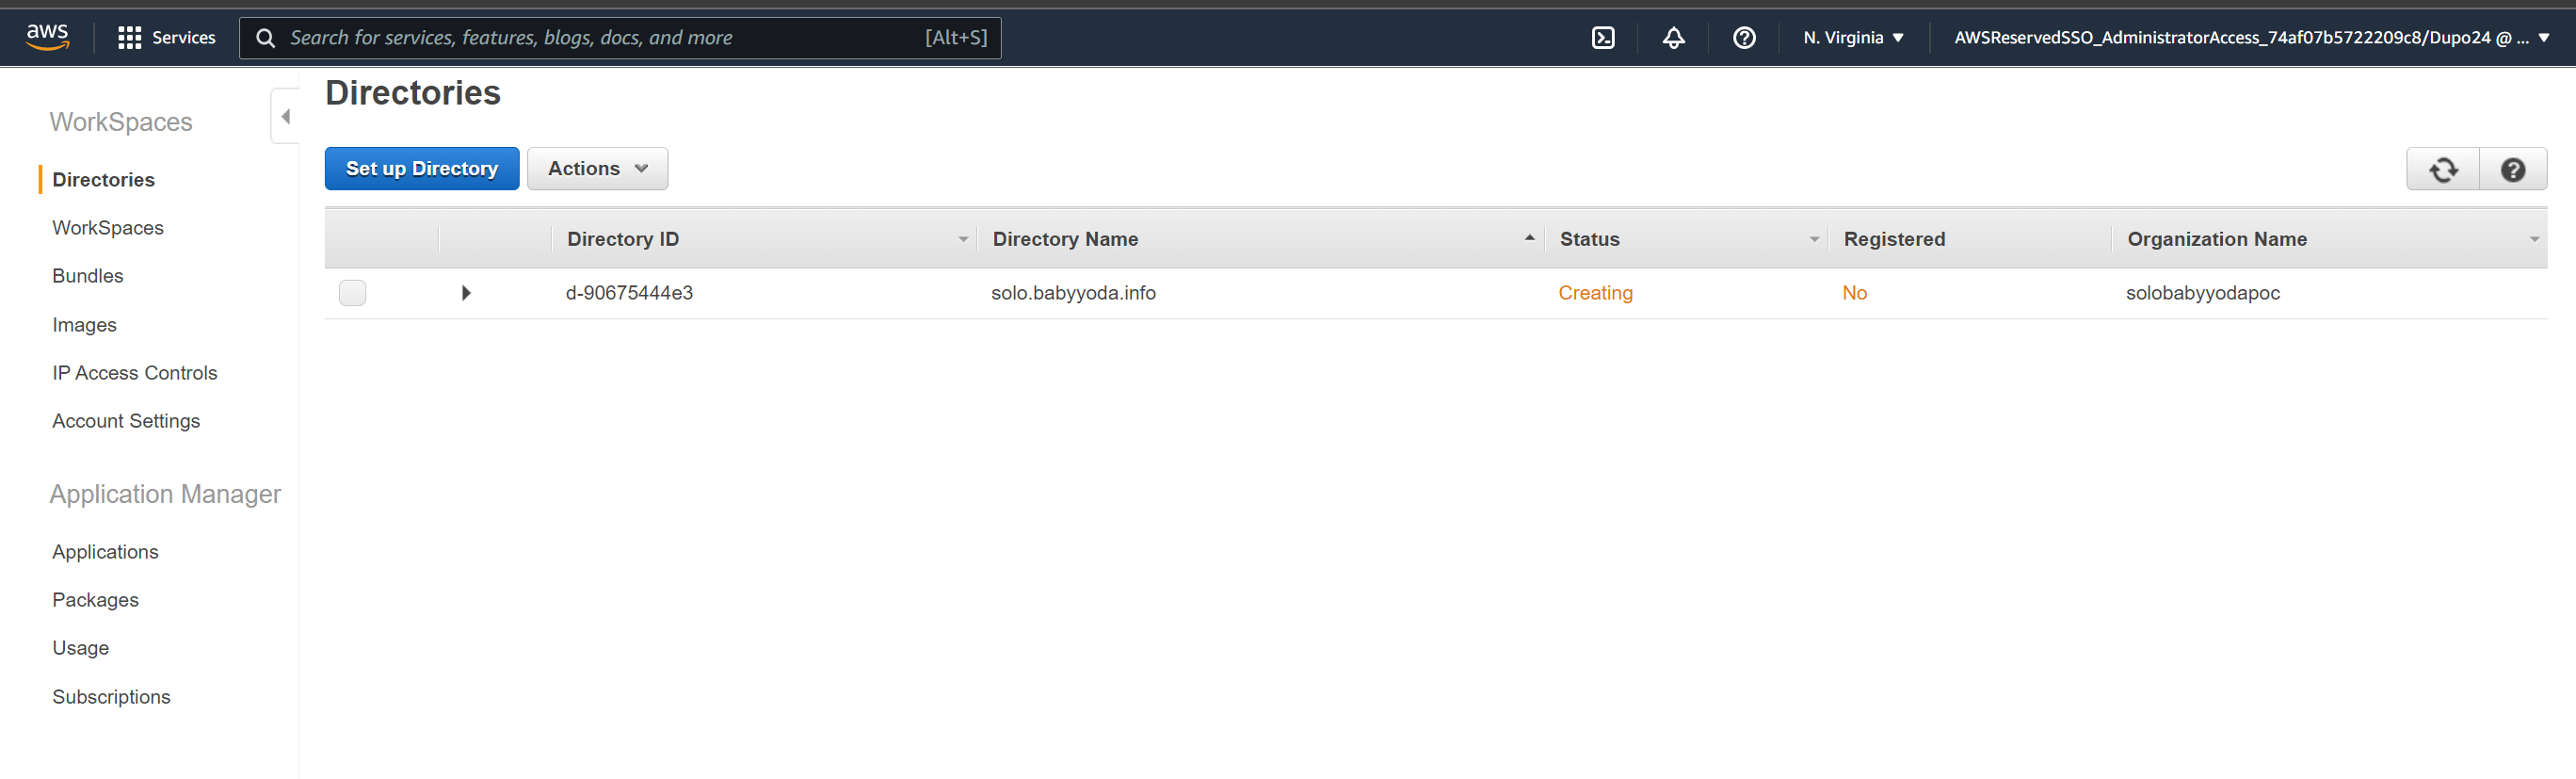
Part 2: Create Workspaces
- Once this is in an Active state, click on workspaces on the left.
- Select the VPC and two of the App subnets
- Make sure both Workdocs and self service permissions are unchecked and click next step.
- Create your username using a personal email address. You'll get emailed some setup steps.
- Click next and select your OS and VDI size from the Bundle - choose a free tier for this demo
- At the bottom, you can select specific sizes of your volumes.
- Select AutoStop and leave it at One Hour.
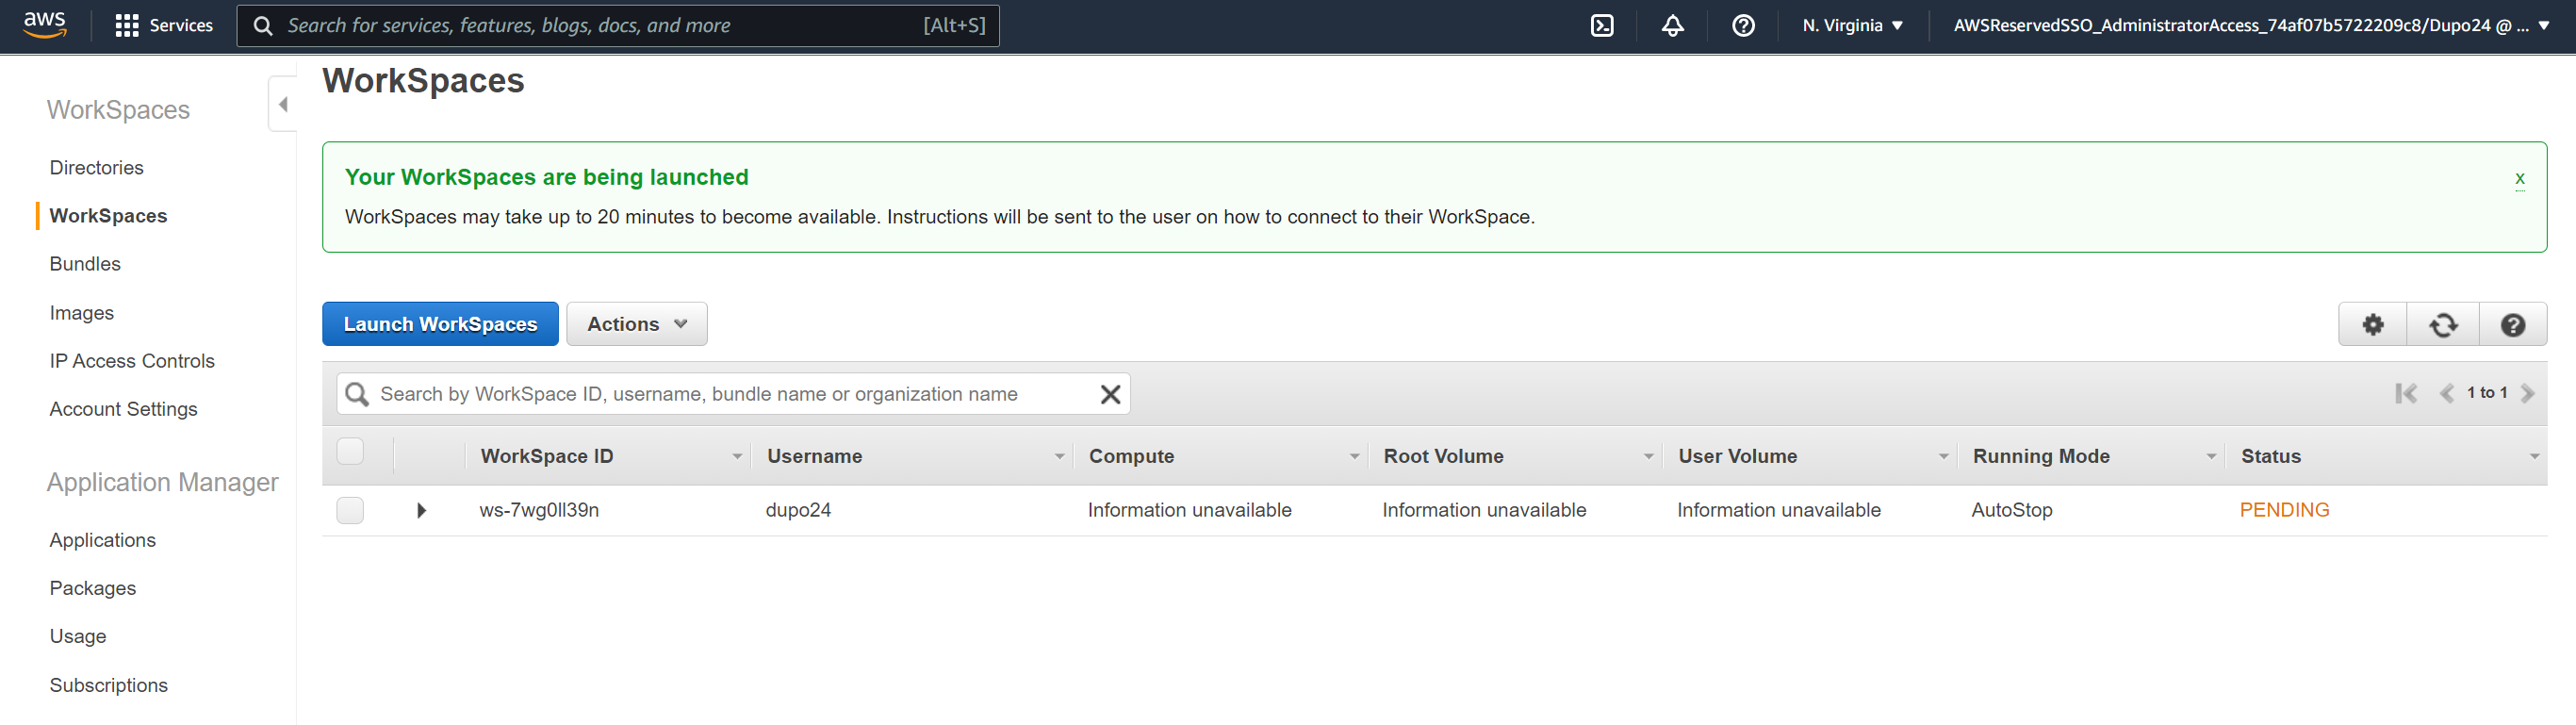
- You can select encryption using KMS here if needed, but to keep it simple, scroll down and select Next Step and Launch Workspaces.
Access Workspace
- You'll get an email such as the one below when this has been provisioned.
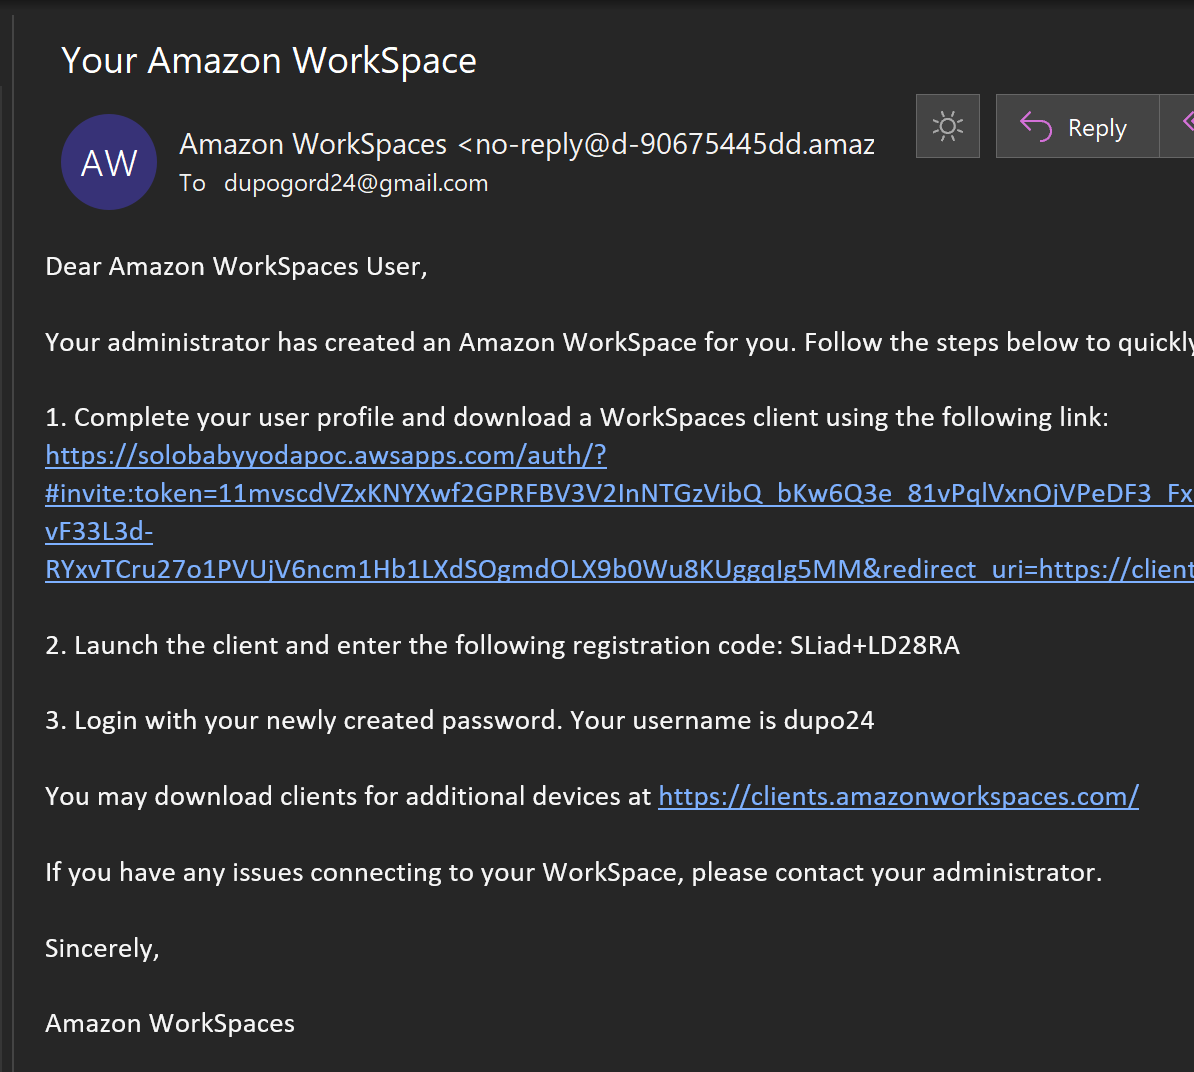
- Set your password up for the user (different from the Administrator)
- Download the access client for your OS and install.
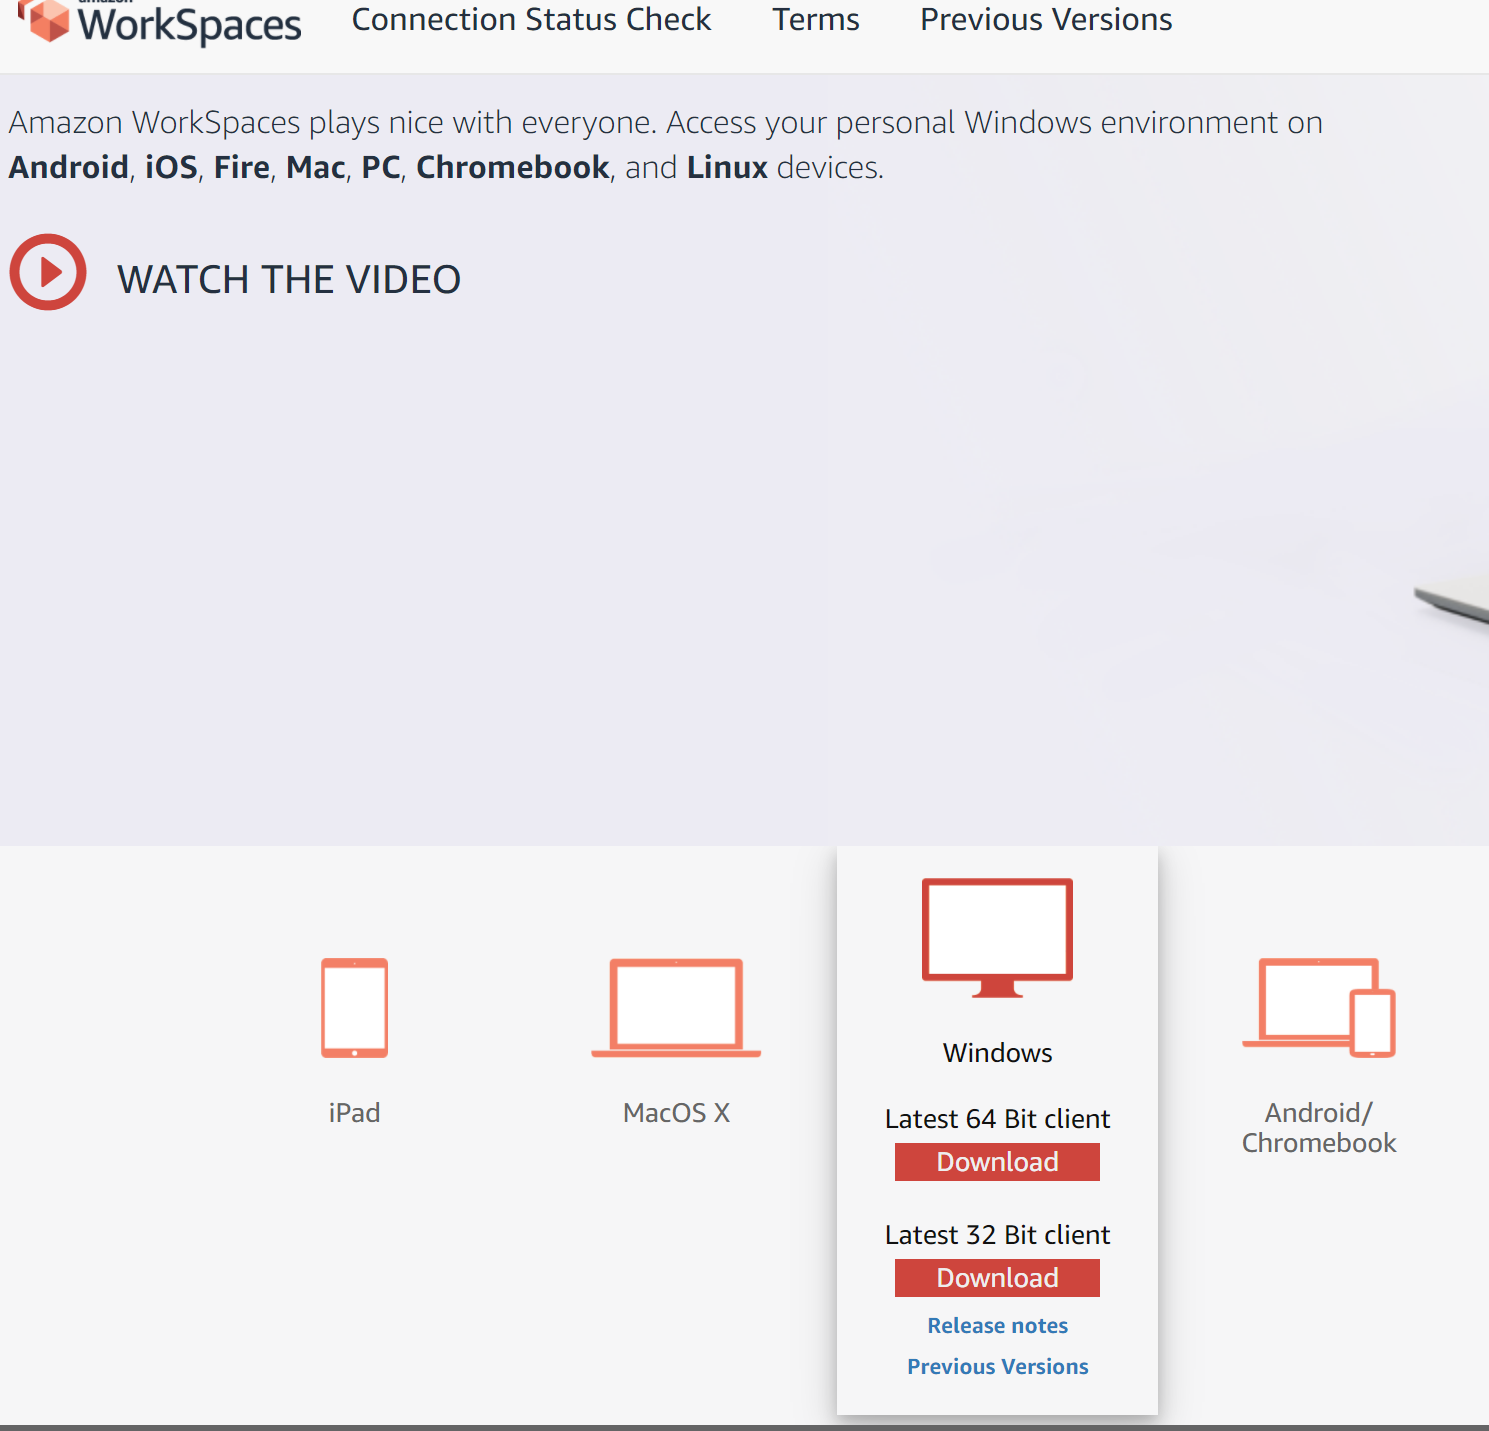
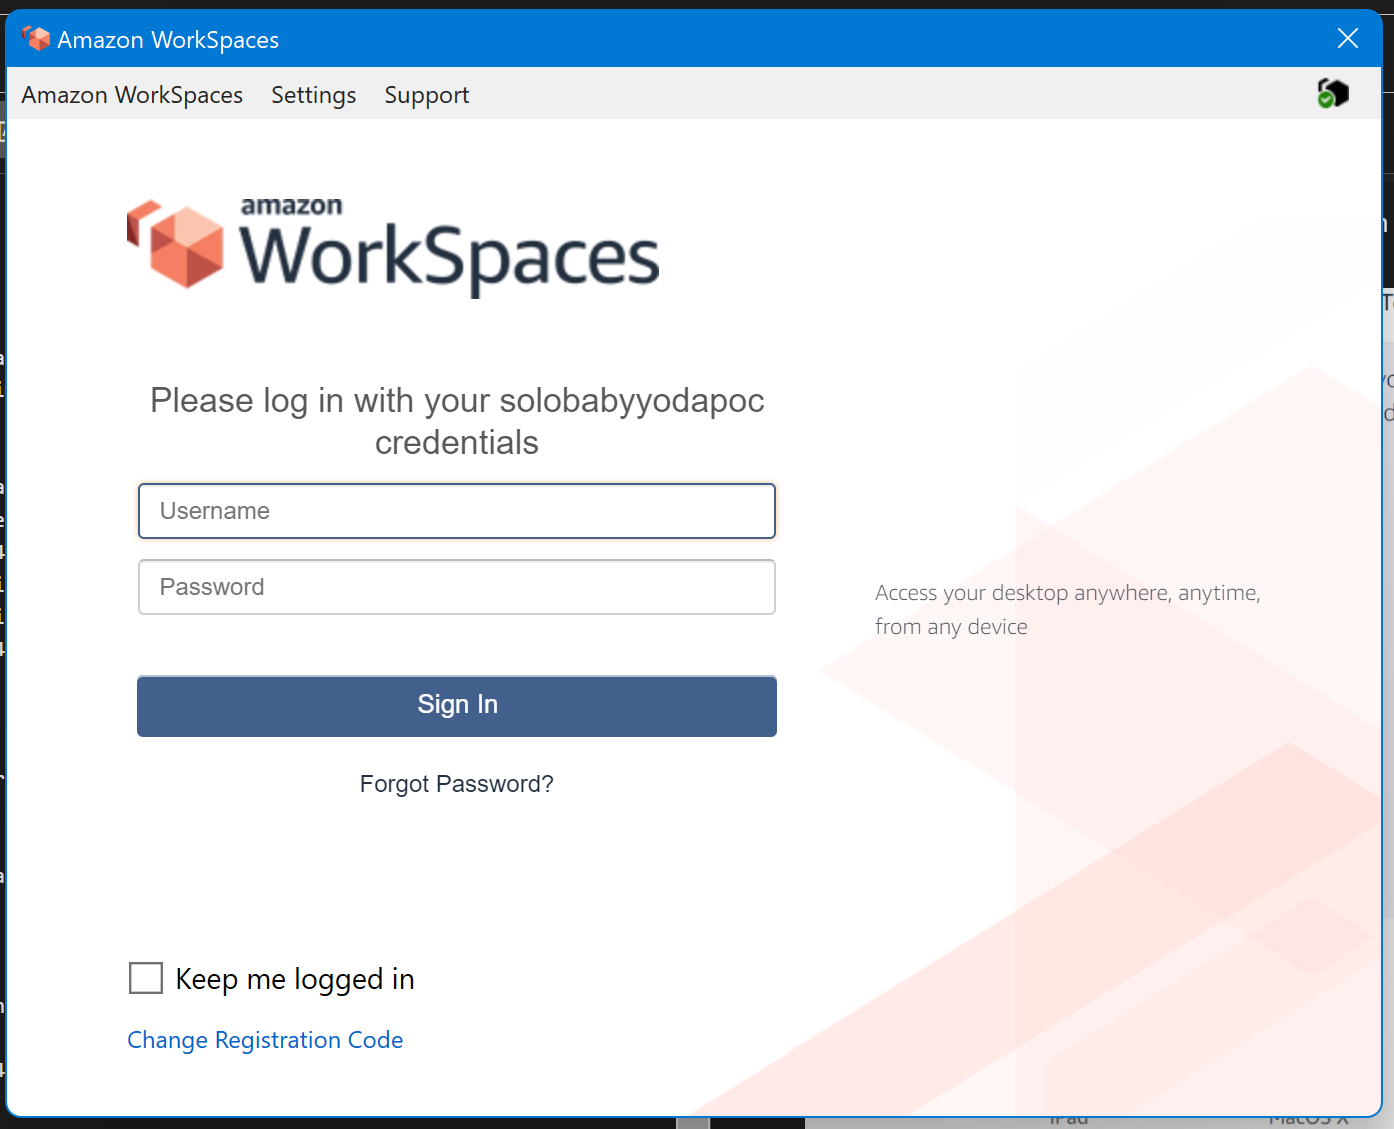
- Open Amazon Workspaces on your machine.
- Enter in the registration code from your email. You'll be taken to this screen to log in:
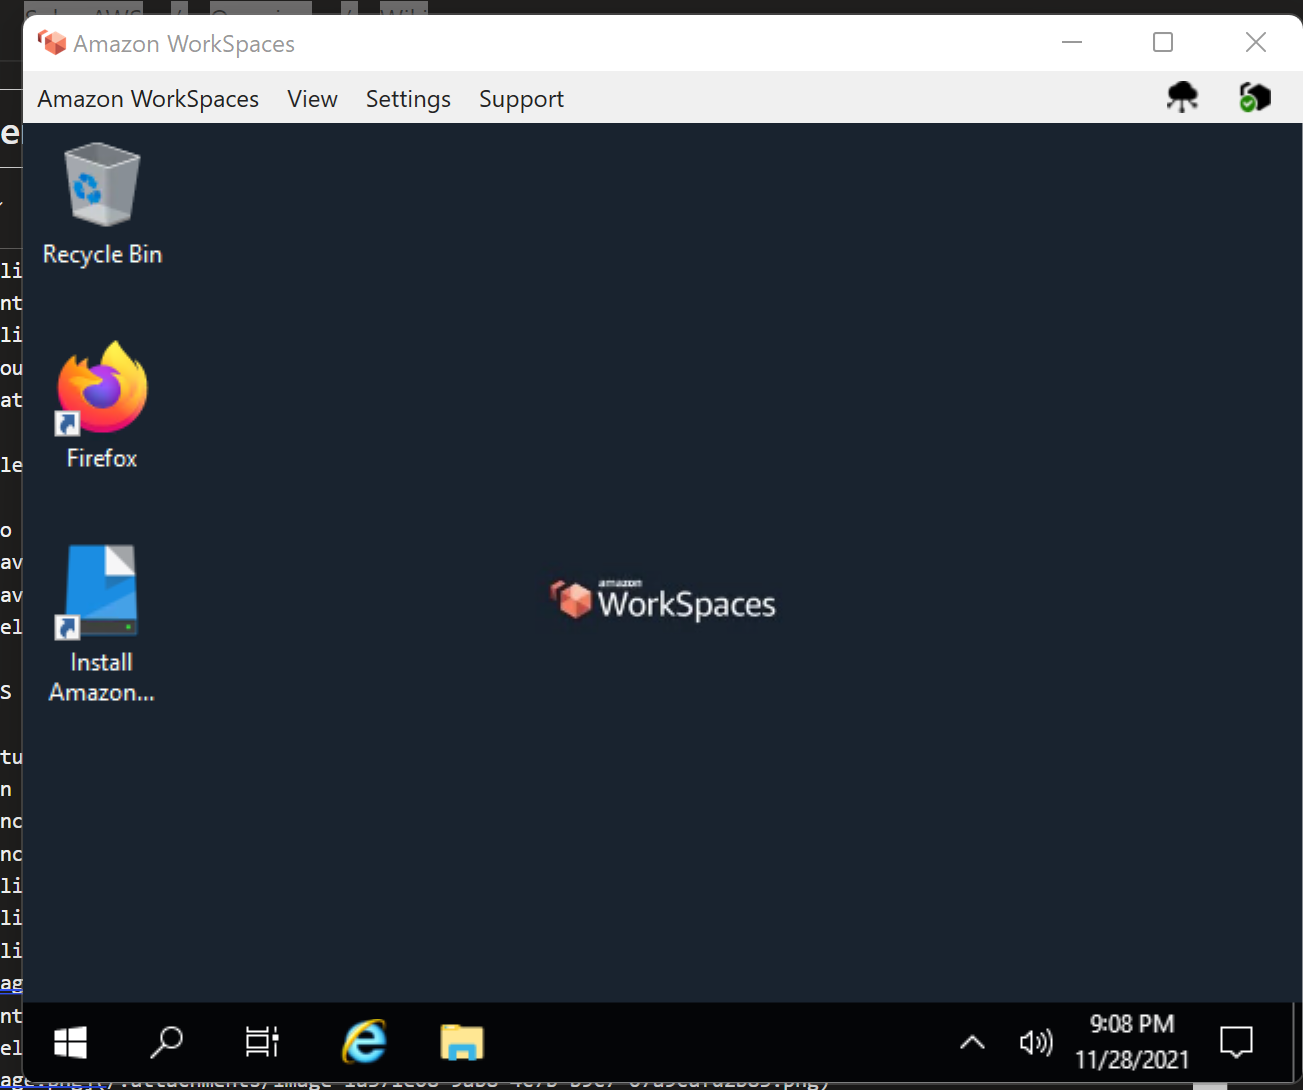
- Once you're logged in, you'll see your newly provisioned WorkSpace, hopefully not as small as mine.
Clean Up
Remove workspaces Remove directory by deregistering and deleting. Delete stack.
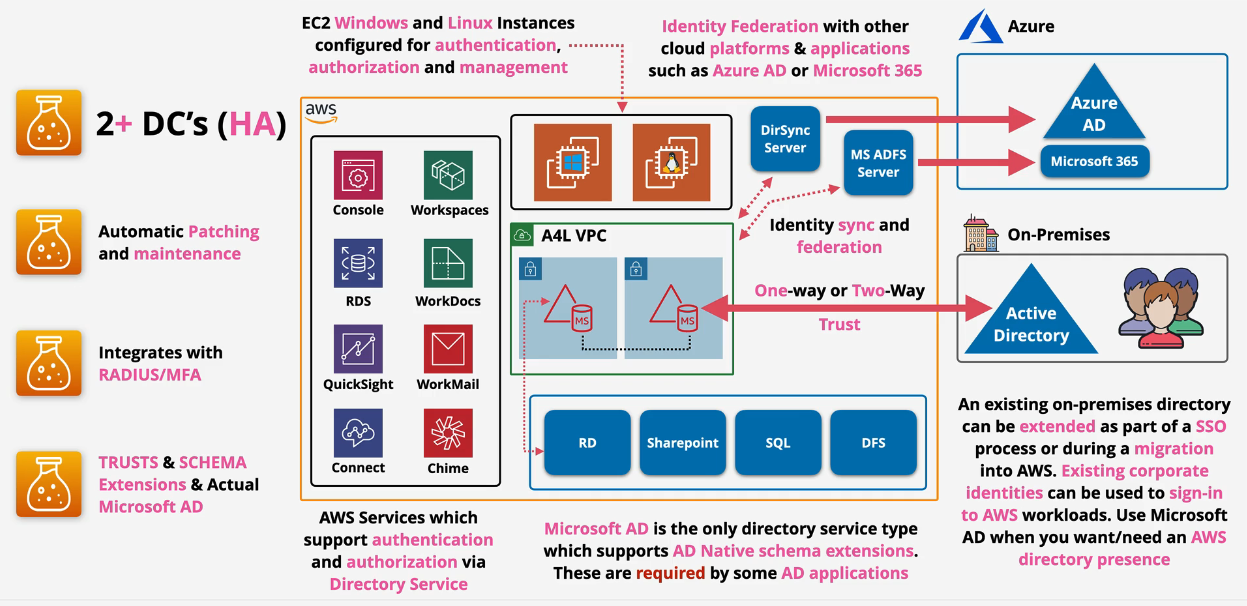
Directory Service - Deep Dive - Microsoft AD
This is Microsoft AD natively running within AWS.
- managed using standard AD tools
- Supports Group Policy
- Supports Schema extension - SharePoint, SQL, DFS
- two sizes - Standard 30000 objects, Enterprise 500,000 objects
- Highly available by default (2 AZ's)
Supports one-way and two-way external and forest trusts with on prem AD Directory is in AWS - can operate through a network link failure to any connected on prem systems
Supports RADIUS based MFA
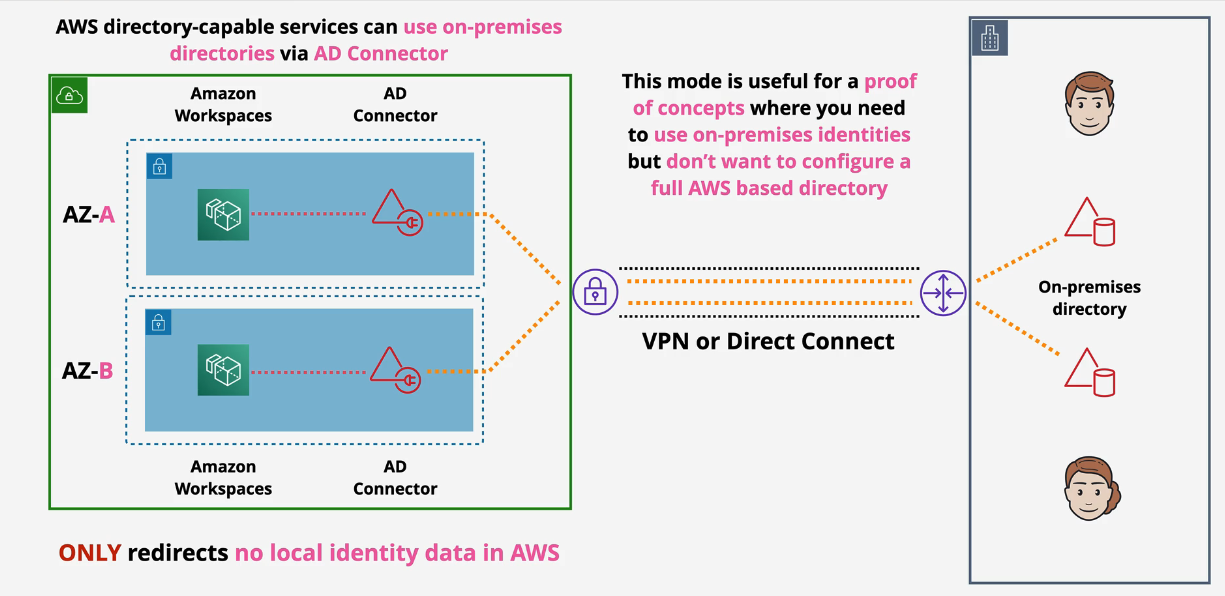
Directory Service Deep Dive - AD Connector
- redirects to existing onprem AD - nothing stored in AWS
- creates a pair of directory endpoints (ENIs) in your VPC.
- requires a service account to connect.
- requires network connectivity via Direct Connect (DX) or VPN
- used for PoC's
- two sizes, small and large, which controls the amount of compute allocated.
- multiple AD connectors can be used to spread load
- Requires two subnets within a VPC - Different AZs
Demo: Implementing a Hybrid Directory Solution in AWS
You will be building this:
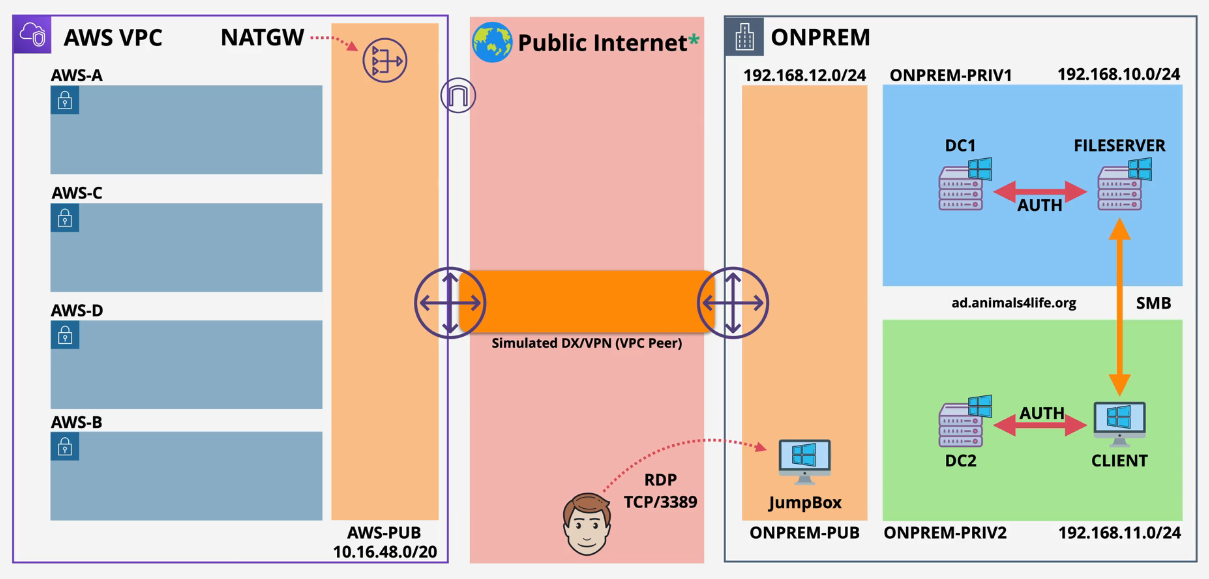
Part 1:
-
Log into the Management account and ensure you are in the N. Virginia region
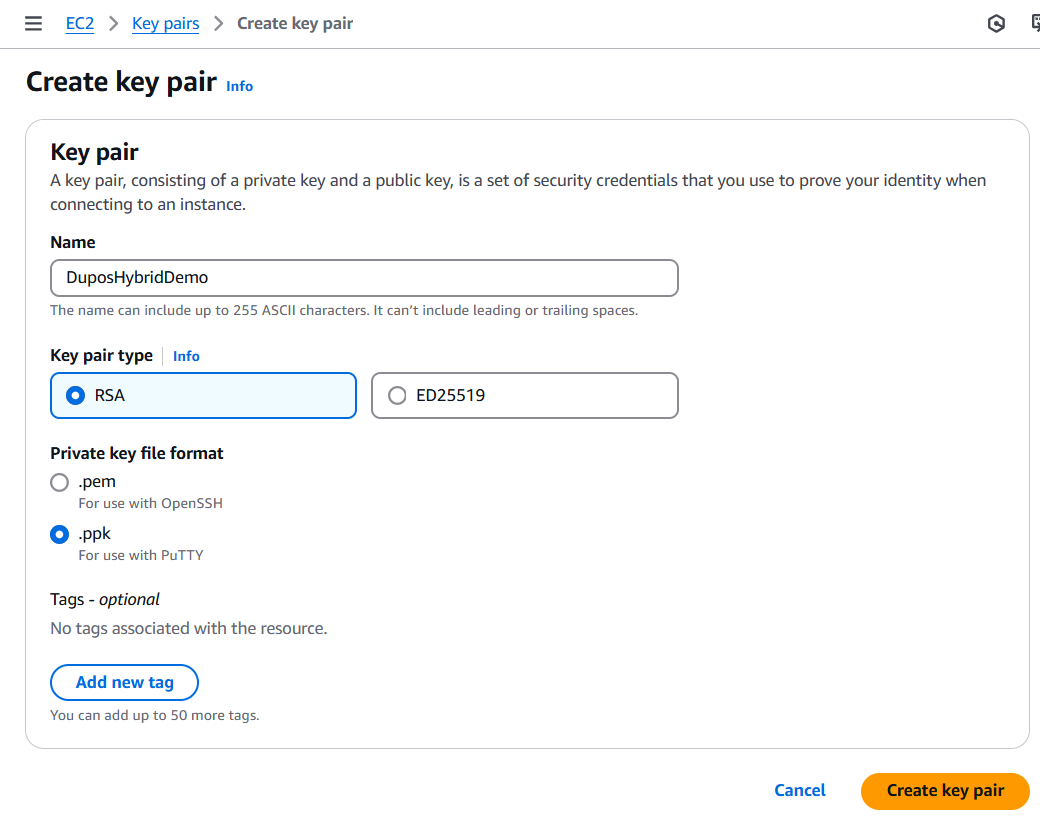
-
Create a new Key Pair in the EC2 Console.
 2.Navigate to the CloudFormation template here: https://console.aws.amazon.com/cloudformation/home?region=us-east-1#/stacks/quickcreate?templateURL=https://learn-cantrill-labs.s3.amazonaws.com/aws-hybrid-activedirectory/01_HYBRIDDIR.yaml&stackName=HYBRIDDIR
 -
Enter the Domain Admin password AND the Key Pair Name, check the boxes and create the stack.
- This will create a number of nested stacks. Wait for these to complete - takes about an hour
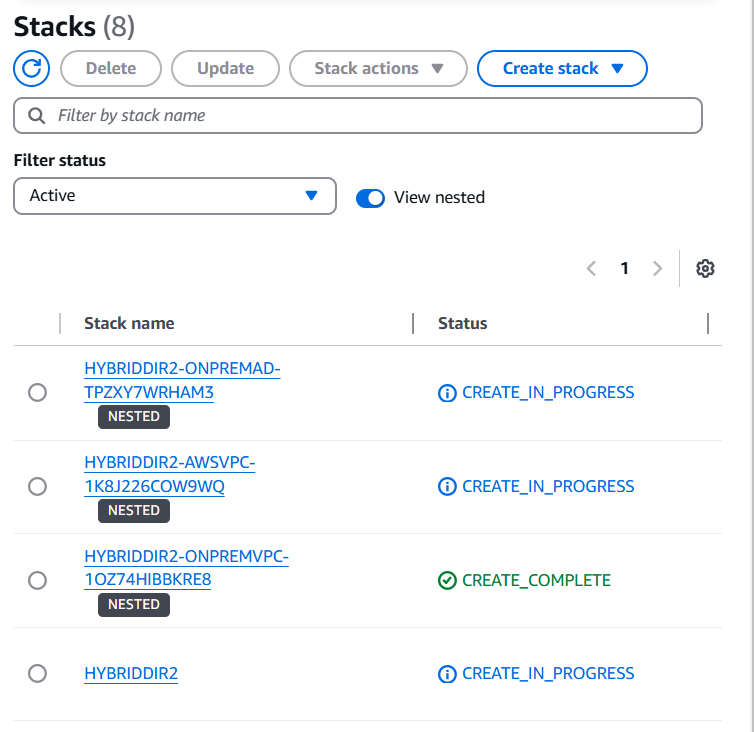 Once the previous stacks are created, continue with Part 2.