[[TOC]]
Demo - Automated EC2 Start and Stop and Protect Using Lambda
Manual Invocation
- Log into the Management account and make sure you are in the N. Virginia Region.
- Click the deployment link here and create the stack.
- Navigate to the IAM console and click on create role.
- This will be an AWS service role (Execution roles = Service)
- On the Select Trusted Entity screen, select Lambda.
- Click Next and then click Create Policy
- Copy this policy below into the JSON and save.
 {
  "Version": "2012-10-17",
  "Statement": [
    {
      "Effect": "Allow",
      "Action": [
        "logs:CreateLogGroup",
        "logs:CreateLogStream",
        "logs:PutLogEvents"
      ],
      "Resource": "arn:aws:logs:*:*:*"
    },
    {
      "Effect": "Allow",
      "Action": [
        "ec2:Start*",
        "ec2:Stop*"
      ],
      "Resource": "*"
    }
  ]
}
- Attach this newly created policy to the role
- Name the role and save.
- Navigate into the EC2 Console
- Copy the instance ID's into Notepad.
- Navigate to the Lambda console and create a new function (author from scratch)
- Name this StopEC2 and select Python 3.8 as the runtime.
- Choose the default execution role as the role you created above and create the function.
- Copy the code below into the lambda_function.py
import boto3
import os
import json

region = 'us-east-1'
ec2 = boto3.client('ec2', region_name=region)

def lambda_handler(event, context):
    instances=os.environ['EC2_INSTANCES'].split(",")
    ec2.stop_instances(InstanceIds=instances)
    print('stopped instances: ' + str(instances))
- Deploy this function
- Click Configuration and then scroll down to the Environment Variables section.
- Add a variable called EC2_INSTANCES and then paste the instance ID's in the field, separated by a comma.
- Test the function and it should execute your lambda function and stop those two EC2 instances.
Start Function
- Create a new function called StartEC2 and paste in the Python code below.
import boto3
import os
import json

region = 'us-east-1'
ec2 = boto3.client('ec2', region_name=region)

def lambda_handler(event, context):
    instances=os.environ['EC2_INSTANCES'].split(",")
    ec2.start_instances(InstanceIds=instances)
    print('started instances: ' + str(instances))
- Create your environment variables, deploy and test this function and it should start your EC2 instances.
Event driven invocation
- Navigate to the Lambda console and create a third function, called ProtectEC2 and paste in the following Python code.
import boto3
import os
import json

region = 'us-east-1'
ec2 = boto3.client('ec2', region_name=region)

def lambda_handler(event, context):
    print("Received event: " + json.dumps(event))
    instances=[ event['detail']['instance-id'] ]
    ec2.start_instances(InstanceIds=instances)
    print ('Protected instance stopped - starting up instance: '+str(instances))
- Navigate in a new tab to EventBridge
- Click Create Rule
- Name this StartEC3 and make sure that the Event Pattern is selected and click next
- On the Build Event Pattern screen, select EC2 Instance State-Change notification.
- This will show us an Event pattern box below that. Click on Event Source and make it EC2, then select EC2 Instance State-change notification and then under specific states, select stopped.
- Click Specific instance IDs and paste in the ID of instance1 and click next
- On the Select Targets screen, select Lambda function from the dropdown and then select the ProtectEC2 function.
- Click next and add tags if necessary and then click on Create Rule.
Test
- Navigate back to the EC2 console and stop both instances.
- Wait a bit and refresh the page and you'll notice that the instance stops and then starts back up again automatically.
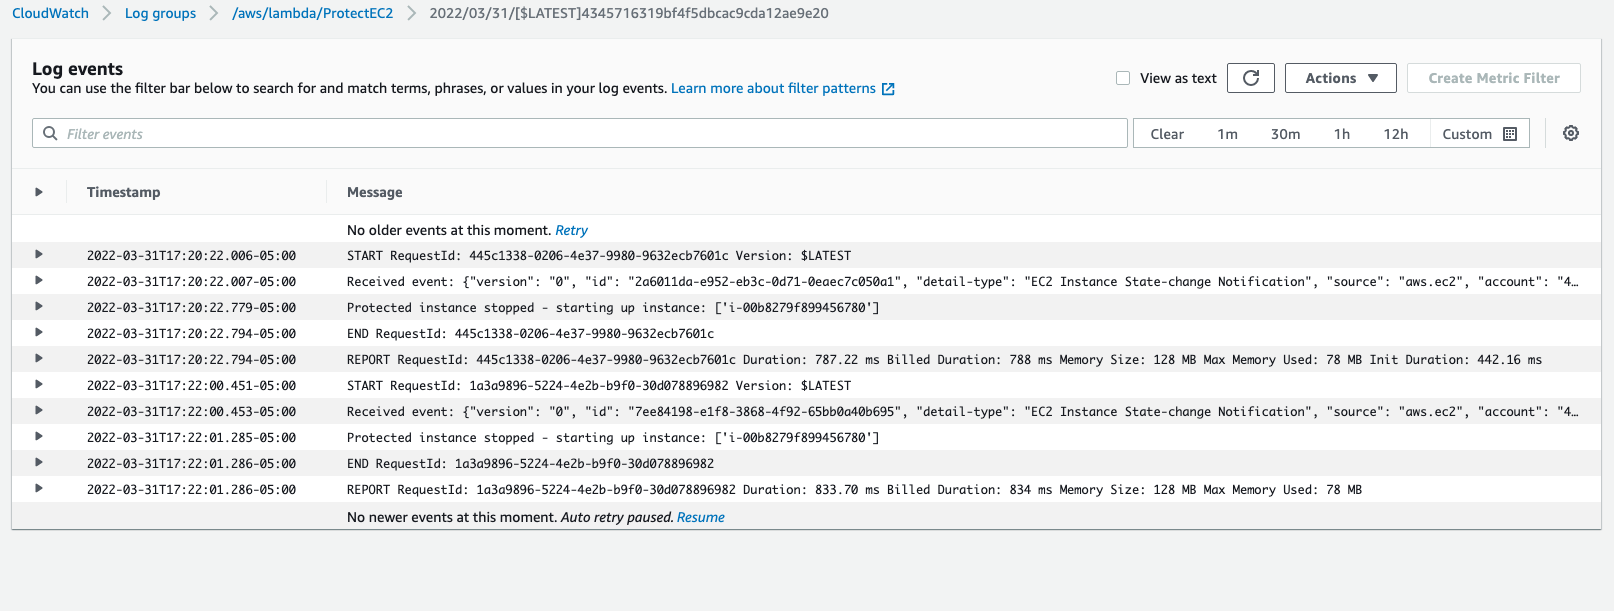
View this in Cloudwatch Logs.
- Navigate to Cloudwatch console.
- Click on Logs > Log Groups
- This log will show up as /aws/lambda/ProtectEC2.
Play around with this
You can create another rule to stop the EC2 instances and then deploy both those in Eventbridge that will basically cycle those machines in a never ending loop.
You can also use this to stop EC2 instances at a certain time of the day and then start them at another time during the day.
Cleanup
Delete the lambda functions Delete the event from Eventbridge Delete the custom role Delete the stack
Demo - Cat Cuddle - Pet-Cuddle-o-tron
Simple Email Service (SES)
- Log into AWS and make sure you are in the N. Virginia region.
- Navigate to the Simple Email Service console.
- Select Email Address, enter in the address that AWS SES will send email from and then check the address for verification email and verify.
- Create another identity, this one being the to email, not the from. Remember the gmail trick that you can use to spoof these accounts under one email address.
Simple Notification Service (SNS)
This needs to be set up pretty intensively in order for this to work. You'll need to purchase a toll free number and configure via Pinpoint in order to send transactional SMS messages in the US.
Lambda IAM execution role
- Navigate over to the Cloudwatch console and create a new stack based on this yaml below:
Resources:
  LambdaRole:
    Type: AWS::IAM::Role
    Properties:
      AssumeRolePolicyDocument:
        Statement:
          - Action:
            - sts:AssumeRole
            Effect: Allow
            Principal:
              Service:
              - lambda.amazonaws.com
        Version: 2012-10-17
      Path: /
      Policies:
        - PolicyName: cloudwatchlogs
          PolicyDocument:
            Version: 2012-10-17
            Statement:
              - Effect: Allow
                Action:
                  - "logs:CreateLogGroup"
                  - "logs:CreateLogStream"
                  - "logs:PutLogEvents"
                Resource: "arn:aws:logs:*:*:*"
        - PolicyName: snsandsespermissions
          PolicyDocument:
            Version: 2012-10-17
            Statement:
              - Effect: Allow
                Action:
                  - "ses:*"
                  - "sns:*"
                  - "states:*"
                Resource: '*'
- Navigate to the Lambda console and create a new function. Call this
EmailReminderLambdaand give it the runtime of Python 3.8. - Set the default role to the role that was created with the CFN template.
- Add the following code
import boto3, os, json

FROM_EMAIL_ADDRESS = 'babyyoda24513@gmail.com'

ses = boto3.client('ses')

def lambda_handler(event, context):
    # Print event data to logs ..
    print("Received event: " + json.dumps(event))
    # Publish message directly to email, provided by EmailOnly or EmailPar TASK
    ses.send_email( Source=FROM_EMAIL_ADDRESS,
        Destination={ 'ToAddresses': [ event['Input']['email'] ] },
        Message={ 'Subject': {'Data': 'Rolex needs some cuddles!'},
            'Body': {'Text': {'Data': event['Input']['message']}}
        }
    )
    return 'Success!'
State Machine
- Navigate back to IAM and create a role based on the yaml below
Resources:
  StateMachineRole:
    Type: AWS::IAM::Role
    Properties:
      AssumeRolePolicyDocument:
        Statement:
          - Action:
            - sts:AssumeRole
            Effect: Allow
            Principal:
              Service:
              - states.amazonaws.com
        Version: 2012-10-17
      Path: /
      Policies:
        - PolicyName: cloudwatchlogs
          PolicyDocument:
            Version: 2012-10-17
            Statement:
              - Effect: Allow
                Action:
                  - "logs:CreateLogGroup"
                  - "logs:CreateLogStream"
                  - "logs:PutLogEvents"
                  - "logs:CreateLogDelivery"
                  - "logs:GetLogDelivery"
                  - "logs:UpdateLogDelivery"
                  - "logs:DeleteLogDelivery"
                  - "logs:ListLogDeliveries"
                  - "logs:PutResourcePolicy"
                  - "logs:DescribeResourcePolicies"
                  - "logs:DescribeLogGroups"
                Resource: "*"
        - PolicyName: invokelambdasandsendSNS
          PolicyDocument:
            Version: 2012-10-17
            Statement:
              - Effect: Allow
                Action:
                  - "lambda:InvokeFunction"
                  - "sns:*"
                Resource: '*'
- Navigate to the Step Functions console.
- Click on the hamburger menu in the upper left and click on State Machines
- Click on
Write your workflow in code - Paste in the following JSON, replacing the EMAIL LAMBDA ARN with your Lambda function ARN.
{
  "Comment": "Rolex's Cuddle App - using native SNS SMS and Lambda for email.",
  "StartAt": "Timer",
  "States": {
    "Timer": {
      "Type": "Wait",
      "SecondsPath": "$.waitSeconds",
      "Next": "ChoiceState"
    },
    "ChoiceState": {
      "Type" : "Choice",
      "Choices": [
        {
          "Variable": "$.preference",
          "StringEquals": "email",
          "Next": "EmailOnly"
        },
        {
          "Variable": "$.preference",
          "StringEquals": "sms",
          "Next": "SMSOnly"
        },
        {
          "Variable": "$.preference",
          "StringEquals": "both",
          "Next": "EmailandSMS"
        }
      ],
      "Default": "NoChoice"
    },
    "EmailOnly": {
      "Type" : "Task",
      "Resource": "arn:aws:states:::lambda:invoke",
      "Parameters": {
        "FunctionName": "EMAIL_LAMBDA_ARN",
        "Payload": {
          "Input.$": "$"
        }
      },
      "Next": "NextState"
    },
    "SMSOnly": {
      "Type" : "Task",
      "Resource": "arn:aws:states:::sns:publish",
      "Parameters": {
        "Message": {
          "Input.$": "$.message"
        },
        "PhoneNumber.$": "$.phone"
      },
      "Next": "NextState"
    },
    "EmailandSMS": {
      "Type": "Parallel",
      "Branches": [
        {
          "StartAt": "ParallelEmail",
          "States": {
            "ParallelEmail": {
              "Type" : "Task",
              "Resource": "arn:aws:states:::lambda:invoke",
              "Parameters": {
                "FunctionName": "EMAIL_LAMBDA_ARN",
                "Payload": {
                  "Input.$": "$"
                }
              },
              "End": true
            }
          }
        },
        {
          "StartAt": "ParallelSMS",
          "States": {
            "ParallelSMS": {
              "Type" : "Task",
              "Resource": "arn:aws:states:::sns:publish",
              "Parameters": {
                "Message": {
                  "Input.$": "$.message"
                },
                "PhoneNumber.$": "$.phone"
              },
              "End": true
            }
          }
        }
      ],
      "Next": "NextState"
    },
    "NoChoice": {
      "Type": "Fail",
      "Error": "DefaultStateError",
      "Cause": "No Choice Made!"
    },
    "NextState": {
      "Type": "Pass",
      "End": true
    }
  }
}
- Name this state machine and select the state machine role and then change the logging to ALL.
- Create the state machine and copy down the ARN from this state machine.
Lambda function
- Navigate to the Lambda console and create a new "author from scratch" Lambda function
- Call this
api_Rolexor your own pet's name and then set the runtime to Python 3.8. - Paste in the following code into the function, replace the State Machine ARN and deploy.
import boto3, json, os, decimal

SM_ARN = 'arn:aws:states:us-east-1:489725180016:stateMachine:RolexCuddle'

sm = boto3.client('stepfunctions')

def lambda_handler(event, context):
    # Print event data to logs ..
    print("Received event: " + json.dumps(event))

    # Load data coming from APIGateway
    data = json.loads(event['body'])
    data['waitSeconds'] = int(data['waitSeconds'])

    # Sanity check that all of the parameters we need have come through from API gateway
    # Mixture of optional and mandatory ones
    checks = []
    checks.append('waitSeconds' in data)
    checks.append(type(data['waitSeconds']) == int)
    checks.append('preference' in data)
    checks.append('message' in data)
    if data.get('preference') == 'sms':
        checks.append('phone' in data)
    if data.get('preference') == 'email':
        checks.append('email' in data)

    # if any checks fail, return error to API Gateway to return to client
    if False in checks:
        response = {
            "statusCode": 400,
            "headers": {"Access-Control-Allow-Origin":"*"},
            "body": json.dumps( { "Status": "Success", "Reason": "Input failed validation" }, cls=DecimalEncoder )
        }
    # If none, start the state machine execution and inform client of 2XX success :)
    else:
        sm.start_execution( stateMachineArn=SM_ARN, input=json.dumps(data, cls=DecimalEncoder) )
        response = {
            "statusCode": 200,
            "headers": {"Access-Control-Allow-Origin":"*"},
            "body": json.dumps( {"Status": "Success"}, cls=DecimalEncoder )
        }
    return response

# This is a workaround for: http://bugs.python.org/issue16535
# Solution discussed on this thread https://stackoverflow.com/questions/11942364/typeerror-integer-is-not-json-serializable-when-serializing-json-in-python
# https://stackoverflow.com/questions/1960516/python-json-serialize-a-decimal-object
# Credit goes to the group :)
class DecimalEncoder(json.JSONEncoder):
    def default(self, obj):
        if isinstance(obj, decimal.Decimal):
            return int(obj)
        return super(DecimalEncoder, self).default(obj)
- Copy the lambda function down and paste it in your notes.
API Gateway
- Navigate to the API Gateway Console
- Create a new REST API, make sure you don't select the private one.
- Name this Rolex_API or whatever you'd like.
- Select Regional and click Create.
- Create a new resource and name this rolexcuddle or something.
- Select the Enable API Gateway CORS box. Create the resource
- Select your /rolexcuddle, then from actions dropdown, click Create Method, select POST and then select the checkmark next to it.
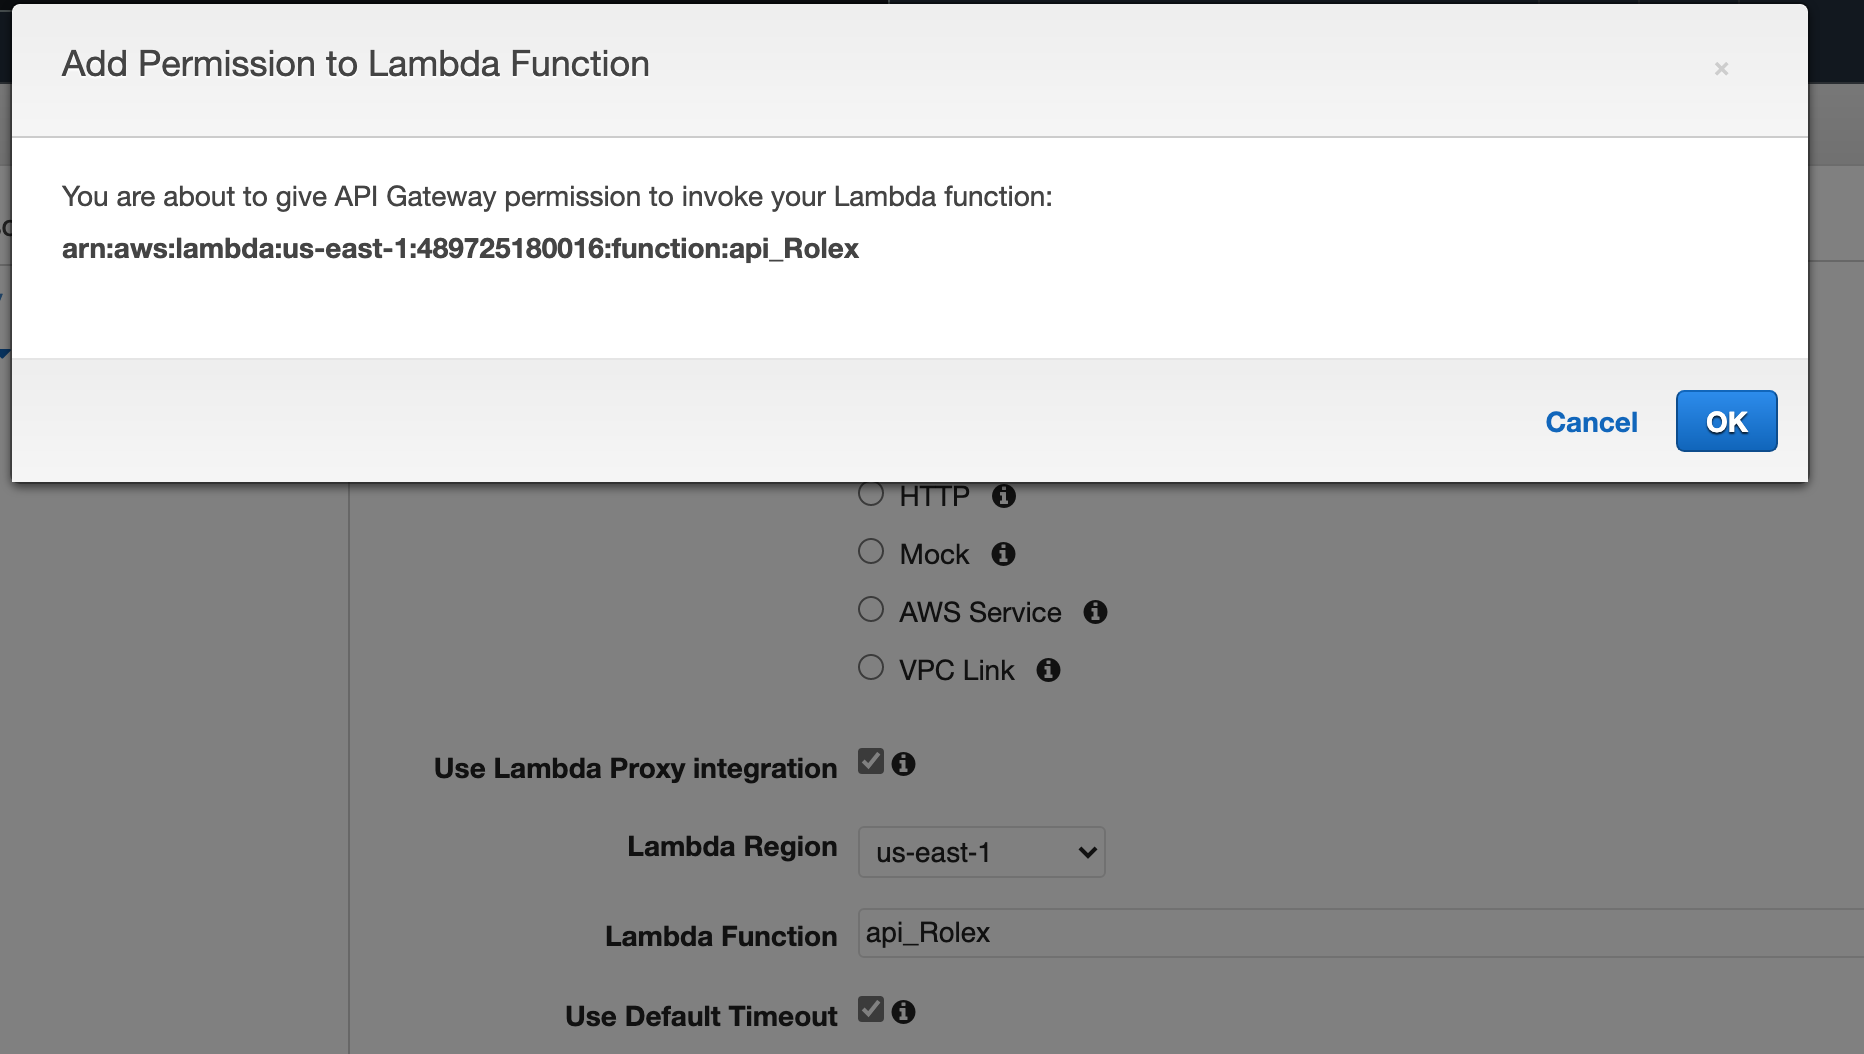
- Select Lambda Function as the integration type, then make sure that us-east-1 is selected and then start typing
apiinto the Lambda function box. Select the function from the dropdown. - Check the Use Lambda Proxy Integration and the Use Default Timeout boxes.
- You might get a permissions popup that looks like this. Click OK:
- Click Actions and then Deploy the API
- Select New Stage and then name the stage and the stage description "prod"
- Copy the Invoke URL into your notes.
Client Side Website
- Navigate to the S3 console
- Create a new bucket and name it whatever you'd like
- Uncheck the Block all Public Access box and the respective prompt to acknowledge.
- Create Bucket.
- Click into the bucket and click the permissions tab.
- Copy the quick policy below, replacing the ARN with your S3 bucket to open this S3 bucket to the Internet.
{
    "Version":"2012-10-17",
    "Statement":[
      {
        "Sid":"PublicRead",
        "Effect":"Allow",
        "Principal": "*",
        "Action":["s3:GetObject"],
        "Resource":["REPLACE_BUCKET_ARN/*"]
      }
    ]
  }
- Enable static website hosting
- Create your files:
index.html
<!DOCTYPE html>
<html lang="en">
  <head>
    <meta charset="utf-8">
    <meta name="viewport" content="width=device-width, initial-scale=1, shrink-to-fit=no">
    <meta name="description" content="Serverless application demo for SAA-C02 Course at https://learn.cantrill.io">
    <meta name="author" content="Adrian Cantrill">
    <title>Pet Cuddle-O-Tron</title>
    <!-- Bootstrap core CSS -->
    <link rel="stylesheet" href="https://stackpath.bootstrapcdn.com/bootstrap/4.4.1/css/bootstrap.min.css" integrity="sha384-Vkoo8x4CGsO3+Hhxv8T/Q5PaXtkKtu6ug5TOeNV6gBiFeWPGFN9MuhOf23Q9Ifjh" crossorigin="anonymous">
    <!-- JS Stuff -->
    <script src="https://code.jquery.com/jquery-3.4.1.slim.min.js" integrity="sha384-J6qa4849blE2+poT4WnyKhv5vZF5SrPo0iEjwBvKU7imGFAV0wwj1yYfoRSJoZ+n" crossorigin="anonymous"></script>
    <script src="https://cdn.jsdelivr.net/npm/popper.js@1.16.0/dist/umd/popper.min.js" integrity="sha384-Q6E9RHvbIyZFJoft+2mJbHaEWldlvI9IOYy5n3zV9zzTtmI3UksdQRVvoxMfooAo" crossorigin="anonymous"></script>
    <script src="https://stackpath.bootstrapcdn.com/bootstrap/4.4.1/js/bootstrap.min.js" integrity="sha384-wfSDF2E50Y2D1uUdj0O3uMBJnjuUD4Ih7YwaYd1iqfktj0Uod8GCExl3Og8ifwB6" crossorigin="anonymous"></script>
    <script src="https://cdnjs.cloudflare.com/ajax/libs/fetch/2.0.1/fetch.js"></script>
    <script src="https://cdnjs.cloudflare.com/ajax/libs/tether/1.4.0/js/tether.min.js" integrity="sha384-DztdAPBWPRXSA/3eYEEUWrWCy7G5KFbe8fFjk5JAIxUYHKkDx6Qin1DkWx51bBrb" crossorigin="anonymous"></script>
    <!-- Custom styles -->
    <link href="main.css" rel="stylesheet">
  </head>
  <body>
    <div class="container">
      <form class="form-signin">
        <img class="d-block w-100" src="./whiskers.png" alt="the boss">
        <center><h2 class="form-signin-heading">Pet Cuddle-O-Tron</h2></center>
        <center><h3 class="form-signin-heading">^^ Whiskers Commands You!! ^^</h3></center>
        <div id='error-message'></div>
        <div id='success-message'></div>
        <label for="waitSeconds" class="sr-only"></label>
        <p>These are always needed:</p>
        <input type="text" id="waitSeconds" class="form-control" placeholder="How long until the next cuddle (in seconds) ....">
        <label for="message" class="sr-only">Message for the human minion (Required)</label>
        <input type="text" id="message" class="form-control" placeholder="Message for the human minion (Required)">
        <hr>
        <p>Email address is required to send the human an email<br> Phone number is required to SMS the human<br> Both are required for ....maximum notification</p>
        <label for="email" class="sr-only">email</label>
        <input type="email" id="email" class="form-control" placeholder="human@minion.com">
        <label for="phone" class="sr-only">phone</label>
        <input type="text" id="phone" class="form-control" placeholder="+13376668008 REAL PHONE NUMBER HERE">
        <hr>
        <h3>Human Minion Hailing Options:<br><br></h3>
        <button id="emailButton" class="btn btn-md btn-primary btn-block" type="submit">LEVEL1 :  Email Only</button>
        <button id="smsButton" class="btn btn-md btn-primary btn-block" type="submit">LEVEL2 :  SMS Only</button>
        <button id="bothButton" class="btn btn-md btn-primary btn-block" type="submit">LEVEL3 : ALLTHETHINGS</button>
        <div id='results-message'></div>
      </form>
    </div> <!-- /container -->
    <script src="serverless.js"></script>
  </body>
</html>
main.css
body {
  padding-top: 40px;
  padding-bottom: 40px;
  background-color: #eee;
}

hr {
  border-top: solid black;
}

div #error-message {
  color: red;
  font-size: 15px;
  font-weight: bold;
}

div #success-message, #results-message {
  color: green;
  font-size: 15px;
  font-weight: bold;
}

.form-signin {
  max-width:480px;
  padding: 15px;
  margin: 0 auto;
}
.form-signin .form-signin-heading,
.form-signin .checkbox {
  margin-bottom: 10px;
}
.form-signin .checkbox {
  font-weight: normal;
}
.form-signin .form-control {
  position: relative;
  height: auto;
  -webkit-box-sizing: border-box;
          box-sizing: border-box;
  padding: 10px;
  font-size: 16px;
}
.form-signin .form-control:focus {
  z-index: 2;
}
.form-signin input[type="Artist"] {
  margin-bottom: -1px;
  border-bottom-right-radius: 0;
  border-bottom-left-radius: 0;
}
.form-signin input[type="bottom"] {
  margin-bottom: 10px;
  border-top-left-radius: 0;
  border-top-right-radius: 0;
}
serverless.js
var API_ENDPOINT = 'REPLACEME_API_GATEWAY_INVOKE_URL';
// if correct it should be similar to https://somethingsomething.execute-api.us-east-1.amazonaws.com/prod/petcuddleotron

var errorDiv = document.getElementById('error-message')
var successDiv = document.getElementById('success-message')
var resultsDiv = document.getElementById('results-message')

// function output returns input button contents
function waitSecondsValue() { return document.getElementById('waitSeconds').value }
function messageValue() { return document.getElementById('message').value }
function emailValue() { return document.getElementById('email').value }
function phoneValue() { return document.getElementById('phone').value }

function clearNotifications() {
    errorDiv.textContent = '';
    resultsDiv.textContent = '';
    successDiv.textContent = '';
}

// When buttons are clicked, these are run passing values to API Gateway call
document.getElementById('bothButton').addEventListener('click', function(e) { sendData(e, 'both'); });
document.getElementById('emailButton').addEventListener('click', function(e) { sendData(e, 'email'); });
document.getElementById('smsButton').addEventListener('click', function(e) { sendData(e, 'sms'); });


function sendData (e, pref) {
    e.preventDefault()
    clearNotifications()
    fetch(API_ENDPOINT, {
        headers:{
            "Content-type": "application/json"
        },
        method: 'POST',
        body: JSON.stringify({
            waitSeconds: waitSecondsValue(),
            preference: pref,
            message: messageValue(),
            email: emailValue(),
            phone: phoneValue()
        }),
        mode: 'cors'
    })
    .then((resp) => resp.json())
    .then(function(data) {
        console.log(data)
        successDiv.textContent = 'Submitted. But check the result below!';
        resultsDiv.textContent = JSON.stringify(data);
    })
    .catch(function(err) {
        errorDiv.textContent = 'Oops! Error Error:\n' + err.toString();
        console.log(err)
    });
};
- You'll need to add an image of your favorite pet. and update the url in the index.html to point to that image.
- Upload these files to your S3 bucket.
- Grab the Bucket Website Endpoint and copy into your notes.
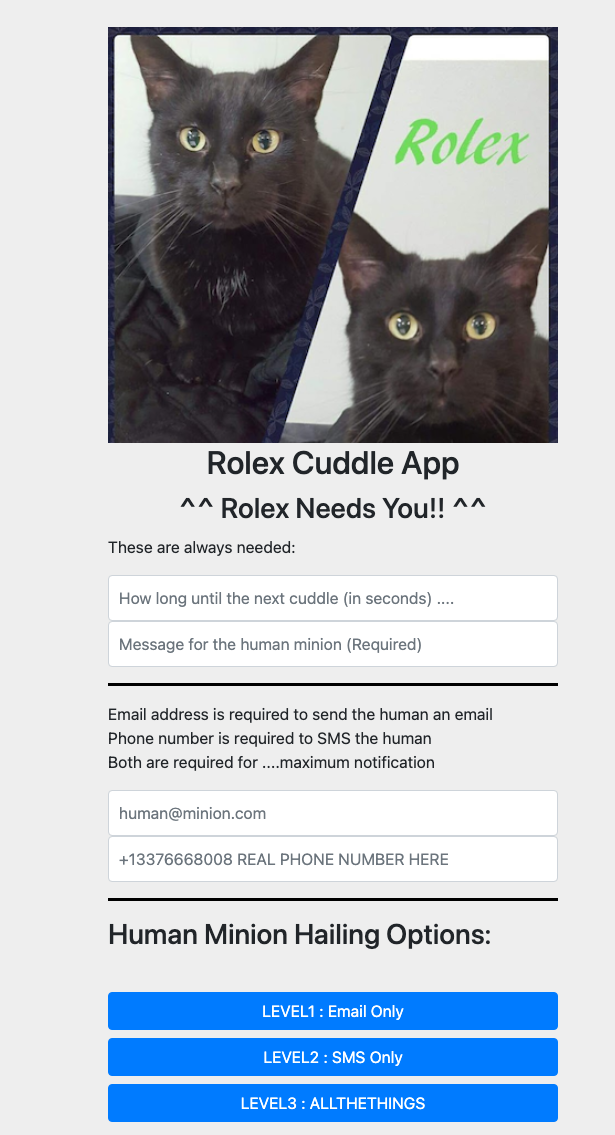
Testing the Application
- Paste the website endpoint in your browser to load it. Before you submit anything, navigate to the Step Function console and click on your step function and click the logging tab. There should be nothing in there because you haven't ran this yet.
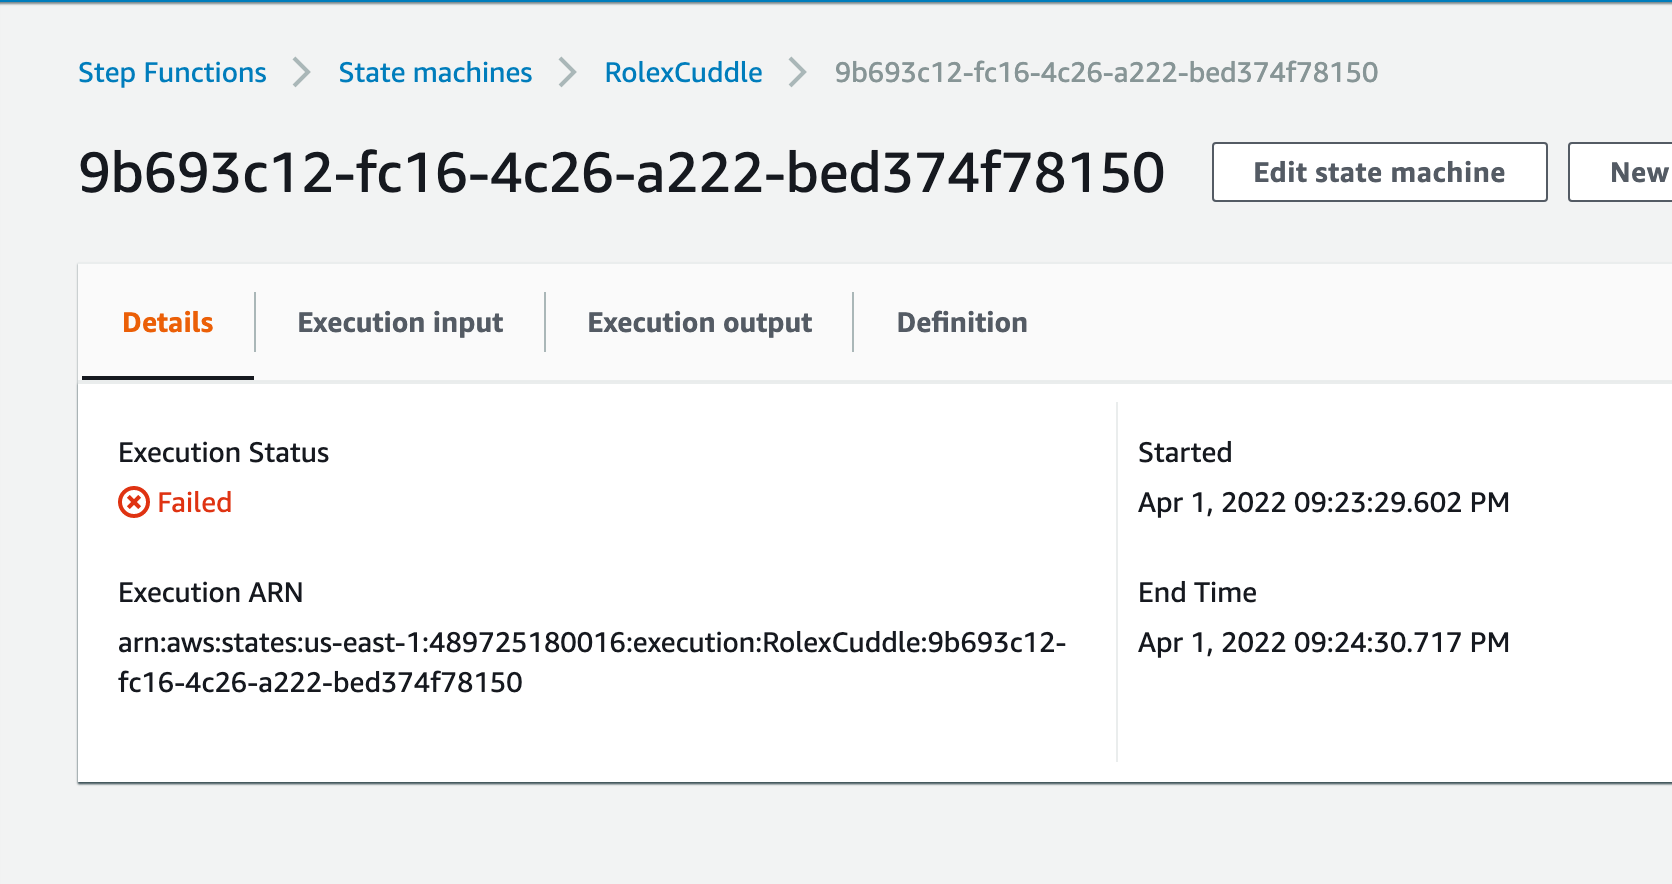
- Fill in the required information and then run your script.
- Refresh the logging page and you should see an execution. My first one failed because added the incorrect email and not the verified email address added to the safe list in the Simple Email Service as in the earlier steps.
Cleanup
- Delete the step function - state machine
- Delete the objects in the S3 bucket and delete the bucket
- Delete the lambda function
- Delete the API and API gateway
- Delete the Roles