Create Main VPC
- Navigate to the Management account and select the VPC console
- Click Create VPC
- Name the VPC - babyyoda-vpc1
- Set the IP CIDR block 10.16.0.0/16
- Select Amazon provided IPv6 and set tenancy to default
- Create VPC
- Navigate to the VPC that you created and look around.
- Click on the VPC and go to Actions > Edit DNS resolution > Enable
- Click on the VPC again and go to Actions > Edit DNS Hostnames > Enable
- Note the IPv4 and IPv6 CIDRs
Plan out the subnets
Use this tool to configure all of the subnets. If we use the tool, we can enter in the VPC CIDR and then the 16 networks that we want to create - remember the 4 tiers and the 3 availability zones?
sn-reserved-A 10.16.0.0/20 AZA IPv6 00
sn-database-A 10.16.16.0/20 AZA IPv6 01
sn-app-A 10.16.32.0/20 AZA IPv6 02
sn-web-A 10.16.48.0/20 AZA IPv6 03

sn-reserved-B 10.16.64.0/20 AZB IPv6 04
sn-database-B 10.16.80.0/20 AZB IPv6 05
sn-app-B 10.16.96.0/20 AZB IPv6 06
sn-web-B 10.16.112.0/20 AZB IPv6 07

sn-reserved-C 10.16.128.0/20 AZC IPv6 08
sn-database-C 10.16.144.0/20 AZC IPv6 09
sn-app-C 10.16.160.0/20 AZC IPv6 0A
sn-web-C 10.16.176.0/20 AZC IPv6 0B
Creating the Subnets
- Navigate to the VPC console of the Management account.
- Click on Subnets
- Click Create Subnet
- Select the VPC that you created
- Enter in the Subnet name - sn-reserved-A - make sure you use the tool above and a plan to map out the subnets.
- Select the availability zone
- Enter in the IPv4 CIDR block
- Select the Custom IPv6 dropdown
- The first one is
00as noted above - Add tags, name and the name of the subnet.
- Click add new subnet and repeat the above process and increment the IPv6 until all 4 in Availability zone A have been created.
- Repeat this process until all 12 subnets in all of the availability zones have been created.

At some point, I'll add the terraform code for this. Look in the IaC-AWS repositories for what we've deployed.
Create the Internet Gateways
- Navigate to the VPC console in the management account.
- Click on the Internet Gateways section
- Click Create Internet Gateway.
- Name this IGW babyyoda-vpc1-igw
- Click Attach to VPC and select our VPC that we created.
- We want to have the Web tier to be public, so we need to create a route table
Create Route Tables
- Click on the Route Tables section on the left
- Click Create Route Table.
- Select the VPC that this is associated with
- Name this babyyoda-vpc-route1-web
- Click Create.
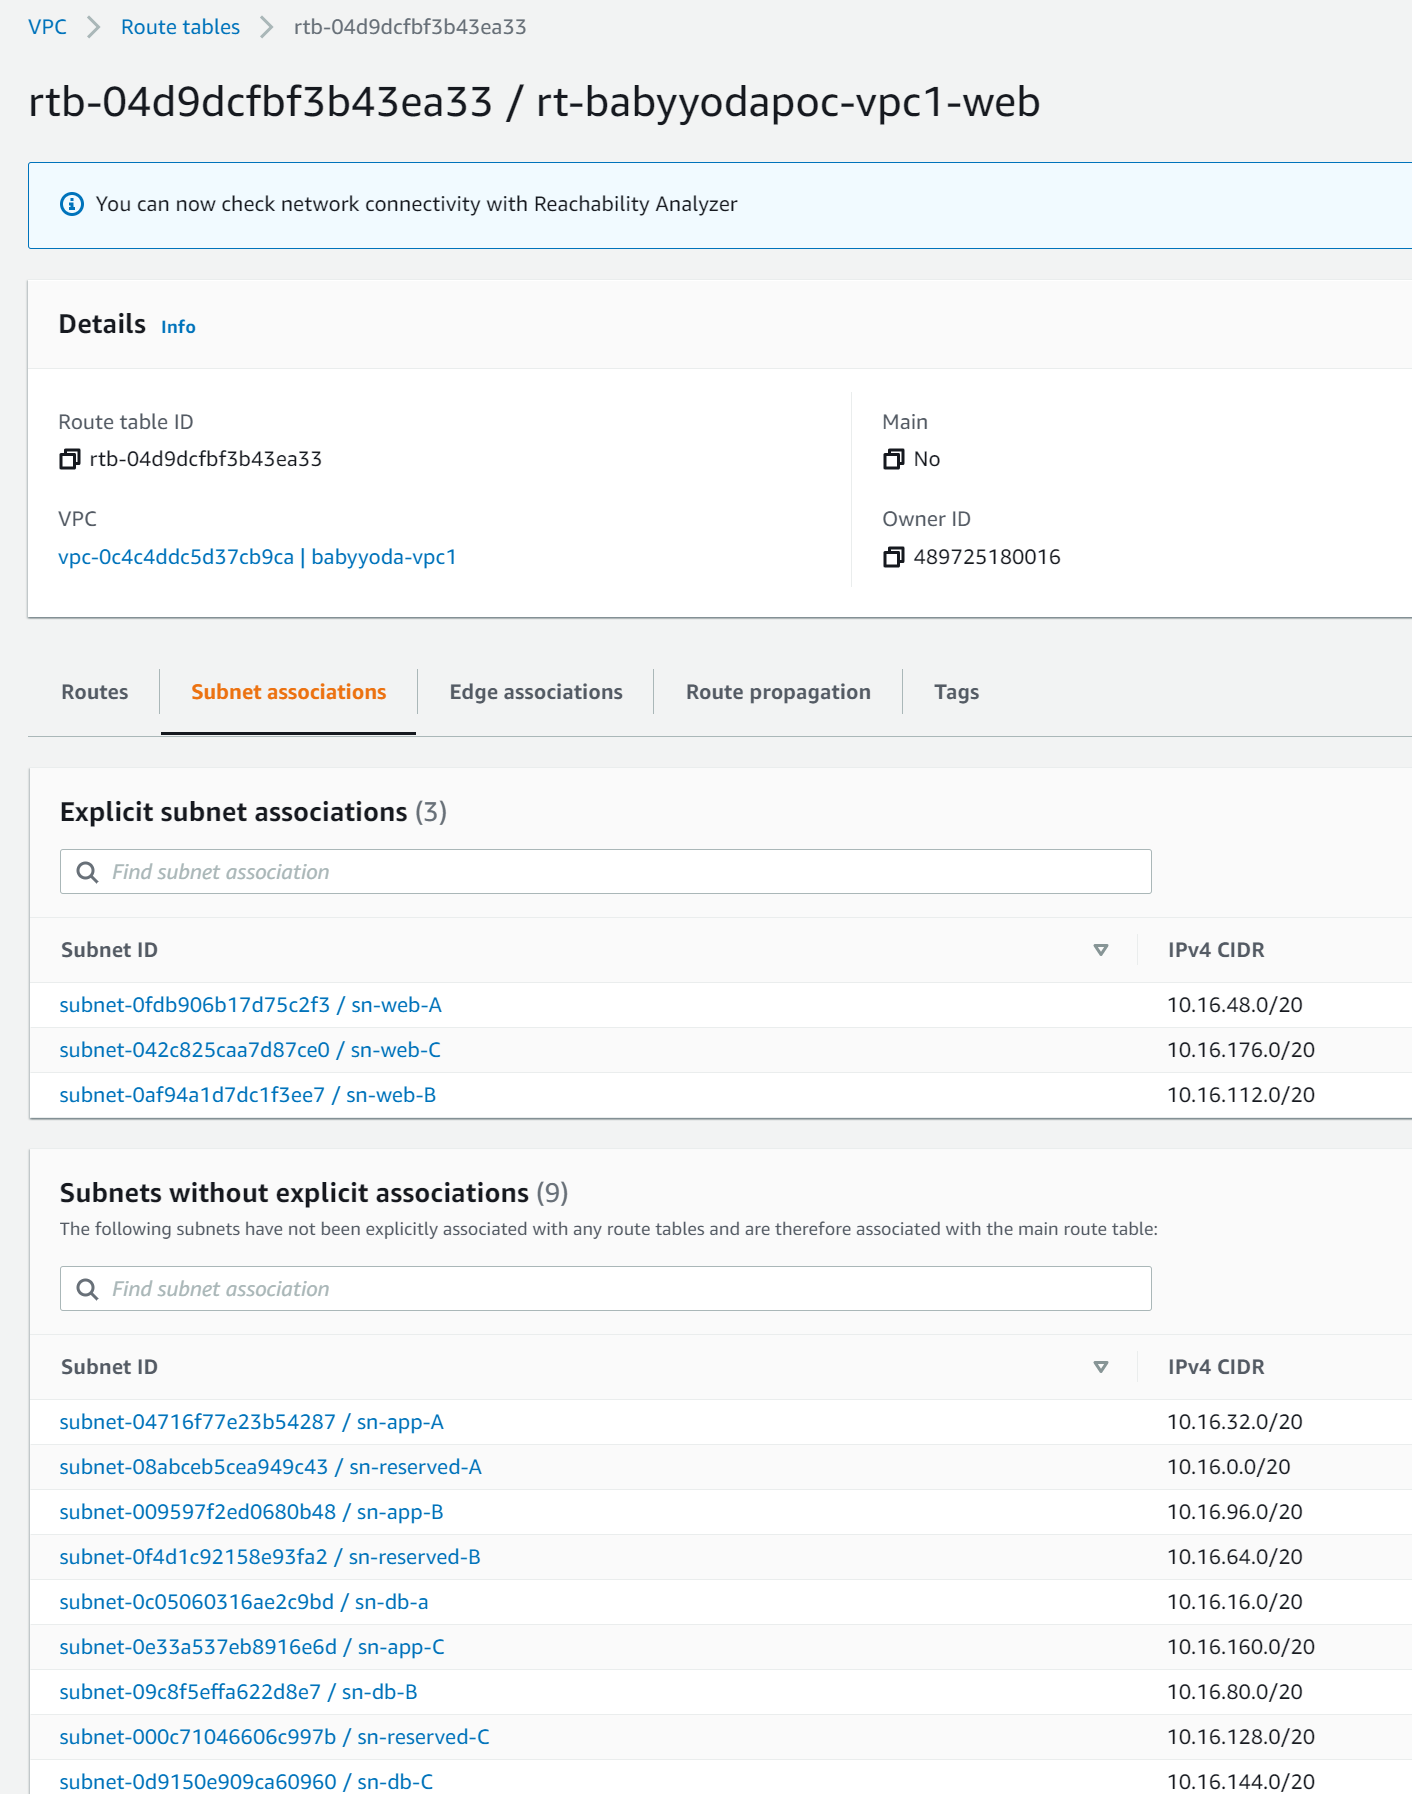
Associate Route Table with Subnets
- Click on the new route table
- Click on Subnet Associations
- Select the 3 web subnets and click Save
- Click on the Routes tab.
- Notice that these have two local routes that cannot be changed or removed
Create Routes
- On the Routes tab, click Edit Routes.
- Add 0.0.0.0/0 as your IPv4 CIDR to your route table.
- The target will be your Internet Gateway
- Add the IPv6 CIDR, ::/0 with the same target to the Internet Gateway.
- Click on the Subnets section.
- Select the Web A subnet
- Click actions, modify Auto IP settings
- Enable
- Repeat for Web B and Web C.
Example:
Deploy Bastion Host
- Navigate to the EC2 console inside of the management network.
- Click Launch instance
- Select Amazon Linux 2 AMI 64 bit x86
- Click the largest instance available on the free tier. t2.micro is usually the only option
- Click Configure Instance Details
- Select the VPC and then Select the Web A subnet.
- Set the auto-assign to explicitly enable on both IPv4 and IPv6
- Look at the other options available and then click Next: Storage.
- Look around at the options for storage, but ultimately select the defaults by clicking Next: Tags.
- For the tags, add in Name and then BBYYODA-Bastion for the value.
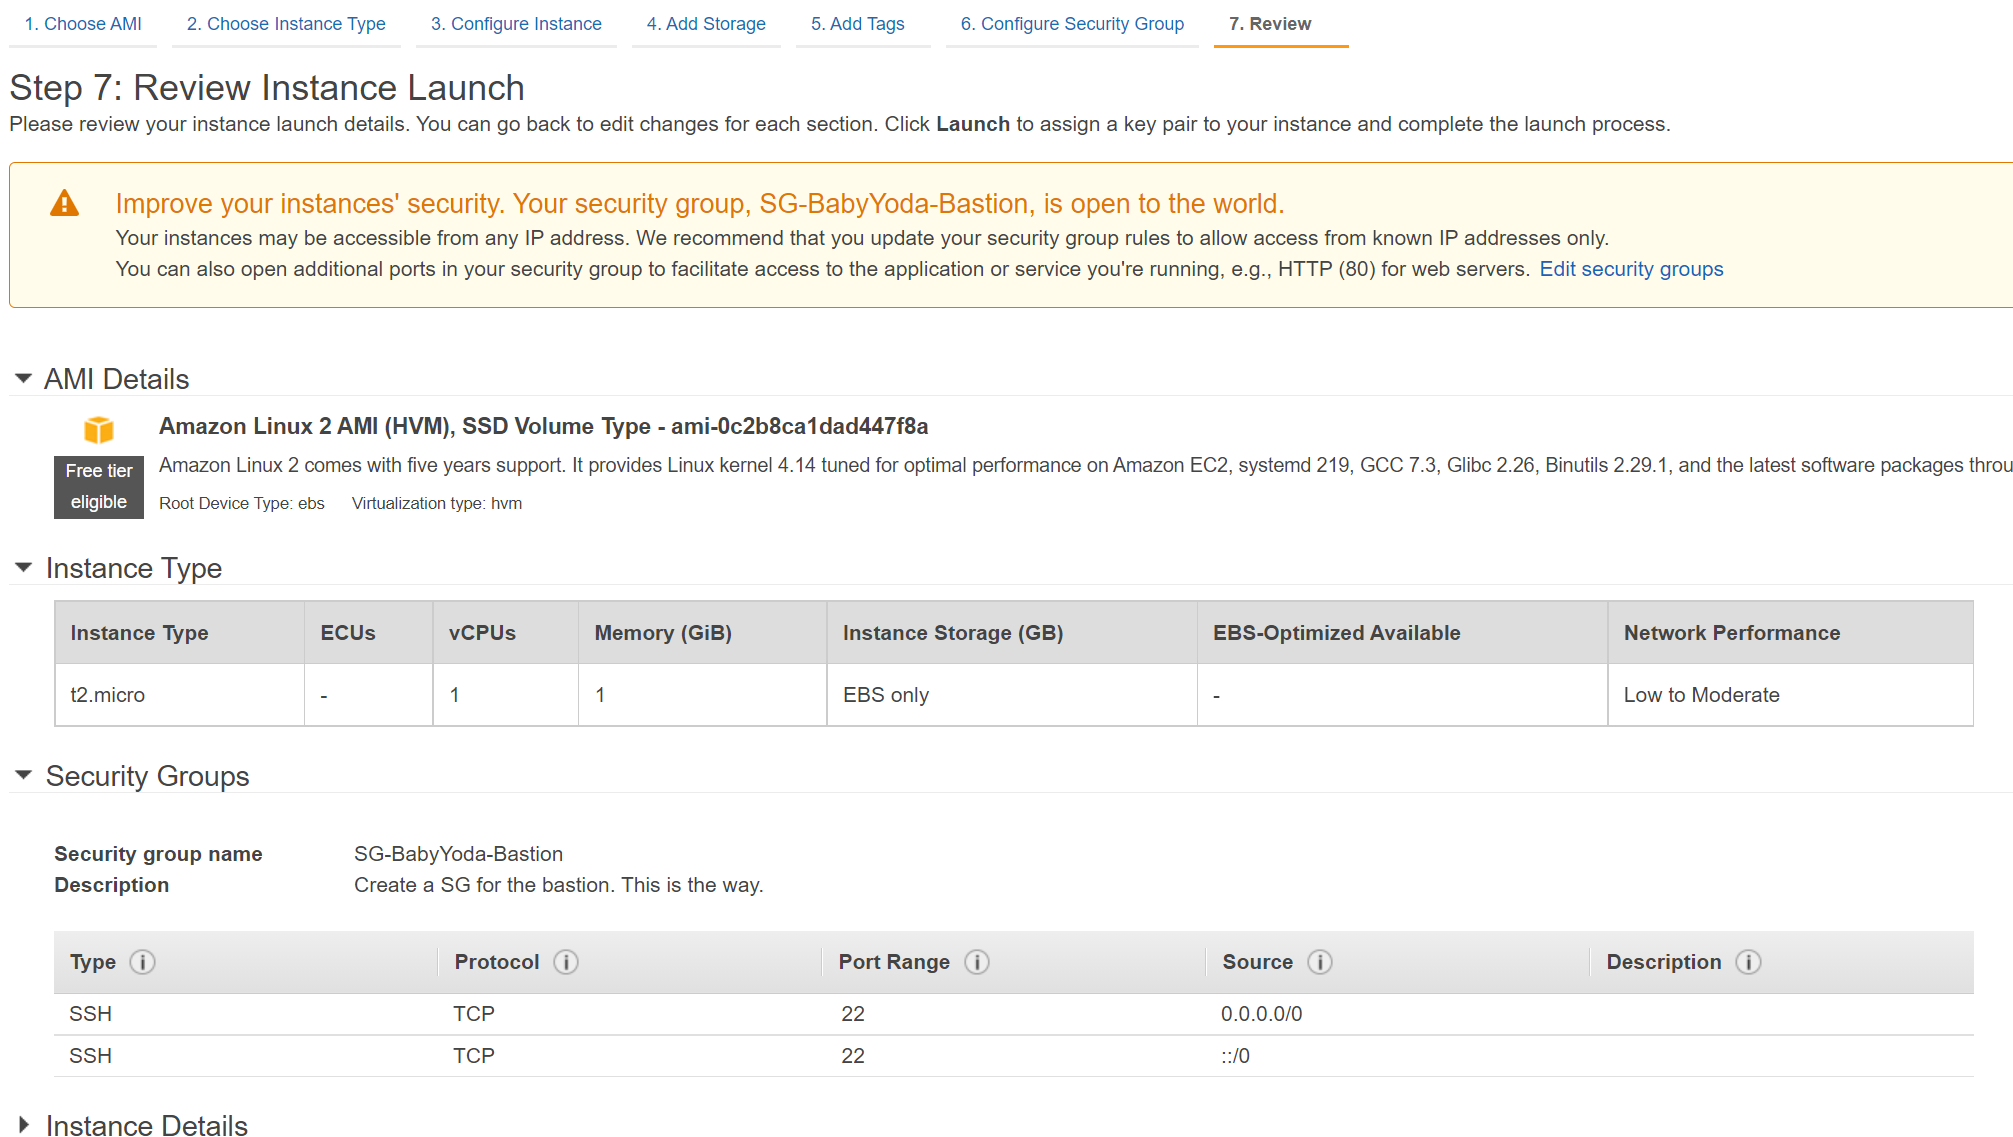
- For the Security group, we will create a new security group and call it SG-BabyYoda-Bastion
- Add a description if needed, if not, copy the name into that description.
- Note the rules for the Security Group, we're enabling SSH, port 22, and we're opening it to ALL of the IP addresses.
a. You don't want to do this in production.
- Click Review and Create and then create the EC2 Instance.
- You will need to select a Key Pair, so for this one we will create a specific Key Pair for this. a. I called mine BY-Bastion and then downloaded and launched this instance.
- Wait for the status checks to say 2/2 checks passed.
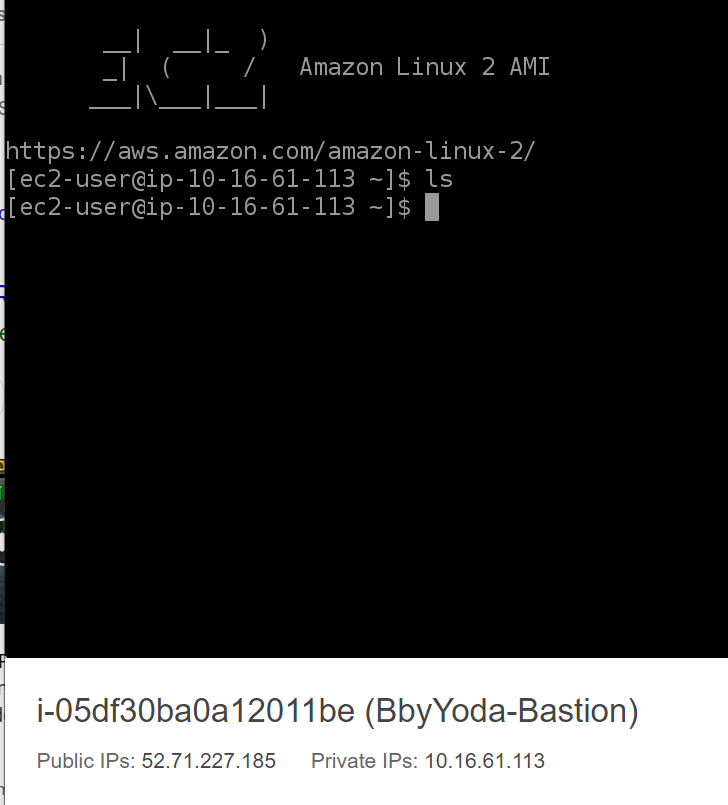
Connect to this EC2 Instance
- When the Status Checks are green, right click the instance and select Connect.
- Select EC2 Instance Connect and verify the settings are correct and hit Connect.
Clean Up
Terminate the EC2 Delete the VPC - I know it was a lot of work, but we'll figure that out to recreate it using CloudFormation quickly.