Demo - Adding CloudFront distribution to S3 Static Website
- Log into AWS and select the N. Virginia region
- Deploy a static website in S3 here.
- Open up the S3 bucket.
- Notice that this thing opens up in a non secure http protocol.
- Navigate to the CloudFront console and open in a new tab.
- Click New Distribution.
- Origin domain - S3 buckets
- Origin path - specific path - leave blank for root of the domain.
- Viewer protocol policy - set to HTTP and HTTPS
- Cache policy and origin request policy - caching optimized set.
- Use all edge locations set - this is a global app, remember?
- Alternate domain name will be used in a later demo
- Custom SSL certificate will be used later, leave this blank
- HTTP/2 checked.
- Default root object needs to be set to index.html so that we point this distribution to the end of the root url.
- IPv6 on by default
- Create distribution and wait for it to deploy
- Visit the distribution by opening up the URL in your browser - https://d4xg79avkp1h0.cloudfront.net
Part 2 - Messing with this
- Replace one of the images with a new image and upload to S3.
- Refresh the CloudFront distribution (no new image)
- Refresh the S3 static website directly (new image)
- Refresh the CloudFront distribution again (no new image)
- Become frustrated.
- A workaround is to perform an invalidation or version your image.
- Navigate back to the Cloudfront console and click on the distribution.
- Click on the invalidation tab and click Create Invalidation and add
/*into the invalidation - Refresh the CloudFront distribution link. (new image!)
- Oh. open up your CloudFront distribution URL as https:// - that works too.
- Leave this in place for the next demo.
Demo - Adding a custom domain and HTTPS
You need a domain name registered in Route53 to do this demo.
- Navigate back to the CloudFront console
- Click your distribution and click edit.
- Change the CNAME to your custom domain name. I used rolex.babyyoda.site.
- Click Request Certificate
- Enter in your FQDN here and choose DNS validation.
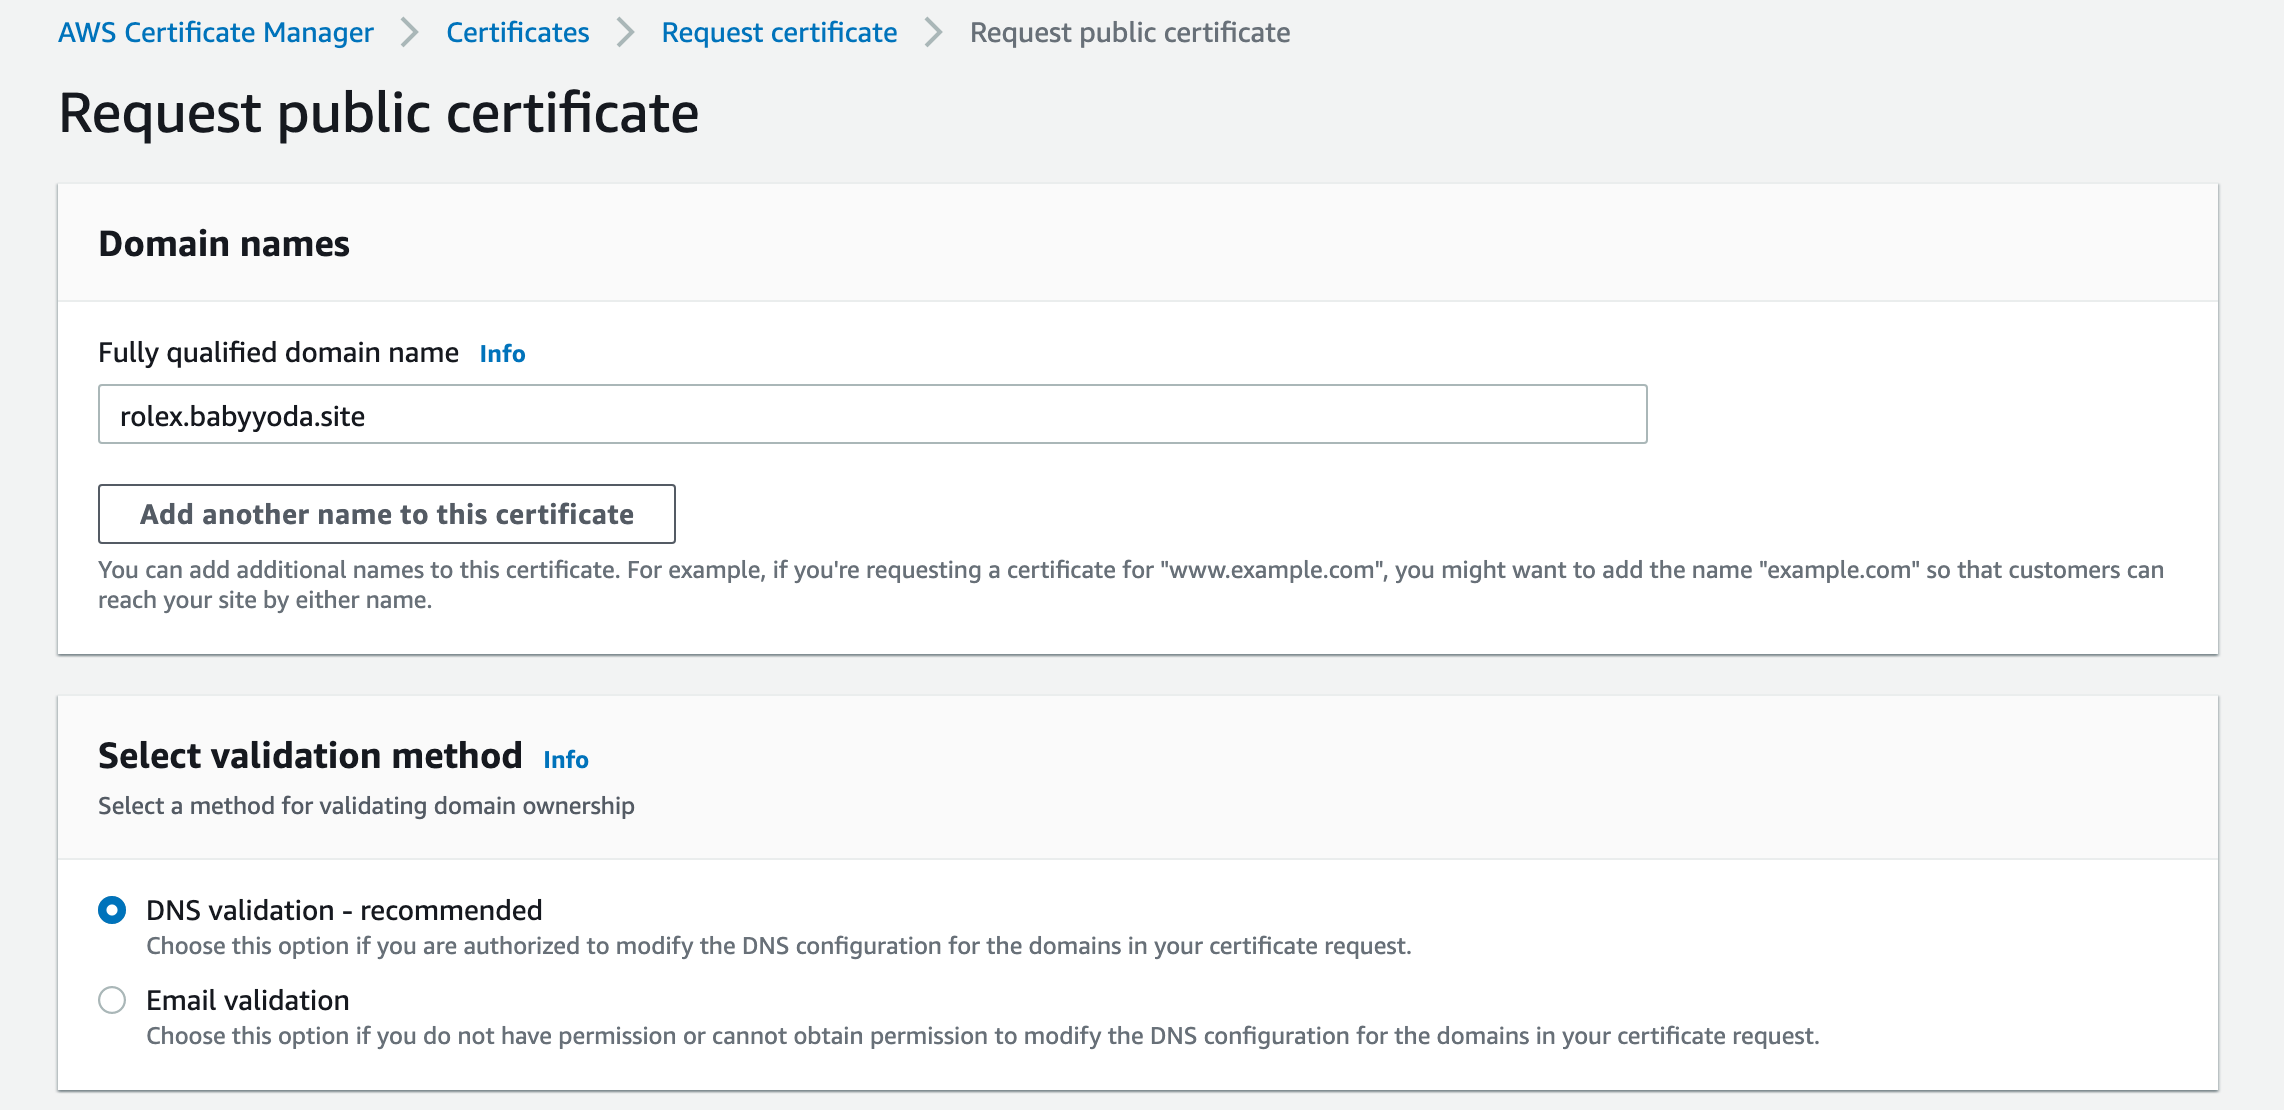 6. Request the certificate
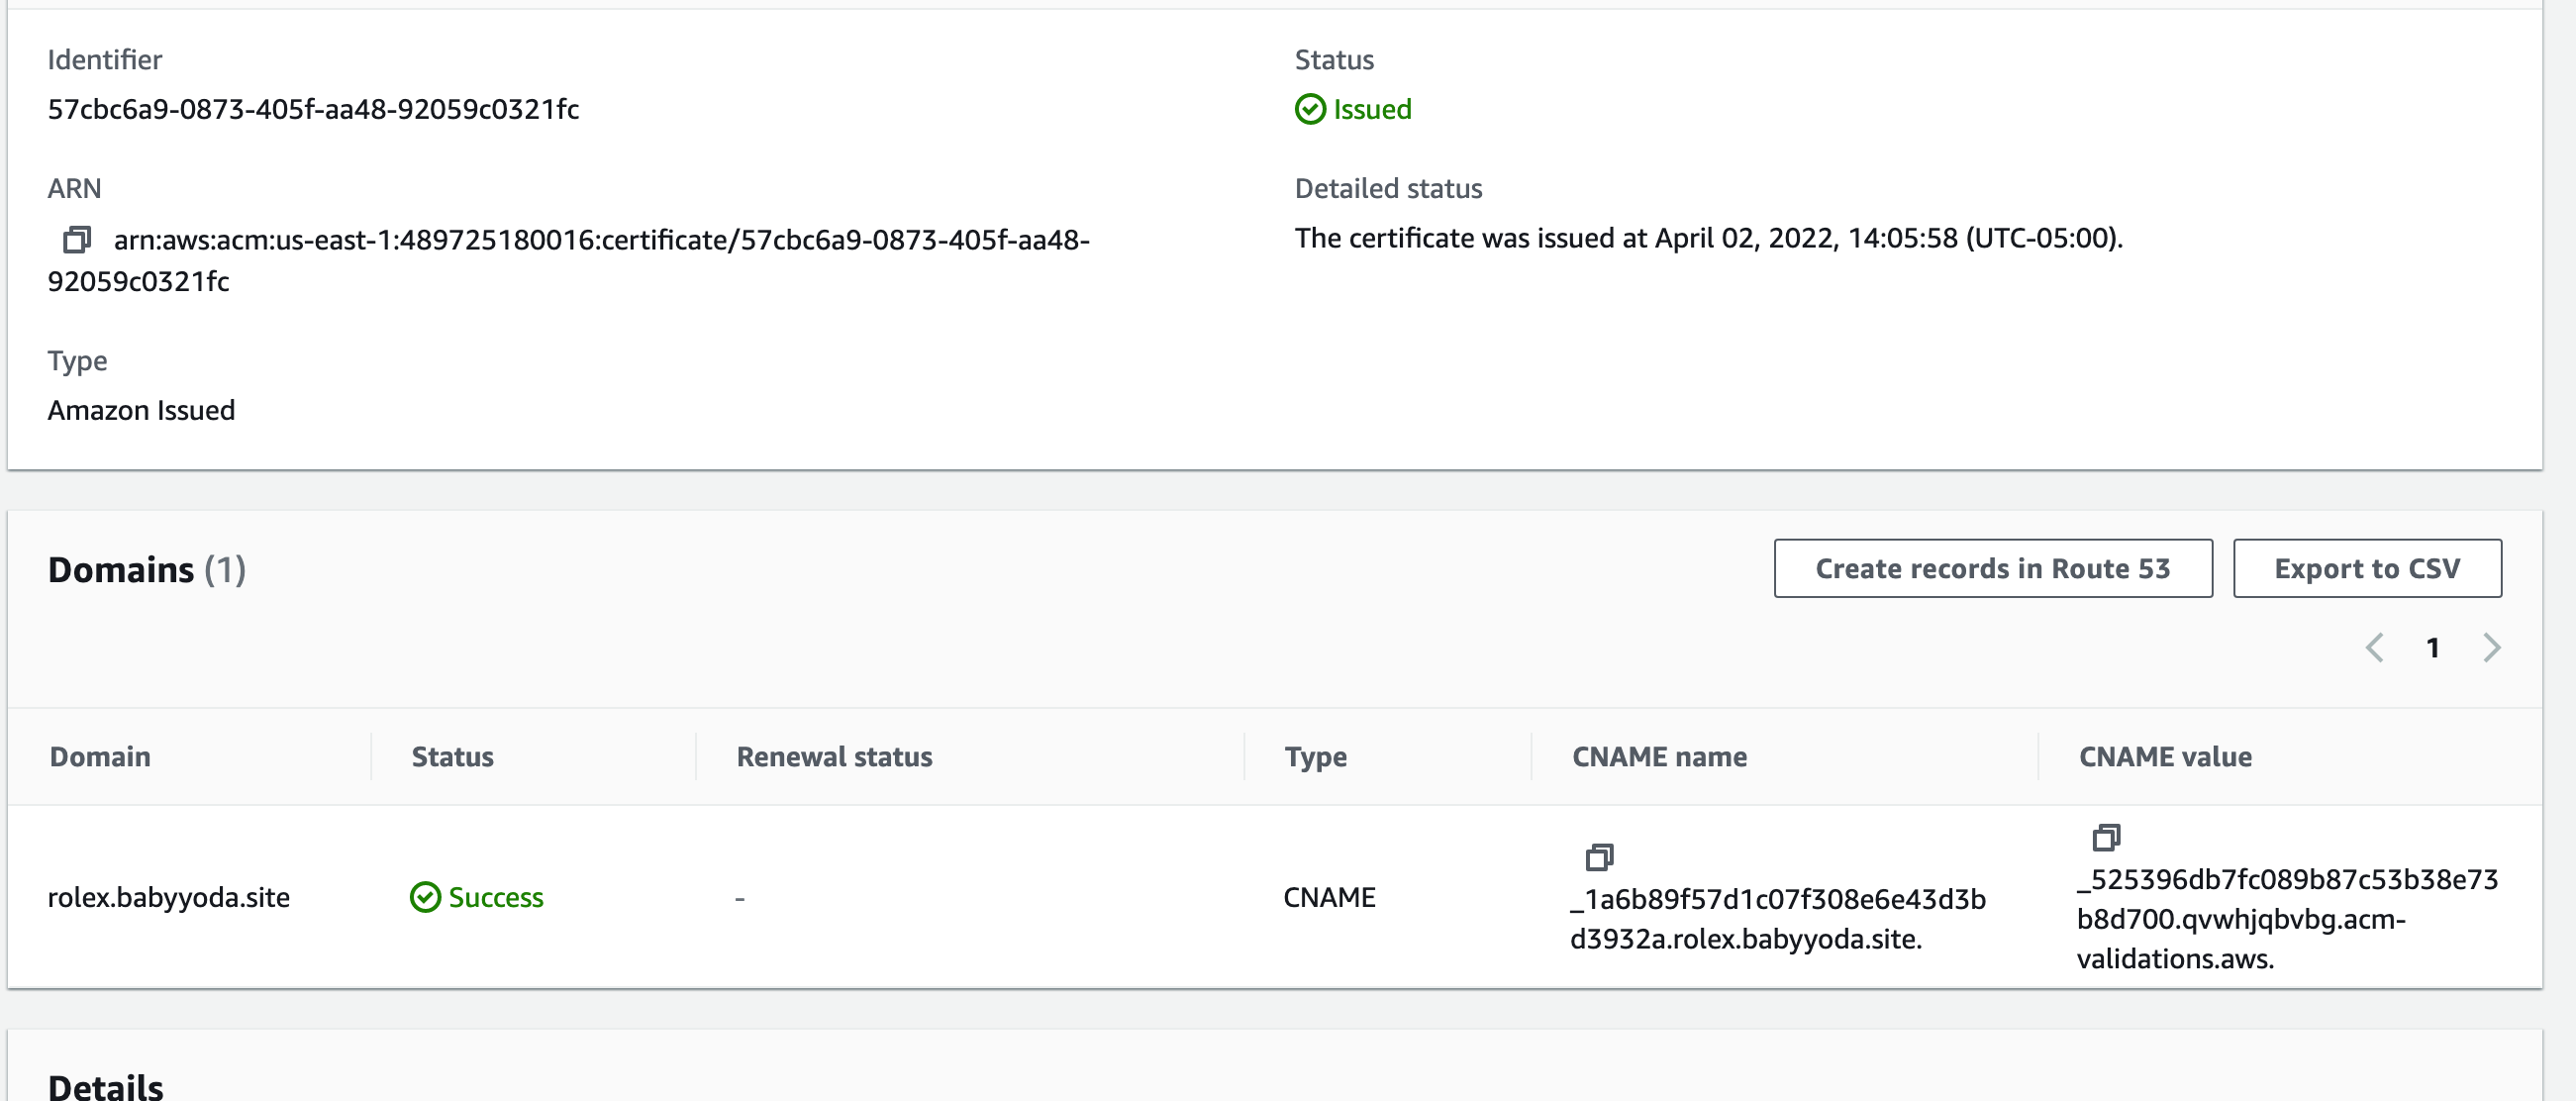
7. Refresh and you should see the certificate issued. Click on this and you can click on the Add Record to Route53.
8. Refresh the ACM console and your domain should move into a Successful Validation status.
6. Request the certificate
7. Refresh and you should see the certificate issued. Click on this and you can click on the Add Record to Route53.
8. Refresh the ACM console and your domain should move into a Successful Validation status.
 9. Navigate back to the CloudFront distribution, click the refresh icon and then select the certificate from the dropdown.
 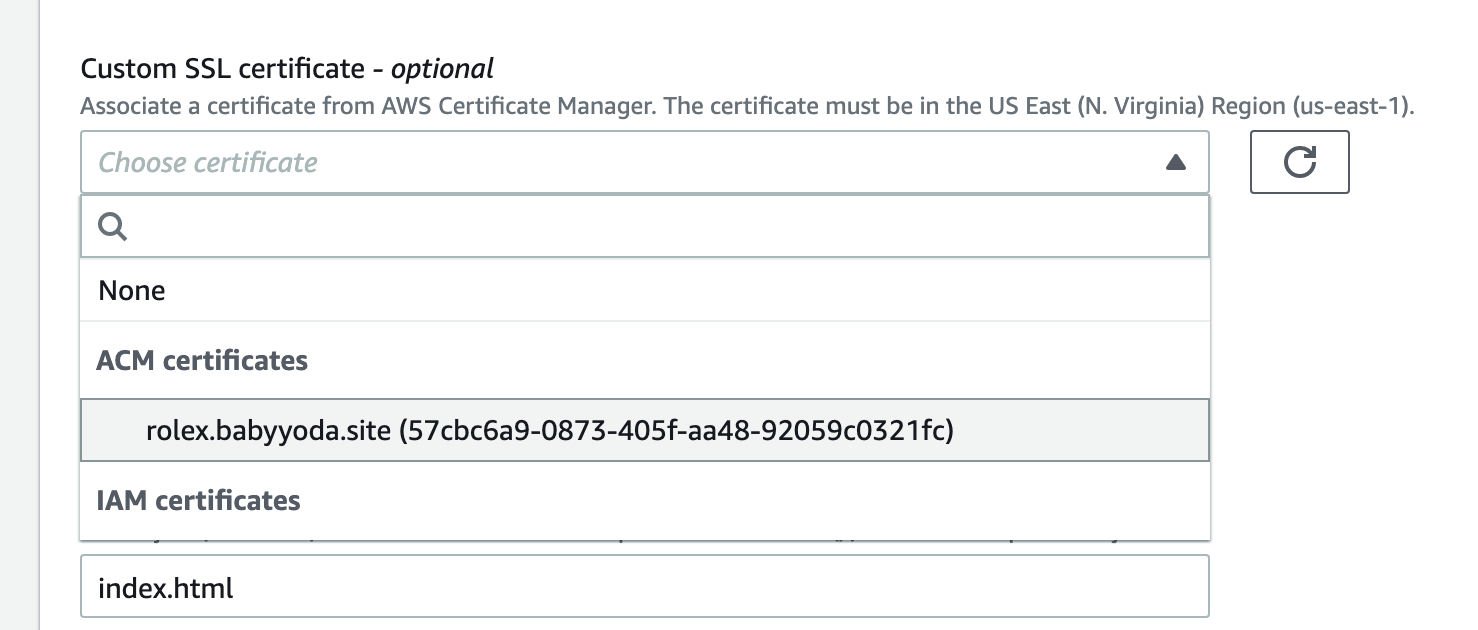 10. Leave the rest of the default and Save Changes.
11. Wait for this to move to the deployed state and then go into the Route53 console
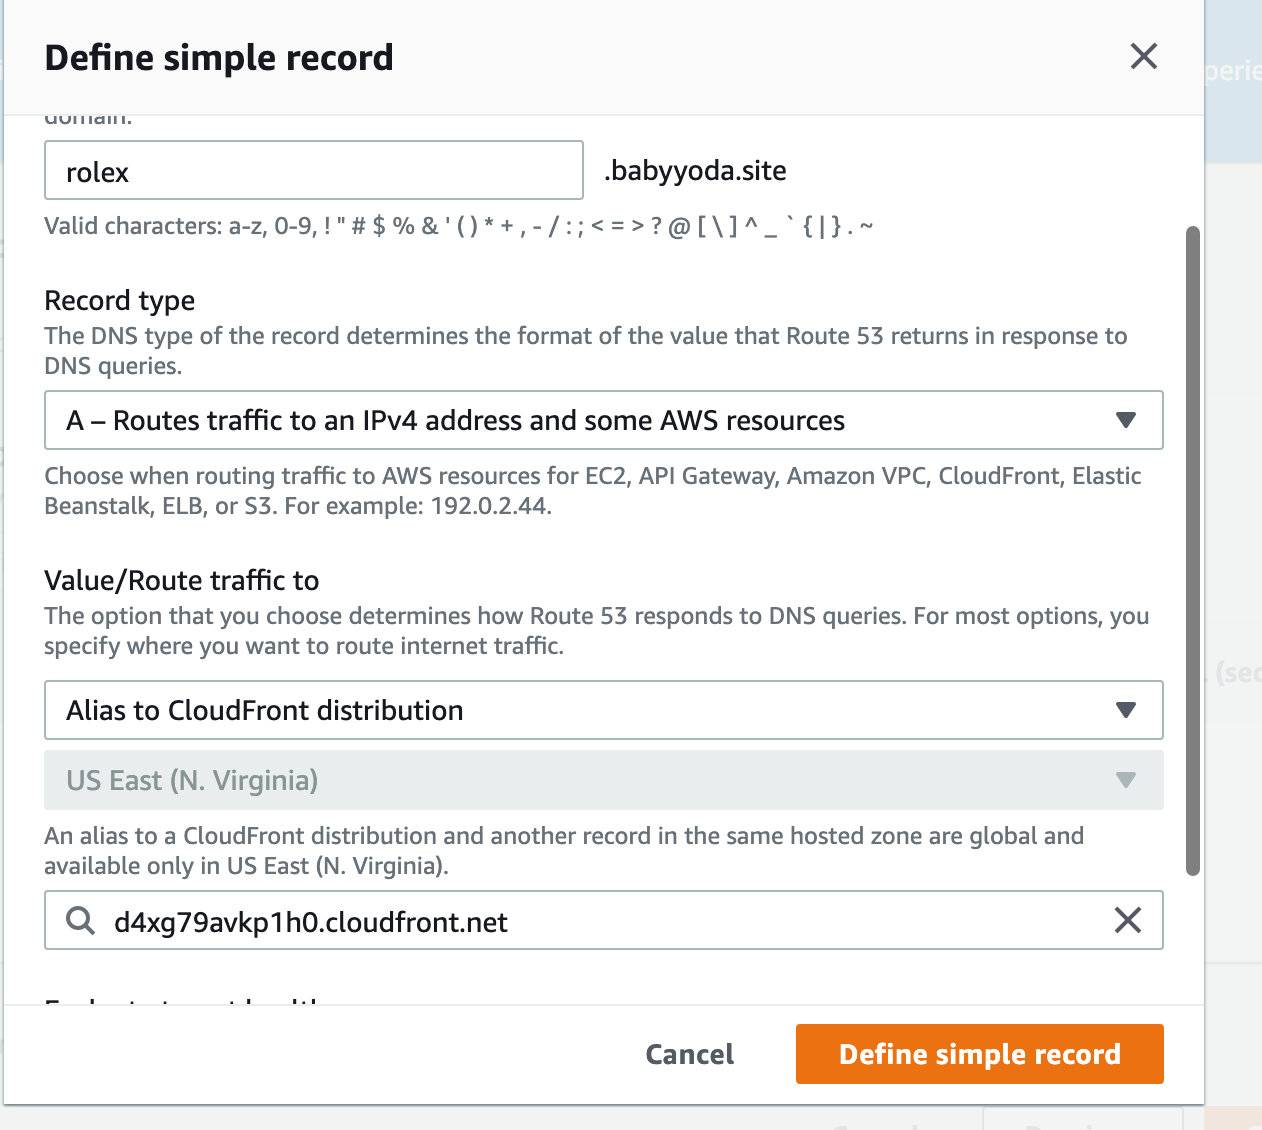
12. Create a simple record for your custom domain.
13. Route this to your CloudFront distribution.
10. Leave the rest of the default and Save Changes.
11. Wait for this to move to the deployed state and then go into the Route53 console
12. Create a simple record for your custom domain.
13. Route this to your CloudFront distribution.
 14. Open your custom domain both as http and https and notice that it loads.
Demo - Using OAI
- Navigate to the S3 console
- Open up the bucket and click on the permissions tab to view the policy
- Notice that this is an open policy to allow everyone to access.
- Navigate to the CloudFront console and click on the distribution.
- Click on the Origins and then edit the origin.
- Select Yes use OA and click on Create New OAI
- Click on Yes, update the bucket policy to automatically update the bucket policy
- Refresh the bucket policy and remove the statement that allows all access.
- Try to access the site via the static website endpoint and you'll get a 403 error.
- Access via the custom domain that you've created and you are allowed to access.
Clean up
Delete the distribution - disable first Remove Route53 records acm and the one pointing at the CloudFront distribution Delete SSL certificate from ACM Delete the OAI Delete the static website bucket