[[TOC]]
Demo: Connecting to EC2 Instance using SSH or EC2 Instance Connect.
You will need to create a key pair in order to do this quick demo
Create key Pair
- Navigate to the EC2 Console inside of the Management account.
- Click on Key Pairs on the left
- Name the Key Pair and select the .pem option. If you use putty, you can generate that key pair for Putty.
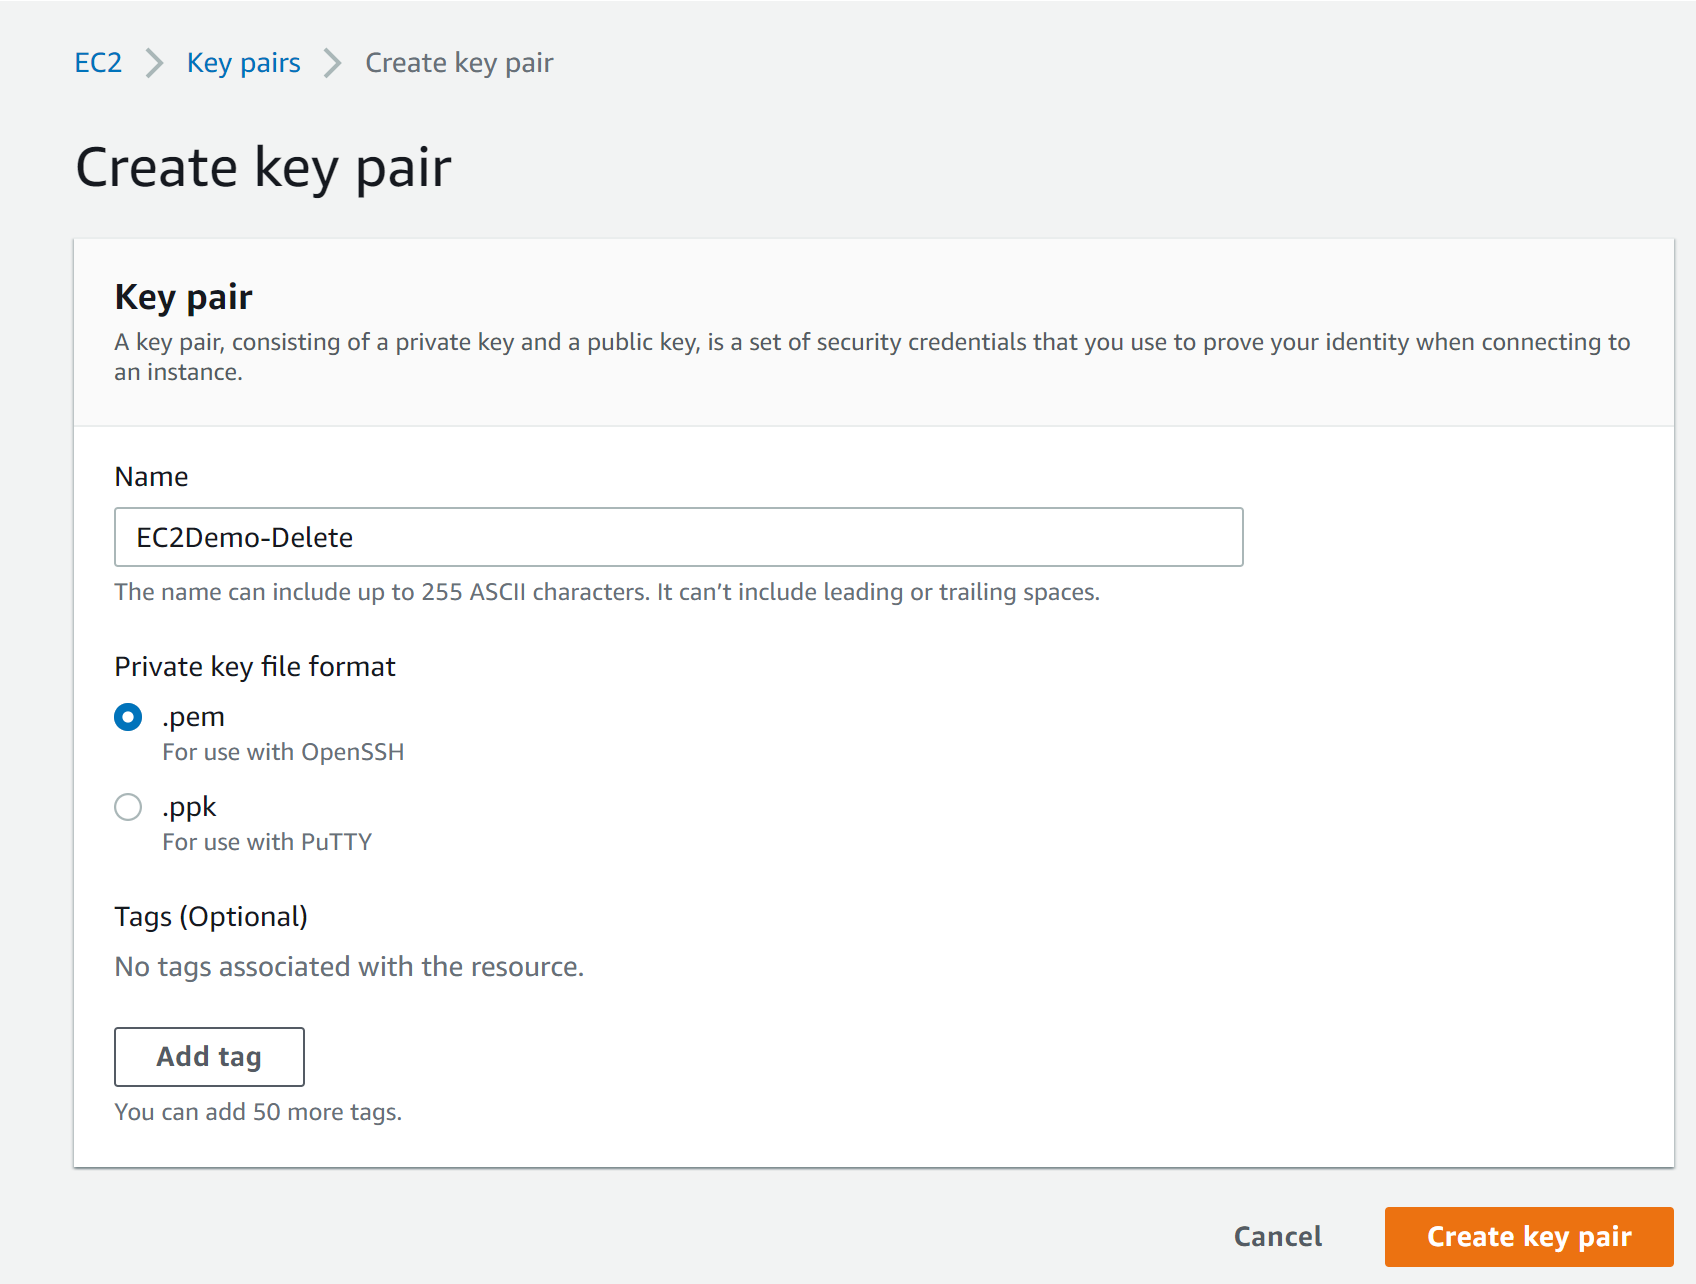
- Create key pair (this will start a download for that pem file.
Deploy Required Resources.
- You should have a VPC and a couple subnets created. If not, don't worry, we can create this in the default VPC.
- Navigate to the EC2 Console.
- Click on Launch Instance.
- Select the Amazon Linux instance AMI - 64 bit x86.
- Select T2.micro (paying attention to the names this time, T is the type, 2nd generation, micro sized)
- Select the VPC, subnet and enable the public IP
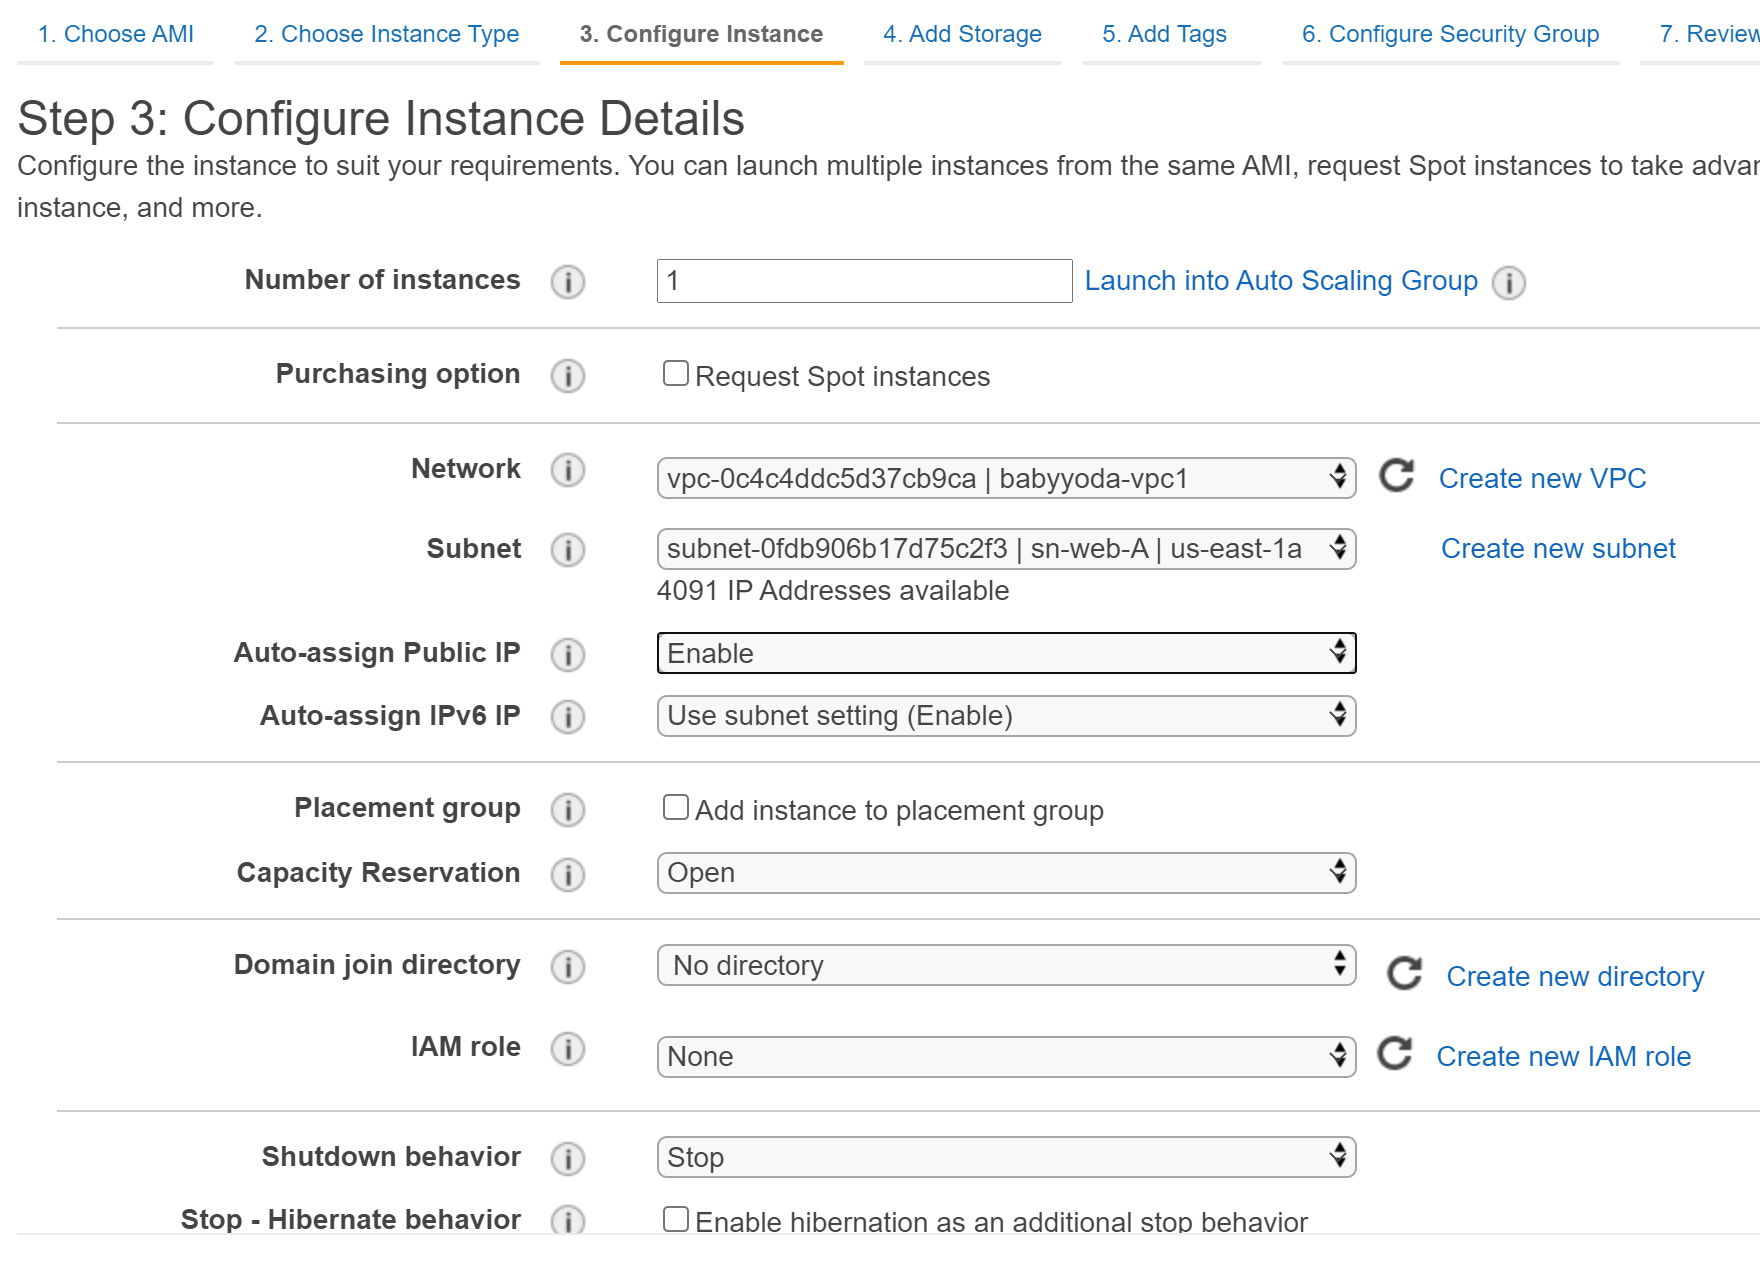
- Click next through until you get to the NSG screen and make sure that port 22 is open to this EC2 instance.
- Click next until you select the key pair, then select the one you created a bit ago and then Launch the instance.
- It may take a bit of time to launch this instance, but please wait and continue on when the status checks show healthy.
Verifying the Resources
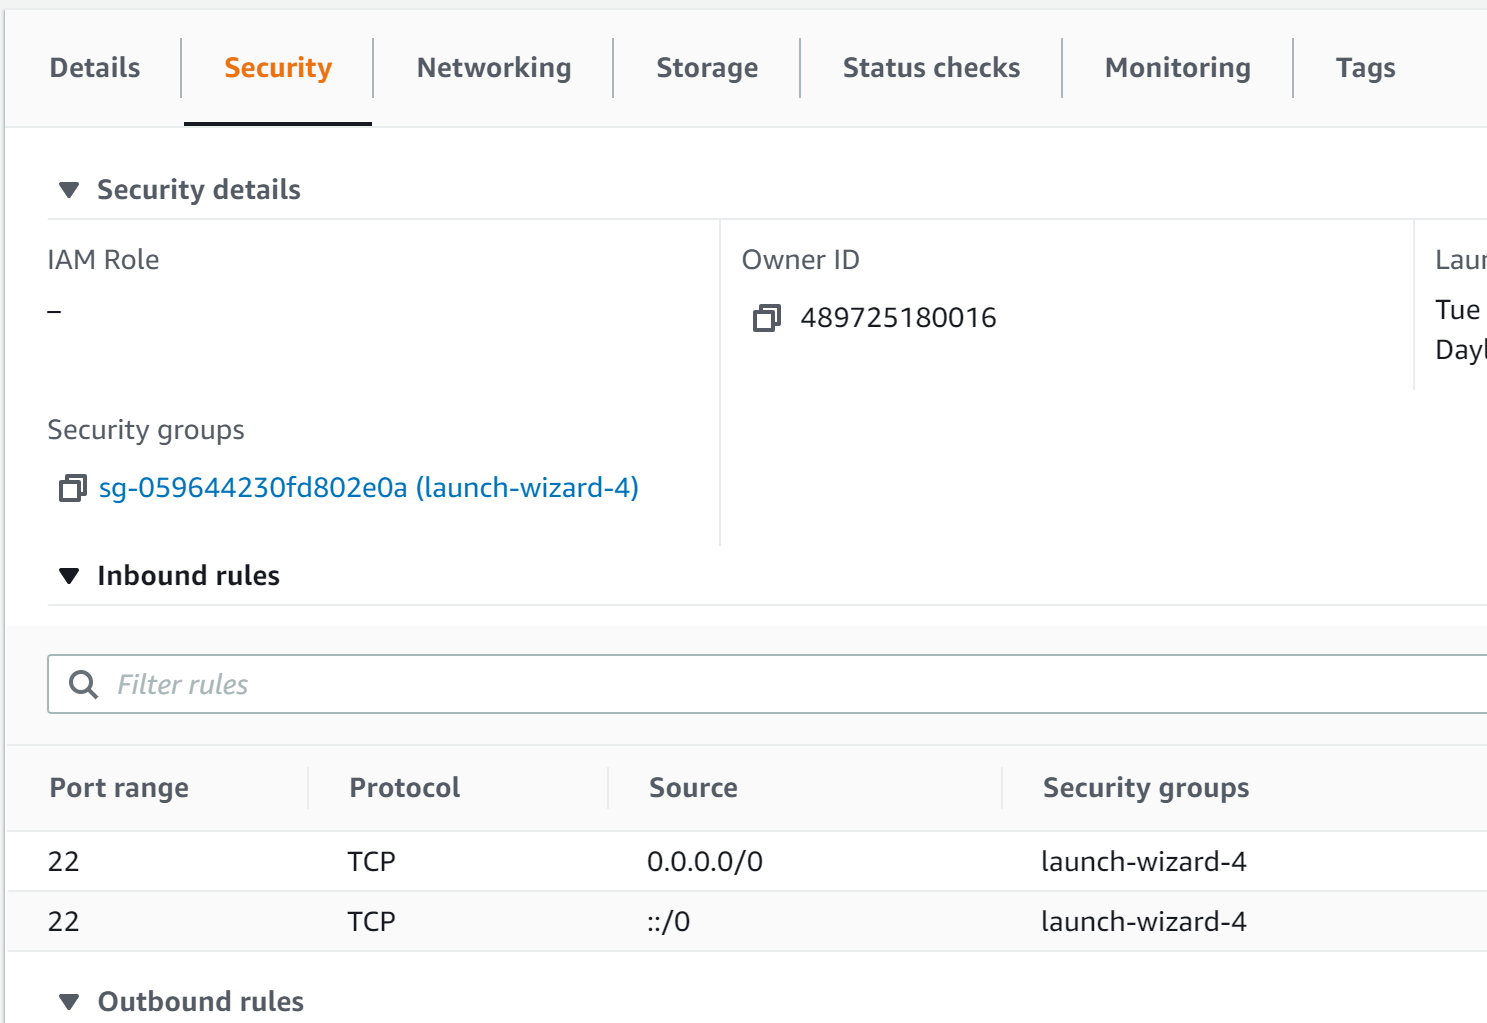
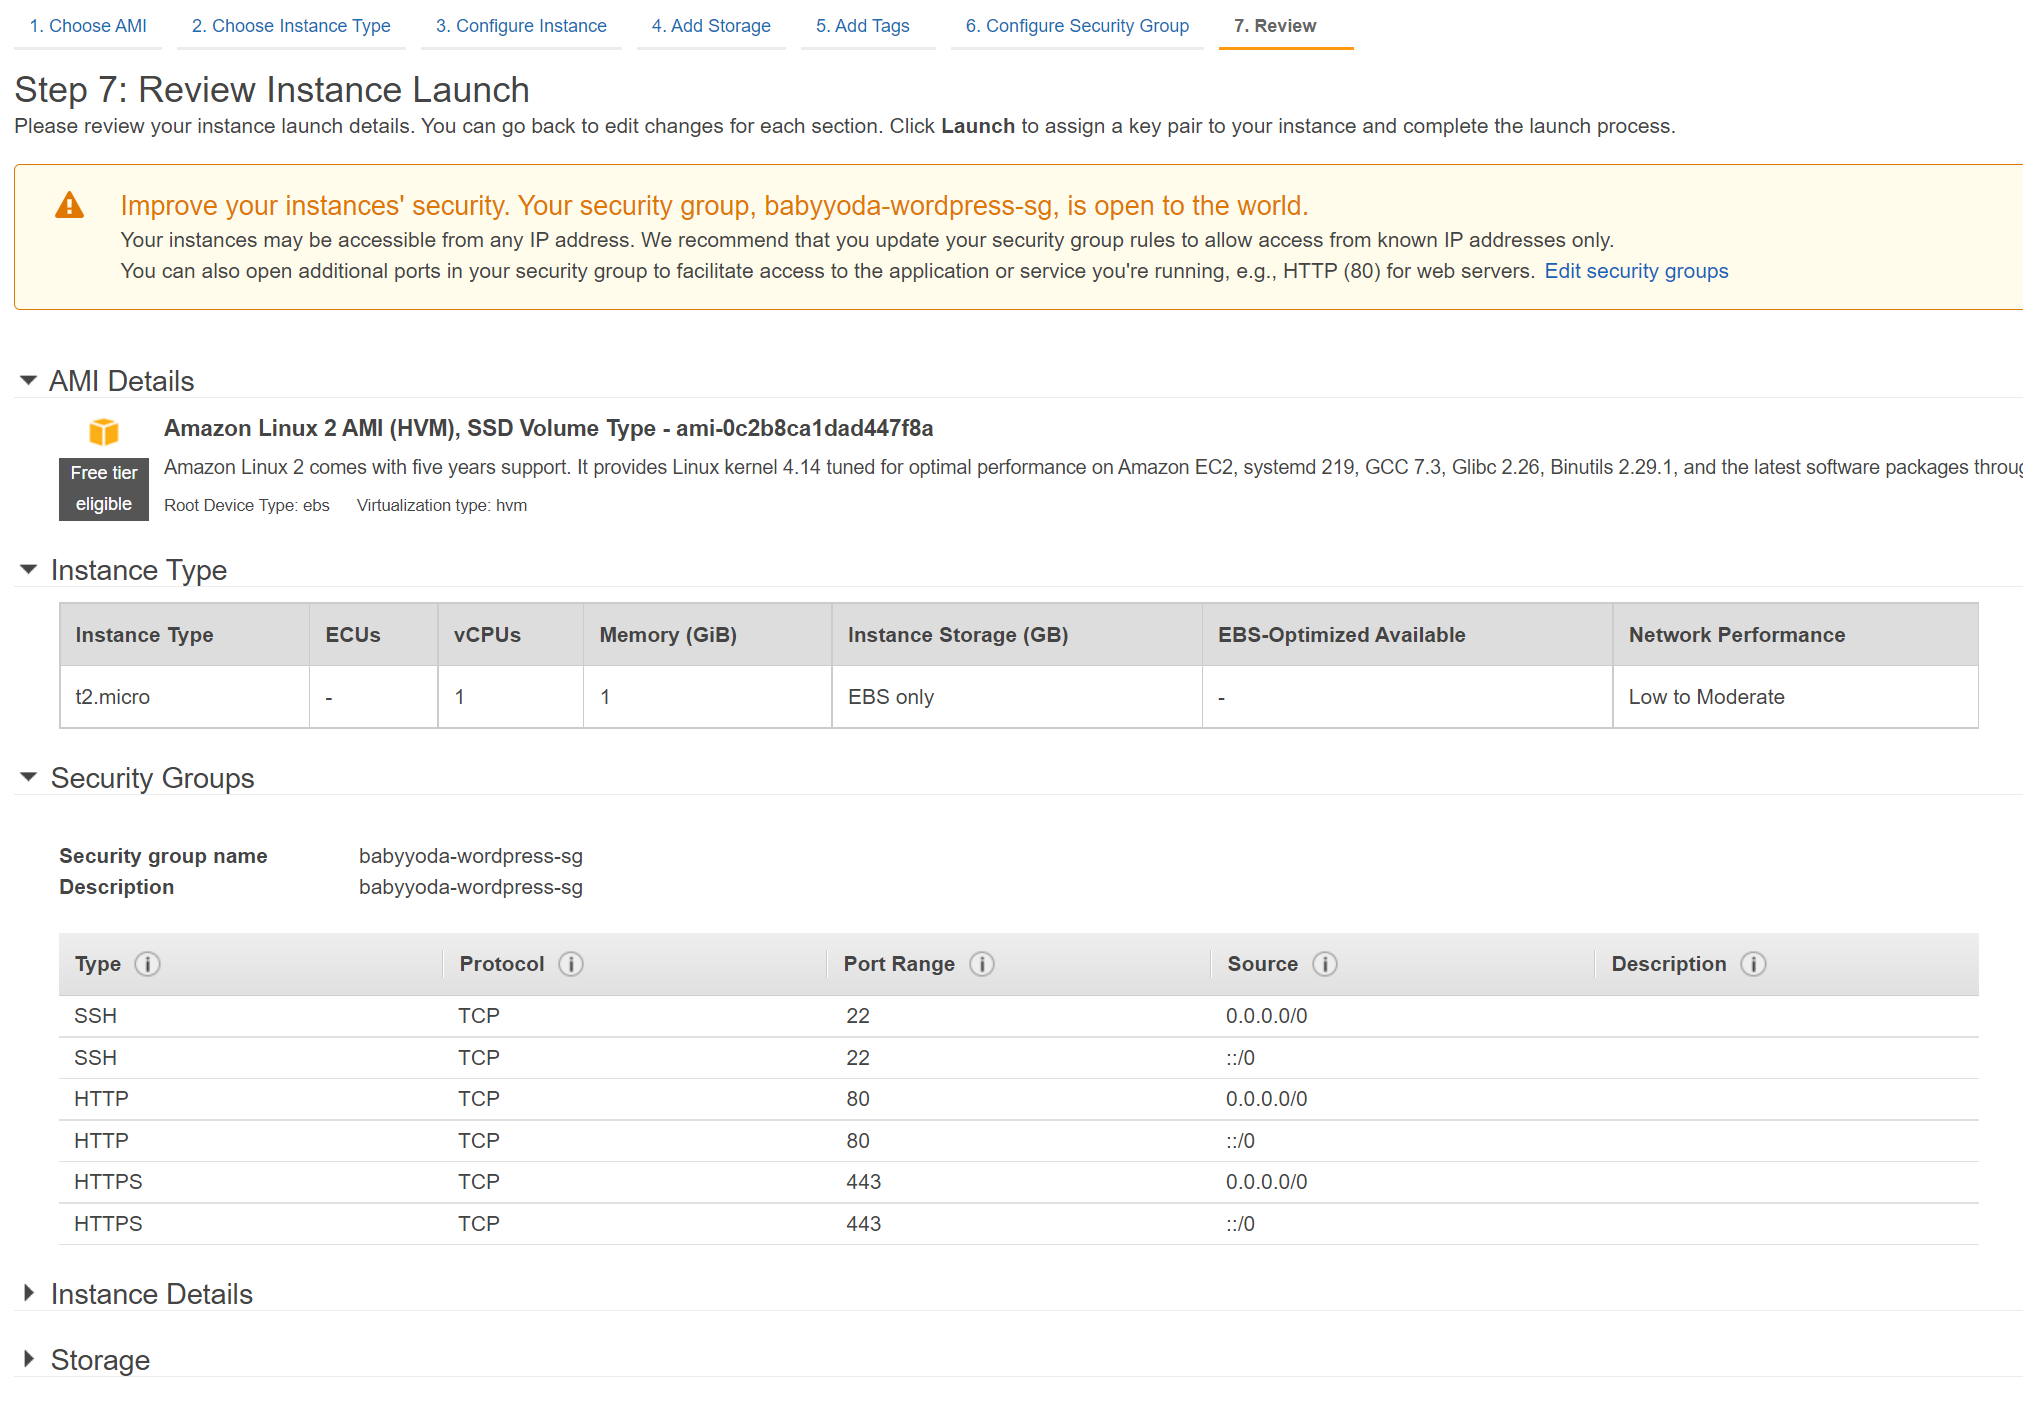
- Click into the EC2 instance and click on the Security tab.
- You'll notice that the security group was created and that port 22 is open inbound to that instance from any source via IPv4 (0.0.0.0/0) and IPv6 (::/0)
Connecting using PuTTY.
- Click on the Connect button at the top of this page. This will bring you to a few different options.
- Click on the SSH client tab.
- Step 1 shows that you need to open an SSH client. We can download PuTTY and install here.
- One thing to note, is if you downloaded the .pem file, you'll need to convert it into a usable key that PuTTY can use. Amazon Documentation
- Open PuttyGen and load the .pem file
- Click Save Private key
- You might get a warning that you didn't enter a passphrase, that's OK for this demo.
- save the file as a .ppk file.
- Back in the EC2 console, copy the public DNS address from this screen.
- Paste this into the normal PuTTY window.
- On the left menu pane, select SSH and then select Auth.
- In the private key field, select the ppk file.
- Click Open.
- You will get this warning the first time you connect:
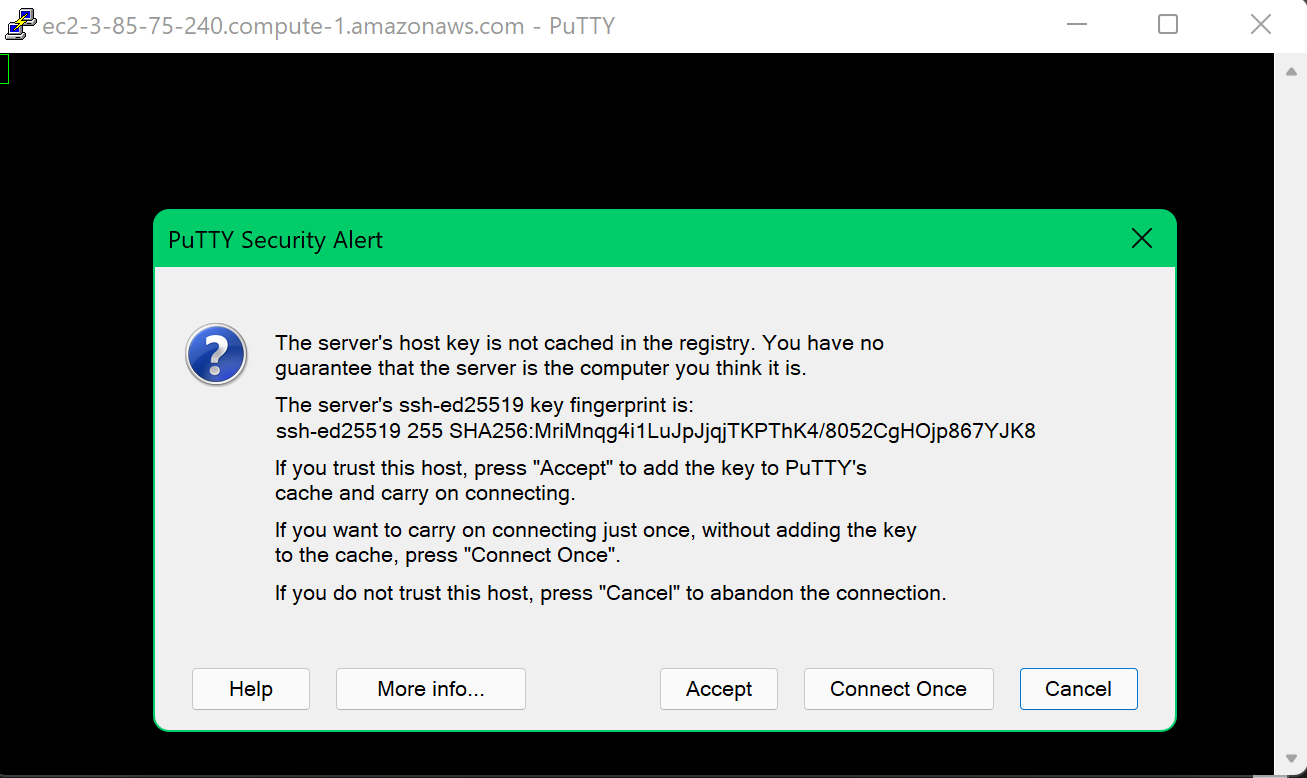
- Log in as the user name ec2-user.
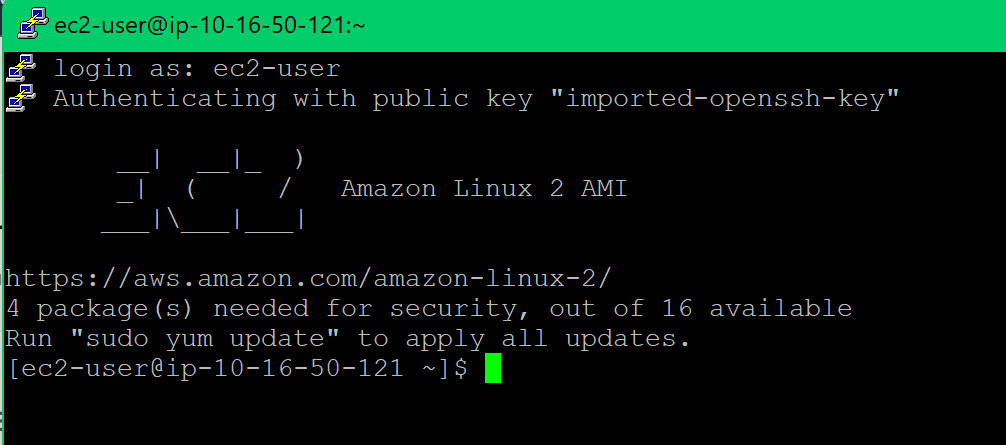
That's it. That's how you connect to this EC2 instance.
Connect using EC2 Connect
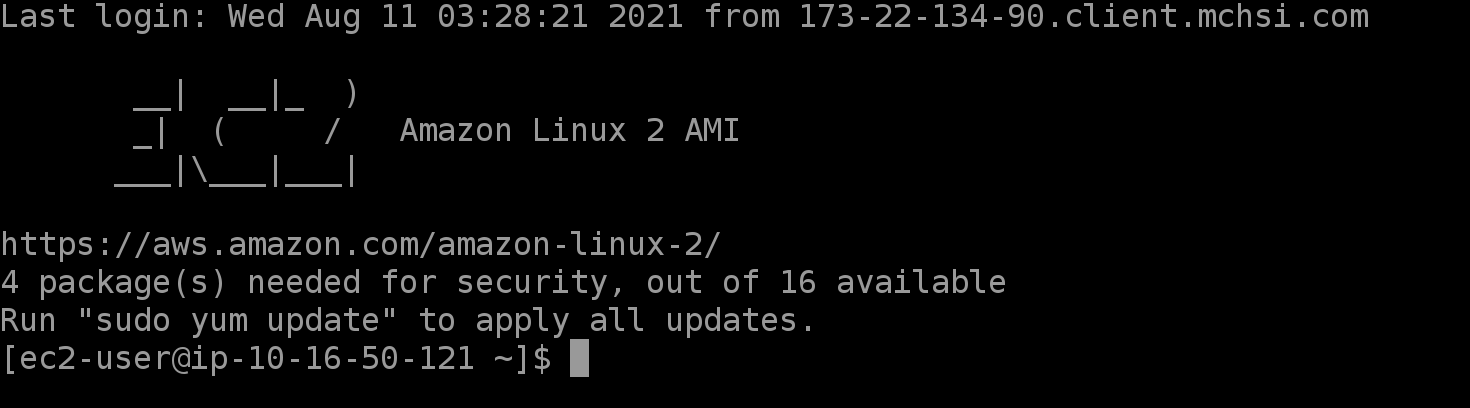
- Click on the EC2 Connect Tab.
- Click Connect.
- That was fun.
Breaking stuff
- Navigate to the EC2 instance and then go to the Security tab where the NSG inbound rules are
- Change the inbound rule for port 22 to only allow your IP address.
- Try to connect using PuTTY and you'll notice that you can connect.
- Try connecting using EC2 Instance Connect and notice that it fails. a. Your EC2 instance connect, while it looks like it's connecting from your IP, it's really not. It's connecting from one of the IP range of the EC2 services within AWS.
- You will need to allow minimum the IP range for the specific region that is located in AWS' list of service IP's
- Once that has been added back, now you can use the EC2 Instance Connect. Never open this up in production to all IP addresses unless this machine has been protected for that use.
Clean Up
Terminate the instance
Demo: EBS Snapshots and Instance Store Volumes
VPC CloudFormation template: Github EBS CloudFormation template: Github
- Navigate over to the EC2 console and notice there are 3 EC2 instanes spun up across 2 availability zones: us-east-1a and us-east-1b and are named Instance1-Instance3
- Click on Volumes and notice there are 3 volumes that are associated with the EC2 instances. a. notice the details about these EBS volumes, 8GB, 100 IOPs, GP2, located in same AZ as the EC2 instance is
- Click Create Volume
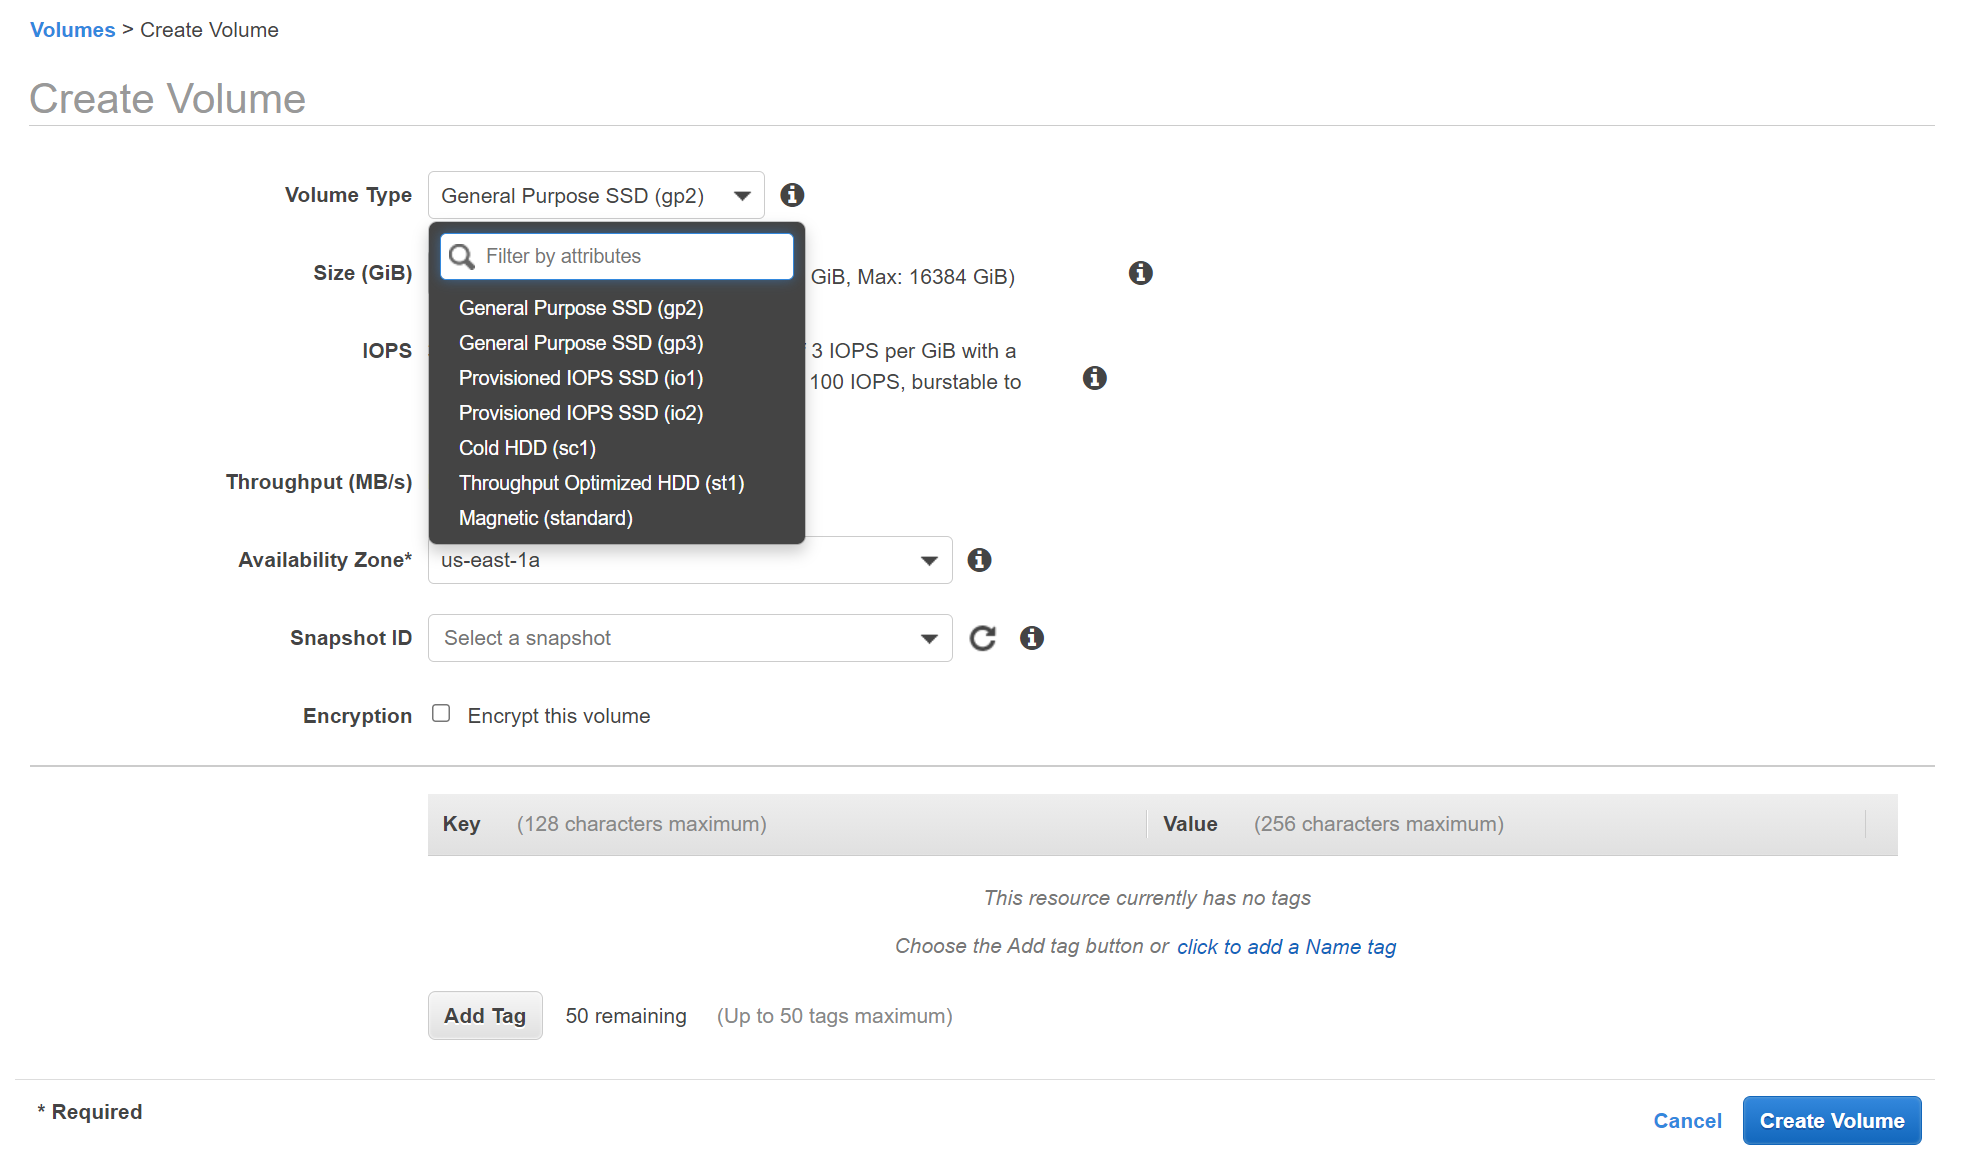
- Here you can select the Volume type, remember that it's one of the types mentioned in the notes. Helps to go back and read those notes.
- Set this to 10 GB GP2, add a tag that says EBSTest volume or something like that
- Once the volumes are created, select it and click on attach Volume.
- Notice that you can only attach this to EC2 instances in one AZ.
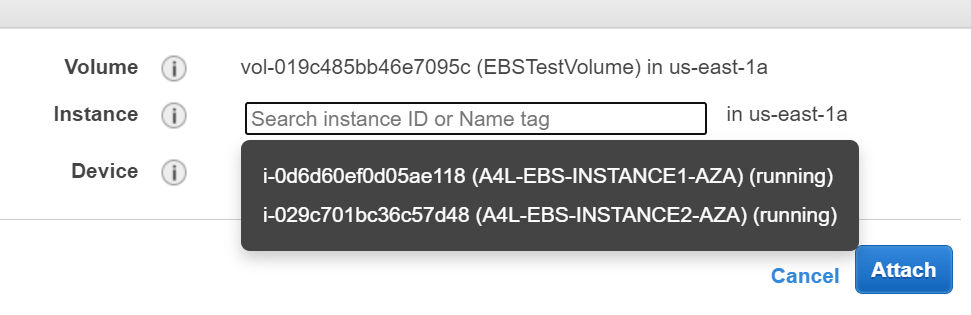
- Select Instance1 and then click Attach.
- Back in the EC2 console, use EC2 Connect to connect to instance1
Create a filesystem
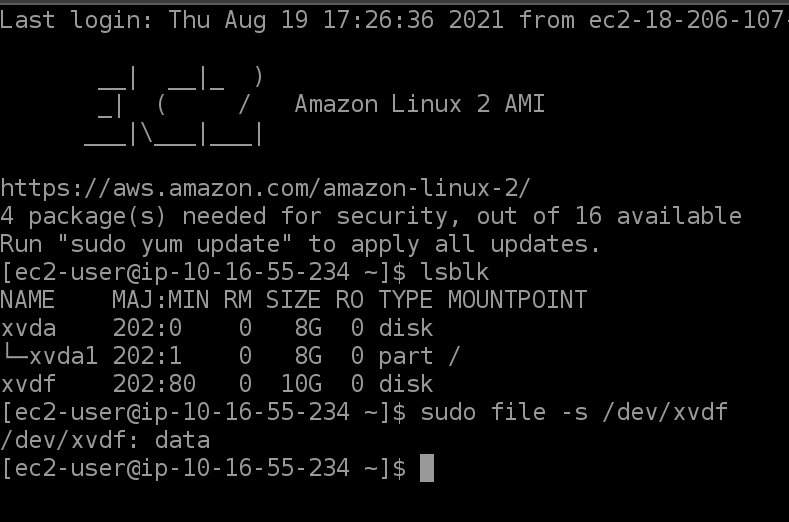
- At the bash prompt inside of the instance, check the volumes by typing
lsblk - run
sudo file -s /dev/xvdfto see what state the volume is in. It should show data at this point becuae it has no file system. Remember that block storage has no file system on creation.
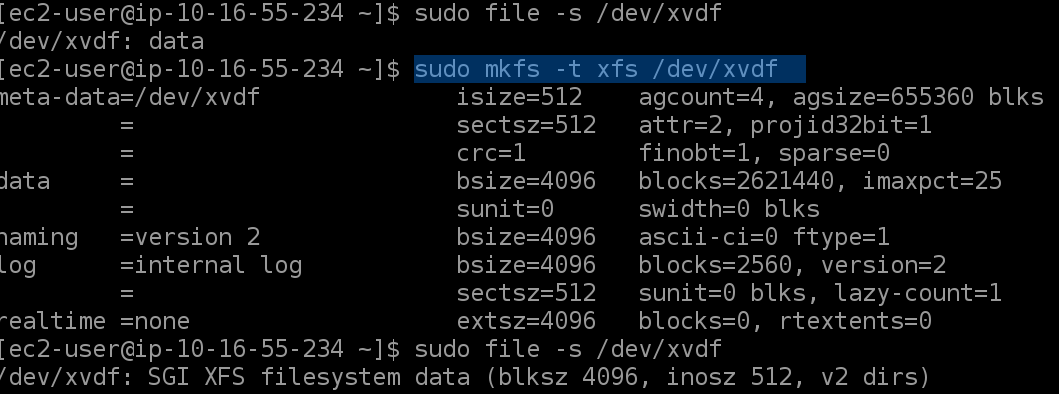
- Run
sudo mkfs -t xfs /dev/xvdfto create the file system. - Run the
sudo file -s /dev/xvdfagain and this time, it should show a file system as xfs.
- Make a directory to mount this volume into by running
sudo mkdir /testvolume - then run
sudo mount /dev/xvdf /testvolumeto mount the volume into that folder cdinto that folder and create a file called myTestFile.txt and add some data.sudo nano myTestFile.txtand then add text and then use Ctrl+O to save and then Ctrl+X to exit.- Run
lsto verify the file is created. - Reboot this instance
sudo reboot
Remount Volume to the Instance
- Connect back to this instance using EC2 Connect and run
df -kto list to mountpoints. Notice that our mountpoint isn't listed - We need to set this to mount on reboot for more persistent storage.
- Gather the UUID
sudo blkidand copy - Run
sudo nano /etc/fstaband then add that UUID line right below the existing oneUUID=04b92f2f-43333 /testvolume xfs defaults,nofail - Ctrl+O and Ctrl+X to save and exit.
- run
sudo mount -ato mount all of the volumes on this instance. - You should see that the mountpoint has now been loaded and will persist between reboots.
Attach to Instance2
- Shut down this instance. Note that we have that myTestFile.txt inside of that volume.
- Under EBS, click Volumes
- Select the EBS Volume you created and then select detach volume
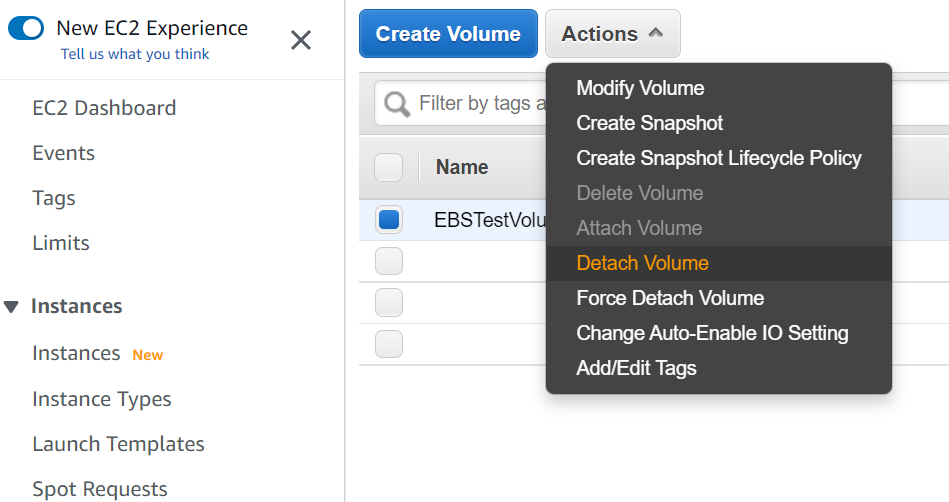
- Select the EBS Volume again and this time, attach it to Instance2, noticing again that you cannot select the instances outside of the availability zone that the EBS volume exists in.
- Connect to this instance using EC2 Connect, mount the volume as you did above.
- Run
sudo file -s /dev/xvdfand notice it already has a file system on that volume. That's expected, right? - Mount the file using the steps above.
cd' andls` into that folder and notice that the file we had was still there and it is, as expected again, right?- Shut down this instance as well and detach the volume from Instance 2. How do we connect this to Instance3 that's remaining?
Attach to EC2 instance in another AZ
We need to use S3 and snapshots as our transfer method of this volume across availability zones.
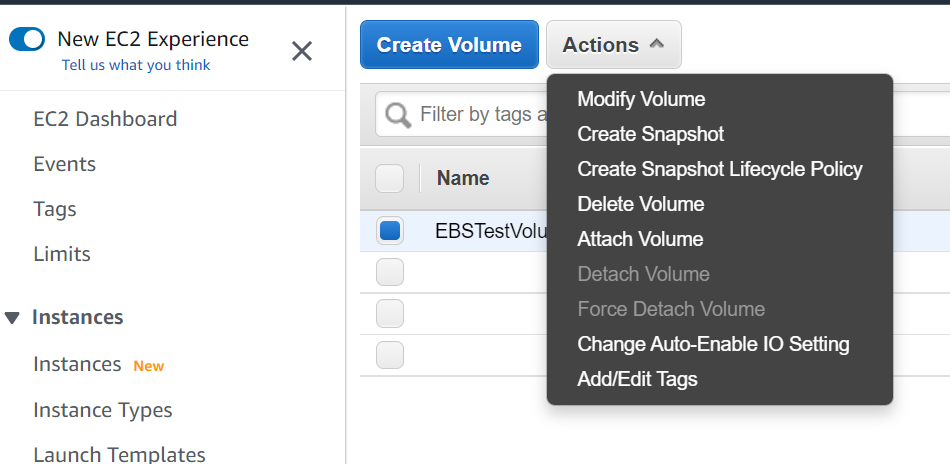
- Click on the EBS volume and then click Actions and then click Create Snapshot. Give this a description if you want and then create.
- In the snapshots menu on the left, you'll find the snapshot of the EBS volume. Wait for this to complete.

- Right click on this and select "Create Volume"
- Here is where we can click another availability zone and then create the volume
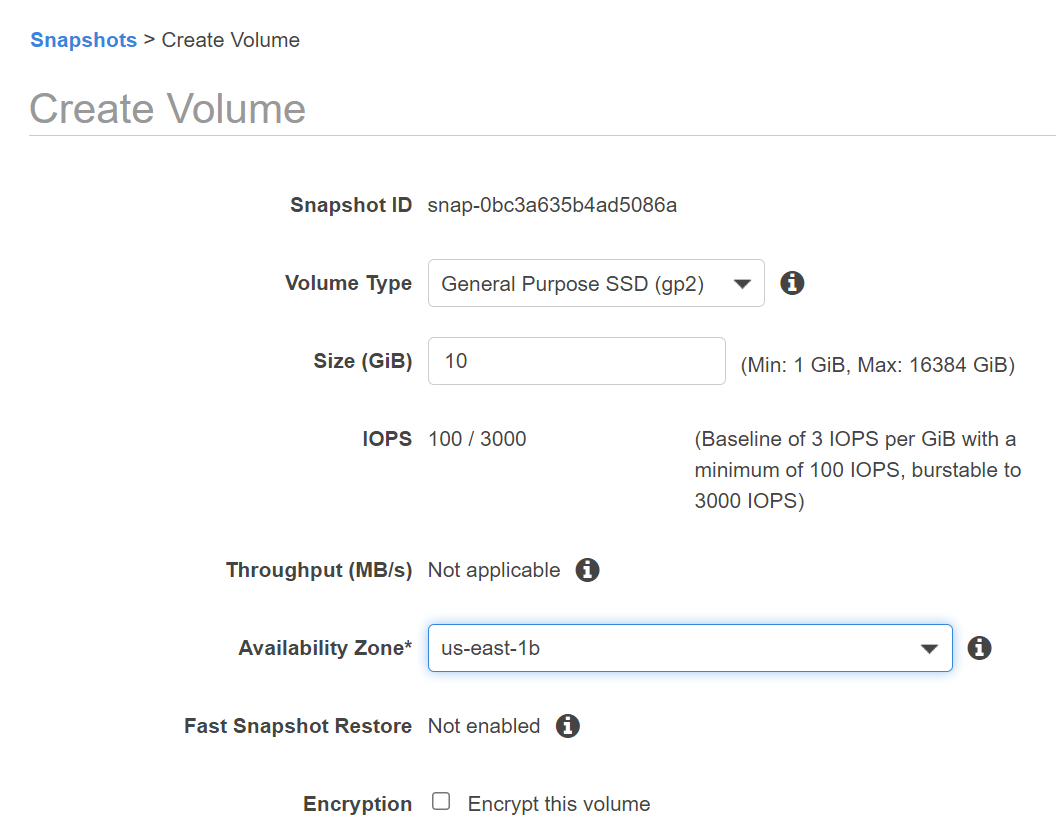
- Attach this to the Instance3
- Connect to this instance using EC2 Connect, mount the volume as you did above.
- Run
sudo file -s /dev/xvdfand notice it already has a file system on that volume. That's expected, right? - Mount the file using the steps above.
cd' andls` into that folder and notice that the file we had was still there and it is, as expected again, right? Yeah, i copied the text again.
Move this snapshot across regions
- Select another region at the top menu.
- Navigate to snapshots and notice that you don't have any snapshots in this region.
- Select the original region that you created the snapshot in. Should be us-east-1
- Right click the snapshot you created and select Copy.
- You can select a list of regions to copy this snapshot to.
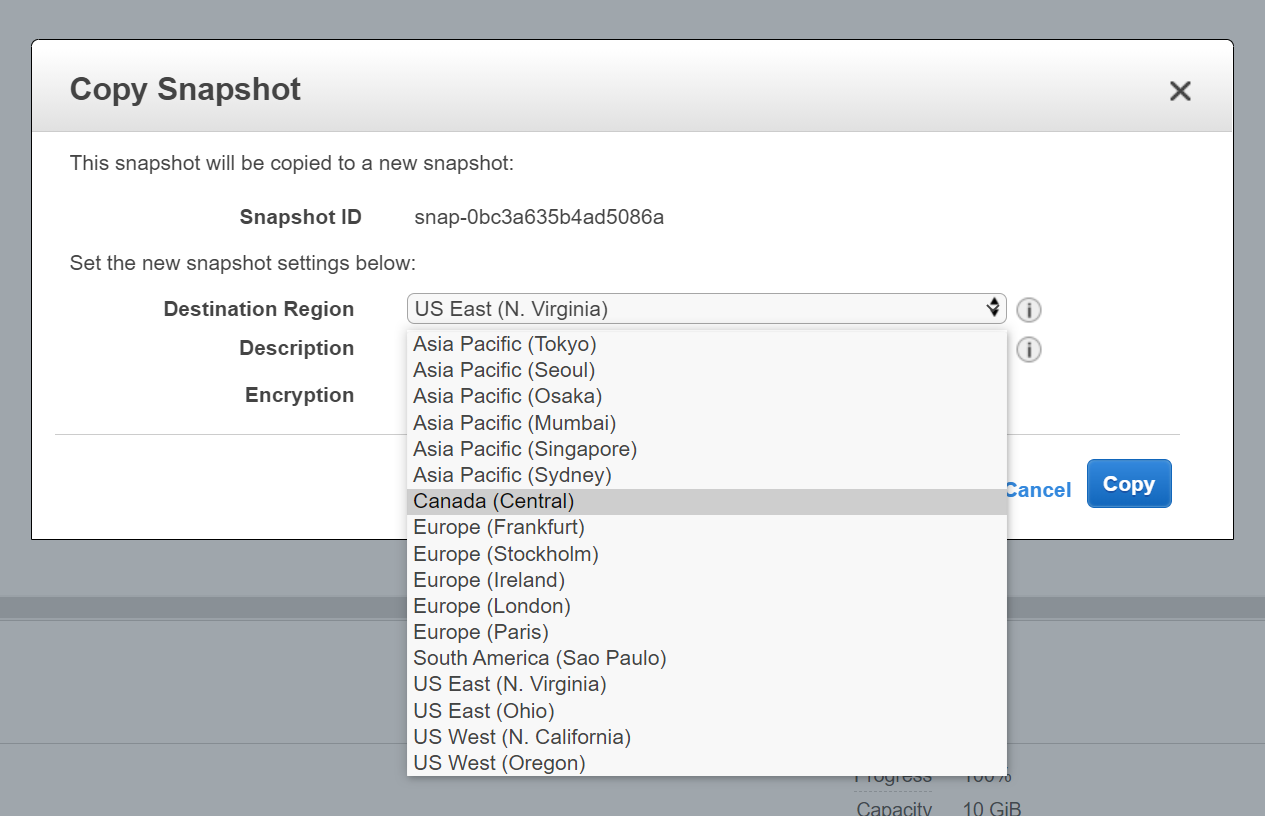
- Switch to that region and then view the snapshots and you'll see that your snapshot was copied there. If we had EC2 instances to attach them to, we could create a volume in that respective AZ and then attach.

Clean Up
- Right click on this snapshot in that region and delete, we won't need to do anything here but a bunch of ifs.
- Switch back to the us-east-1 region and delete that snapshot as well.
- Click on Instances and shut down, don't terminate them yet.
- Click on the EBS volume you created and delete it.
- Right click on the restored snapshot in AZB and detach and delete it.
You should be back at the point to where the VPC and the EC2 instances with the single volumes attached
Instance Store Demo time
Note: This one will cost a bit so you want to make sure this isn't running long term. We will be creating a larger EC2 instance and run it for about 20 minutes.
- Click on Instances and launch a new instance with m5dn.large as the instance type.
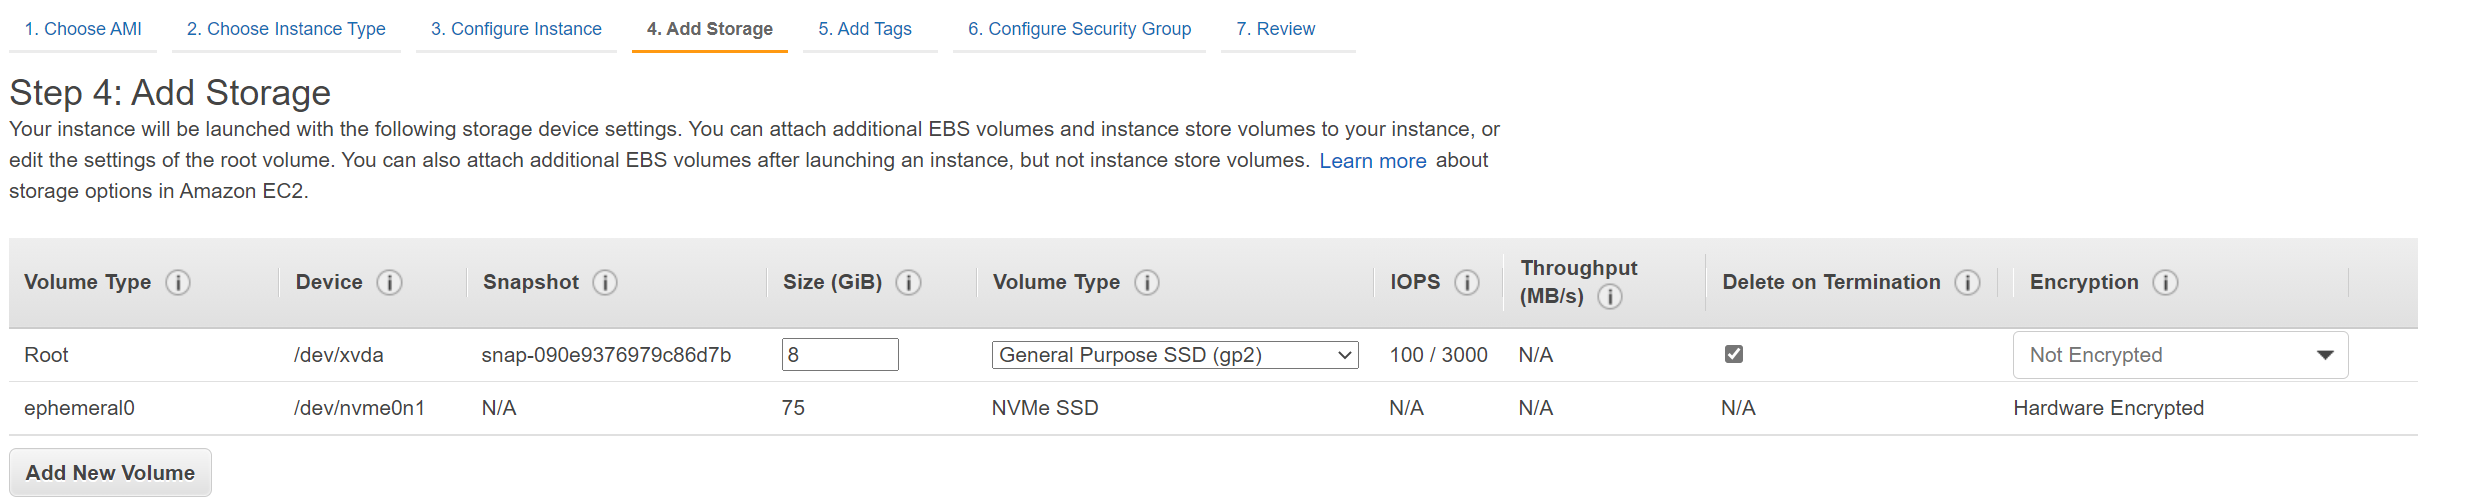
- Select the VPC and a subnet and then click Add Storage
- Notice that this machine comes with a 75gb ephemeral storage block that runs on a NVMe SSD
- Add a tag and an existing security group and then add your key pari and click Launch.
- You'll get this warning:
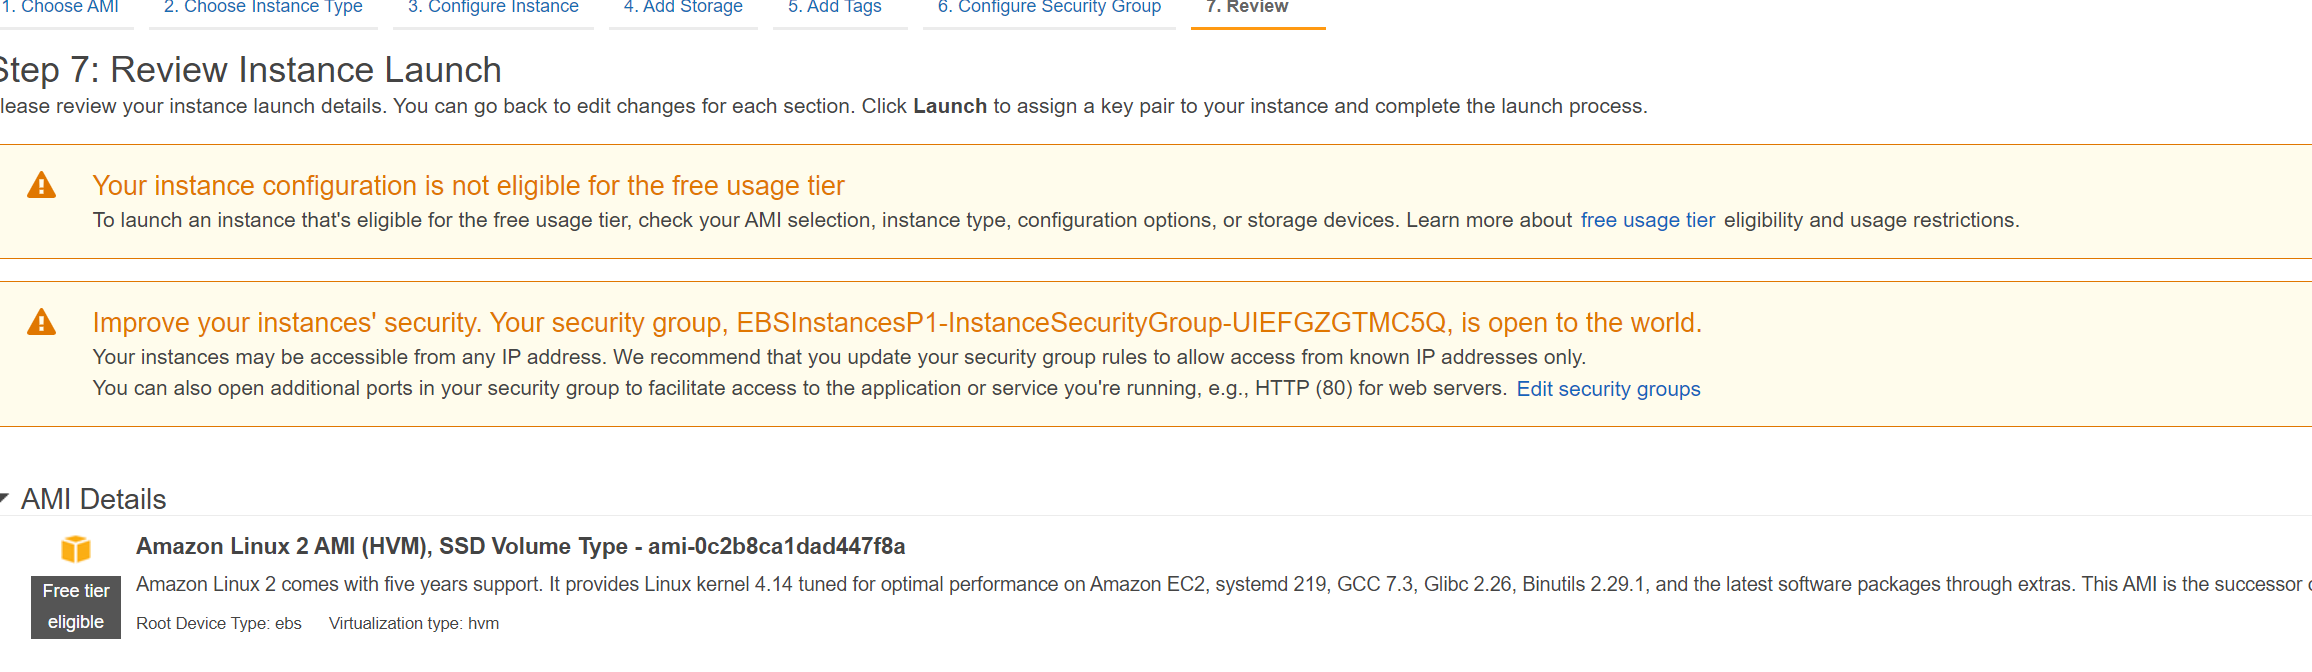
- Launch, wait for it to launch into the running and healthy state and then Connect with EC2 Connect.
Verifying the Instance Store Volumes
- Once connected run
lsblkto list the volumes. - Same commands will be run as before,
sudo file -s /dev/nvme1n1should show data - Run
sudo mkfs -t xfs /dev/nvme1n1to make it into an xfs file system. - run the
sudo file -s /dev/nvme1n1command again to show this is now an xfs formatted volume mkdir /instancestoreto make the directory- Mount this volume into this directory by running
sudo mount /dev/nvme1n1 /instancestore cd /instancestoreinto that folder and then run `ls -la- Create a new file
sudo touch myTestFile.txtNotice we're not using nano this time. It's good to learn different Linux commands. touch creates an empty file with no contents. Use your favorite file editor to add some text - Reboot this instance, do not stop it.
Verifying contents.
- Connect back into this instance and notice that your file is still there with the text that you created. Reboots do not wipe out this storage. This does not mean that AWS won't stop or migrate the host.
- Stop this EC2 instance, wait a few minutes, start the instance again, and then run the commands above and notice that that file and the file system has been completely wiped.
Clean Up
You'll want to delete this new instance as you will be charged for it
- Delete this new EC2 instance
- Delete the EBS stack
- Delete the VPC stack
Demo: Manually Installing Wordpress on EC2 instance
Wordpress is used in a lot of courses to show how a real world app is installed on the cloud. This demo will be a learning experience meant to simulate some not-so-best practices in order to teach some of the better practices. You really need to install some software manually so you can appreciate what autiomation does.
Launch EC2 instance
- Log into the management account AWS console and make sure you are in the N. Virginia region. (see, right away you know better, you wouldn't install this into the management account)
- Navigate to the EC2 console
- Launch a new instance, t2.micro with the latest Amazon Linux AMI and then choose your key pair.
- Either select the Web Subnet of the VPC that you created earlier OR click on the default VPC and a default subnet.
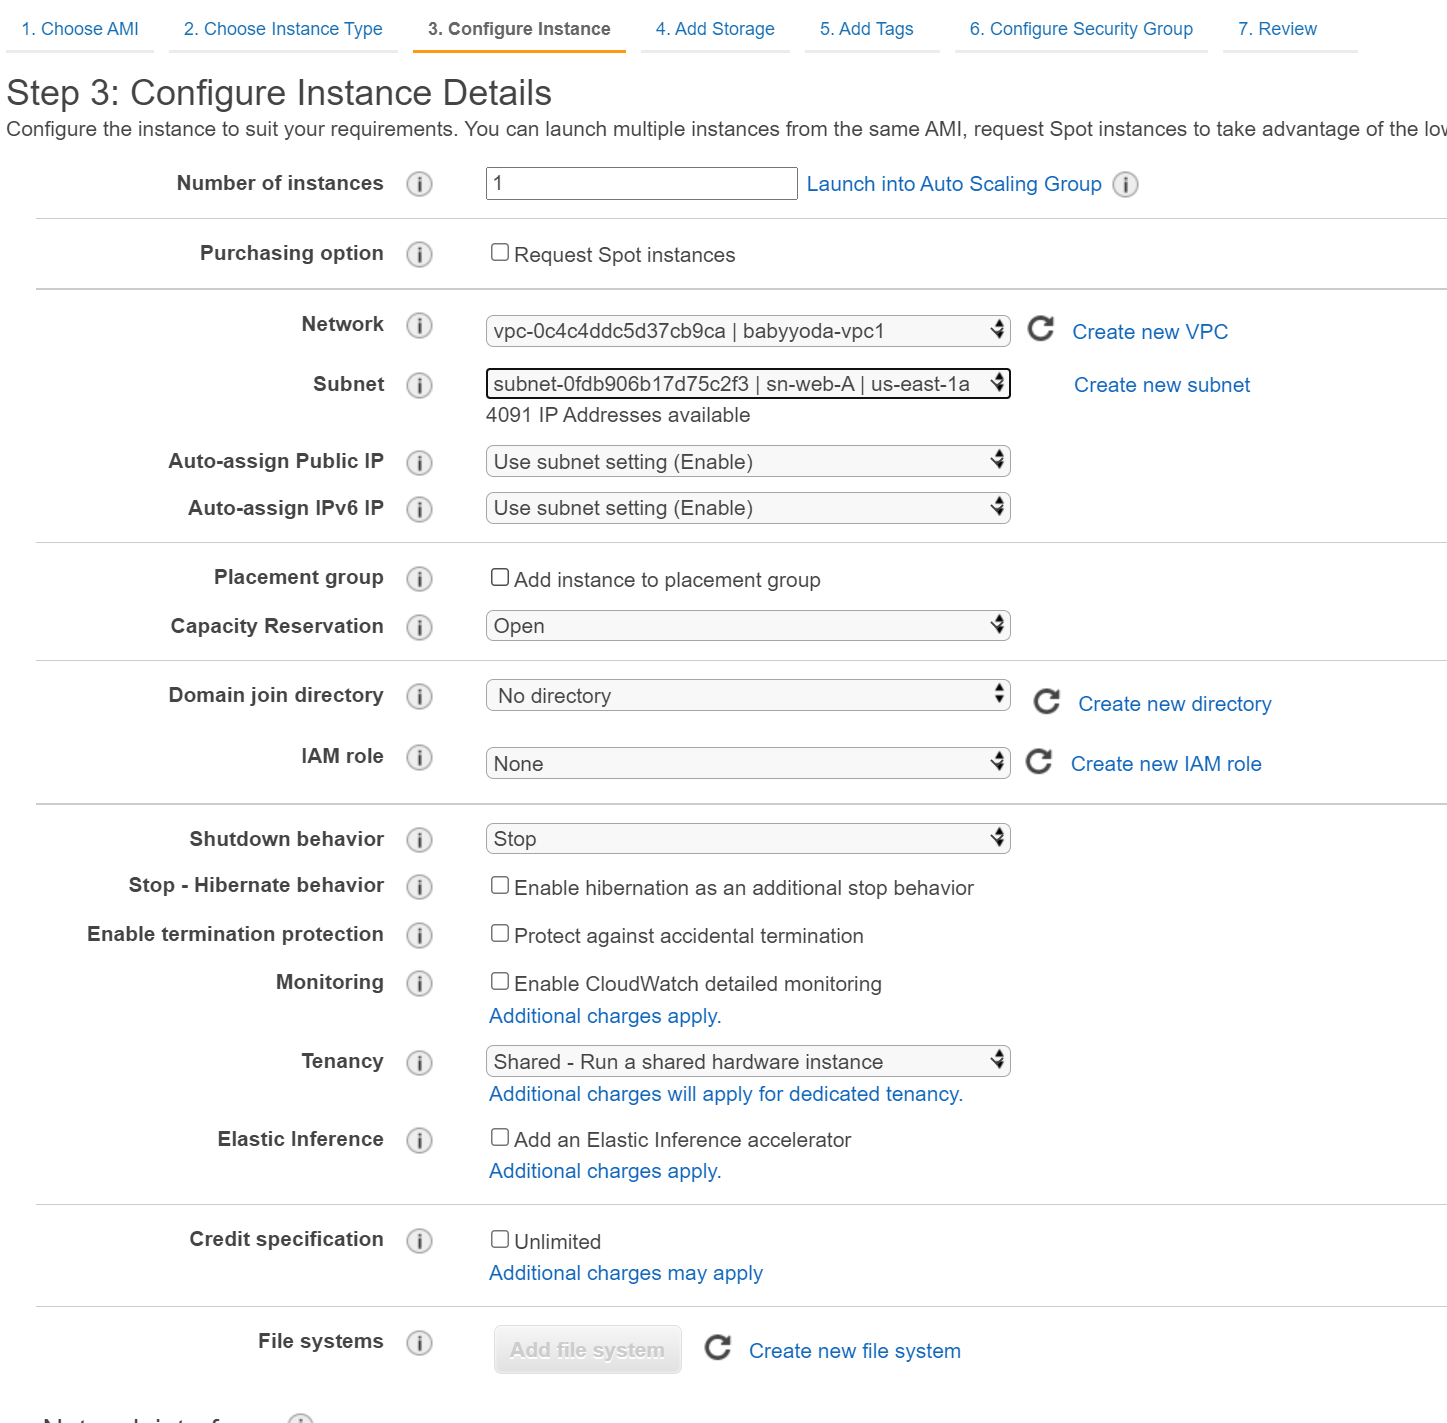
- For the security group, we want to open both HTTP port 80 and HTTPS Port 443.
- Review and Launch instance.
- Use EC2 Instance Connect or SSH depending on how you'd like to connect.
Initialize the Wordpress install
- Hardcode a couple of environment variables at the prompt:
DBName='bbydawordpress'
DBUser='bbydawordpress'
DBPassword='YourP@$$worb' # or make something up.
DBRootPassword='YourP@$$worb'
- To verify that these variables have been set, run
echo DBNameor another one of the variables. - Install the dependencies: MariaDB, HTTPD and WGET and install PHP 7.2
sudo yum install -y mariadb-server httpd wget
sudo amazon-linux-extras install -y lamp-mariadb10.2-php7.2 php7.2
- After those are installed, we need to set the daemon to load whenever the machine reboots.
sudo systemctl enable httpd
sudo systemctl enable mariadb
- Start the processes.
sudo systemctl start httpd
sudo systemctl start mariadb
- Set the root database password
mysqladmin -u root password $DBRootPassword
- Download Wordpress using wget
sudo wget http://wordpress.org/latest.tar.gz -P /var/www/html
- Unpack the gz.
cd /var/www/html
sudo tar -zxvf latest.tar.gz
- Copy the files into the base html folder
sudo cp -rvf wordpress/* .
- Clean up install by deleting the wordpress folder and the latest.tar.gz
sudo -rm -R wordpress
Configuring Wordpress
- Rename the wp-config-sample.php to wp-config.php
sudo cp ./wp-config-sample.php ./wp-config.php
- Replace the variables inside of this file
a. if for some reason you mess this up,
sudo nano wp-config.phpand then edit and save.
sudo sed -i "s/'database_name_here'/'$DBName'/g" wp-config.php
sudo sed -i "s/'username_here'/'$DBUser'/g" wp-config.php
sudo sed -i "s/'password_here'/'$DBName'/g" wp-config.php
- Give the web server permissions to all of the files
sudo chown apache:apache * -R
- Create the Database
echo "CREATE DATABASE $DBName;" >> /tmp/db.setup
echo "CREATE USER '$DBUser'@'localhost' IDENTIFIED BY '$DBPassword';" >> /tmp/db.setup
echo "GRANT ALL ON $DBName.* TO '$DBUser'@'localhost';" >> /tmp/db.setup
echo "FLUSH PRIVILEGES;" >> /tmp/db.setup
mysql -u root --password=$DBRootPassword < /tmp/db.setup
sudo rm /tmp/db.setup
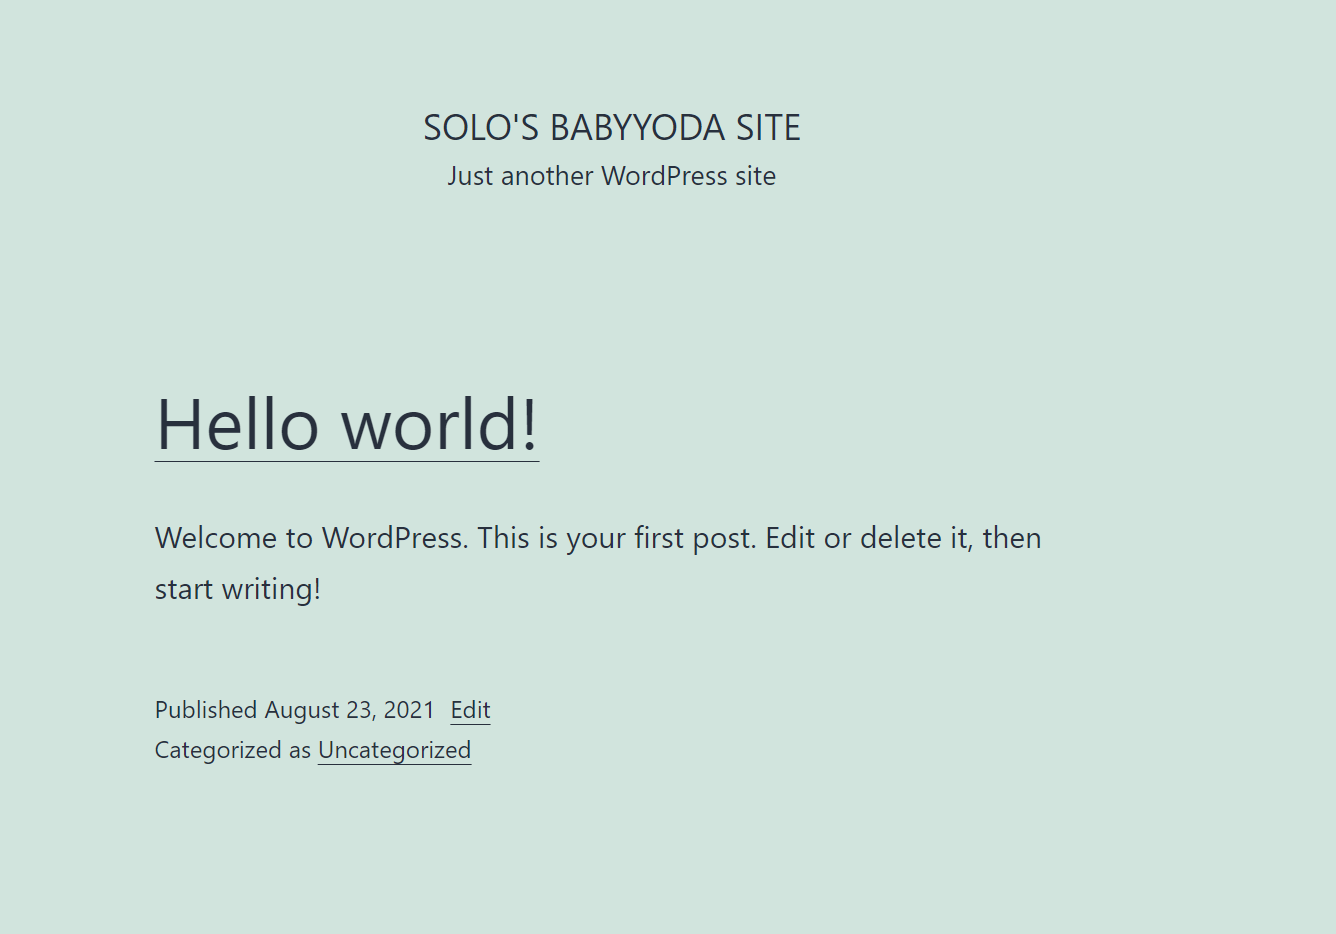
- With any luck, navigate in your browser to the IP address of your EC2 instance and you will see this screen:
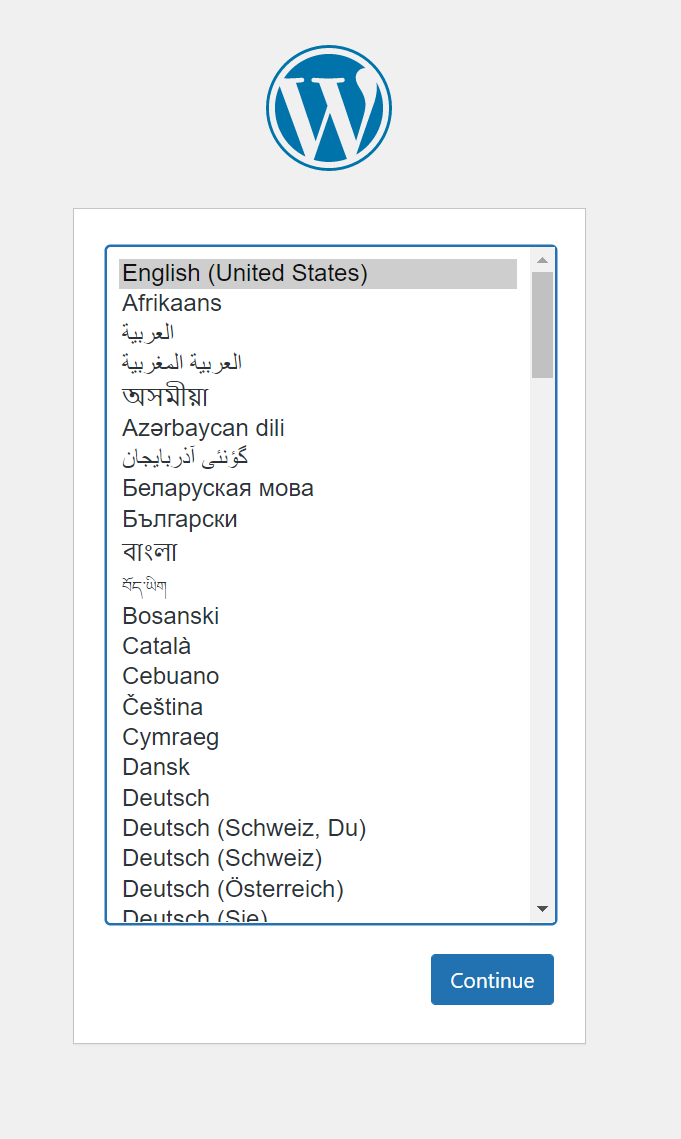
- Follow the steps to install Wordpress
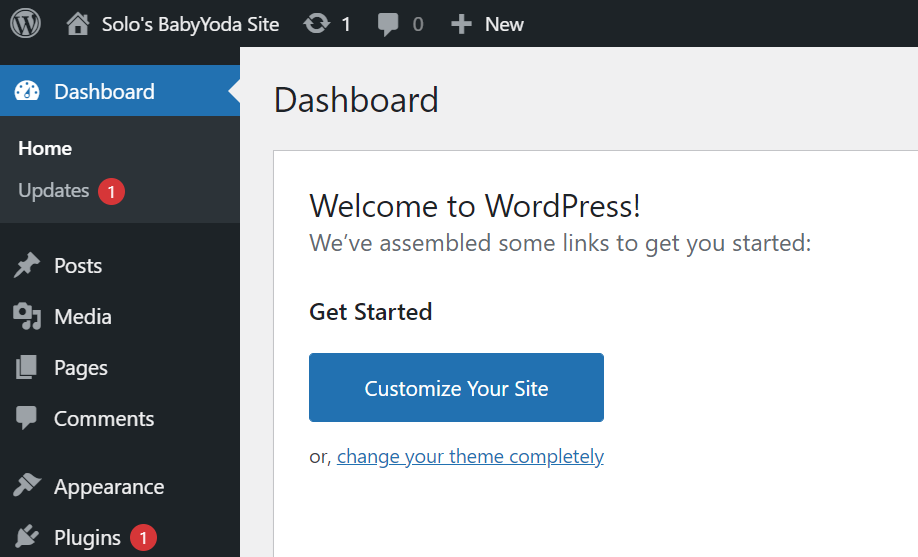
- You should have this MONOLITHIC app installation once it's installed:
Wrap up
That's it. You could literally start your blog right here, but you have noticed a few things:
- monolithic - Database and install are on the same server as is the content. Why not store the content in S3?
- small EC2 instance isn't going to handle much traffic
- not secure. We used basic database names and redundant passwords
- What happens when this machine fails? Lets say after 18 months of successfull blogging, the machine just dies? Where did your database go? where is your install?
- DNS and IP is not permanent, once it restarts, your machine will have a new IP address.
- Where are your dev, test, prod environments?
Clean Up
Terminate the EC2 instance - This will delete the entire thing that we just installed and you'll need to go back through this process again
Demo: Creating an AMI with Wordpress installed
Launch EC2 instance
This demo will be followed as if you removed the previous instance.
- Log into the management account AWS console and make sure you are in the N. Virginia region.
- Navigate to the EC2 console
- Launch a new instance, t2.micro with the latest Amazon Linux AMI and then choose your key pair.
- Either select the Web Subnet of the VPC that you created earlier OR click on the default VPC and a default subnet.
- For the security group, we want to open both HTTP port 80 and HTTPS Port 443.
- Review and Launch instance.
- Use EC2 Instance Connect or SSH depending on how you'd like to connect.
Initialize the Wordpress install
- Hardcode a couple of environment variables at the prompt:
DBName='bbydawordpress'
DBUser='bbydawordpress'
DBPassword='YourP@$$worb' # or make something up.
DBRootPassword='YourP@$$worb'
- To verify that these variables have been set, run
echo DBNameor another one of the variables. - Install the dependencies: MariaDB, HTTPD and WGET and install PHP 7.2
sudo yum install -y mariadb-server httpd wget
sudo amazon-linux-extras install -y lamp-mariadb10.2-php7.2 php7.2
- After those are installed, we need to set the daemon to load whenever the machine reboots.
sudo systemctl enable httpd
sudo systemctl enable mariadb
- Start the processes.
sudo systemctl start httpd
sudo systemctl start mariadb
- Set the root database password
mysqladmin -u root password $DBRootPassword
- Download Wordpress using wget
sudo wget http://wordpress.org/latest.tar.gz -P /var/www/html
- Unpack the gz.
cd /var/www/html
sudo tar -zxvf latest.tar.gz
- Copy the files into the base html folder
sudo cp -rvf wordpress/* .
- Clean up install by deleting the wordpress folder and the latest.tar.gz
sudo -rm -R wordpress
Configuring Wordpress
- Rename the wp-config-sample.php to wp-config.php
sudo cp ./wp-config-sample.php ./wp-config.php
- Replace the variables inside of this file
a. if for some reason you mess this up,
sudo nano wp-config.phpand then edit and save.
sudo sed -i "s/'database_name_here'/'$DBName'/g" wp-config.php
sudo sed -i "s/'username_here'/'$DBUser'/g" wp-config.php
sudo sed -i "s/'password_here'/'$DBName'/g" wp-config.php
- Give the web server permissions to all of the files
sudo chown apache:apache * -R
- Create the Database
echo "CREATE DATABASE $DBName;" >> /tmp/db.setup
echo "CREATE USER '$DBUser'@'localhost' IDENTIFIED BY '$DBPassword';" >> /tmp/db.setup
echo "GRANT ALL ON $DBName.* TO '$DBUser'@'localhost';" >> /tmp/db.setup
echo "FLUSH PRIVILEGES;" >> /tmp/db.setup
mysql -u root --password=$DBRootPassword < /tmp/db.setup
sudo rm /tmp/db.setup
-
With any luck, navigate in your browser to the IP address of your EC2 instance and you will see this screen:
-
Now, we're going to stop here and not finish this install because we want anyone who boots this up to get right to this screen.
-
We also want a custom login script to run when anyone boots up into this image.
sudo nano /etc/update-motd.d/logintext
# Add your message here
echo "This is my Baby Yoda AMI"
sudo chmod 755 /etc/update-motd.d/logintext
sudo rm /etc/update-motd.d/30-banner
sudo update-motd
- Reboot the instance
sudo reboot
- Wait for it to reboot, then use EC2 Instance Connect to log into the image.

Creating the image
- Shut down the EC2 instance
- Right click the instance and select Create Image
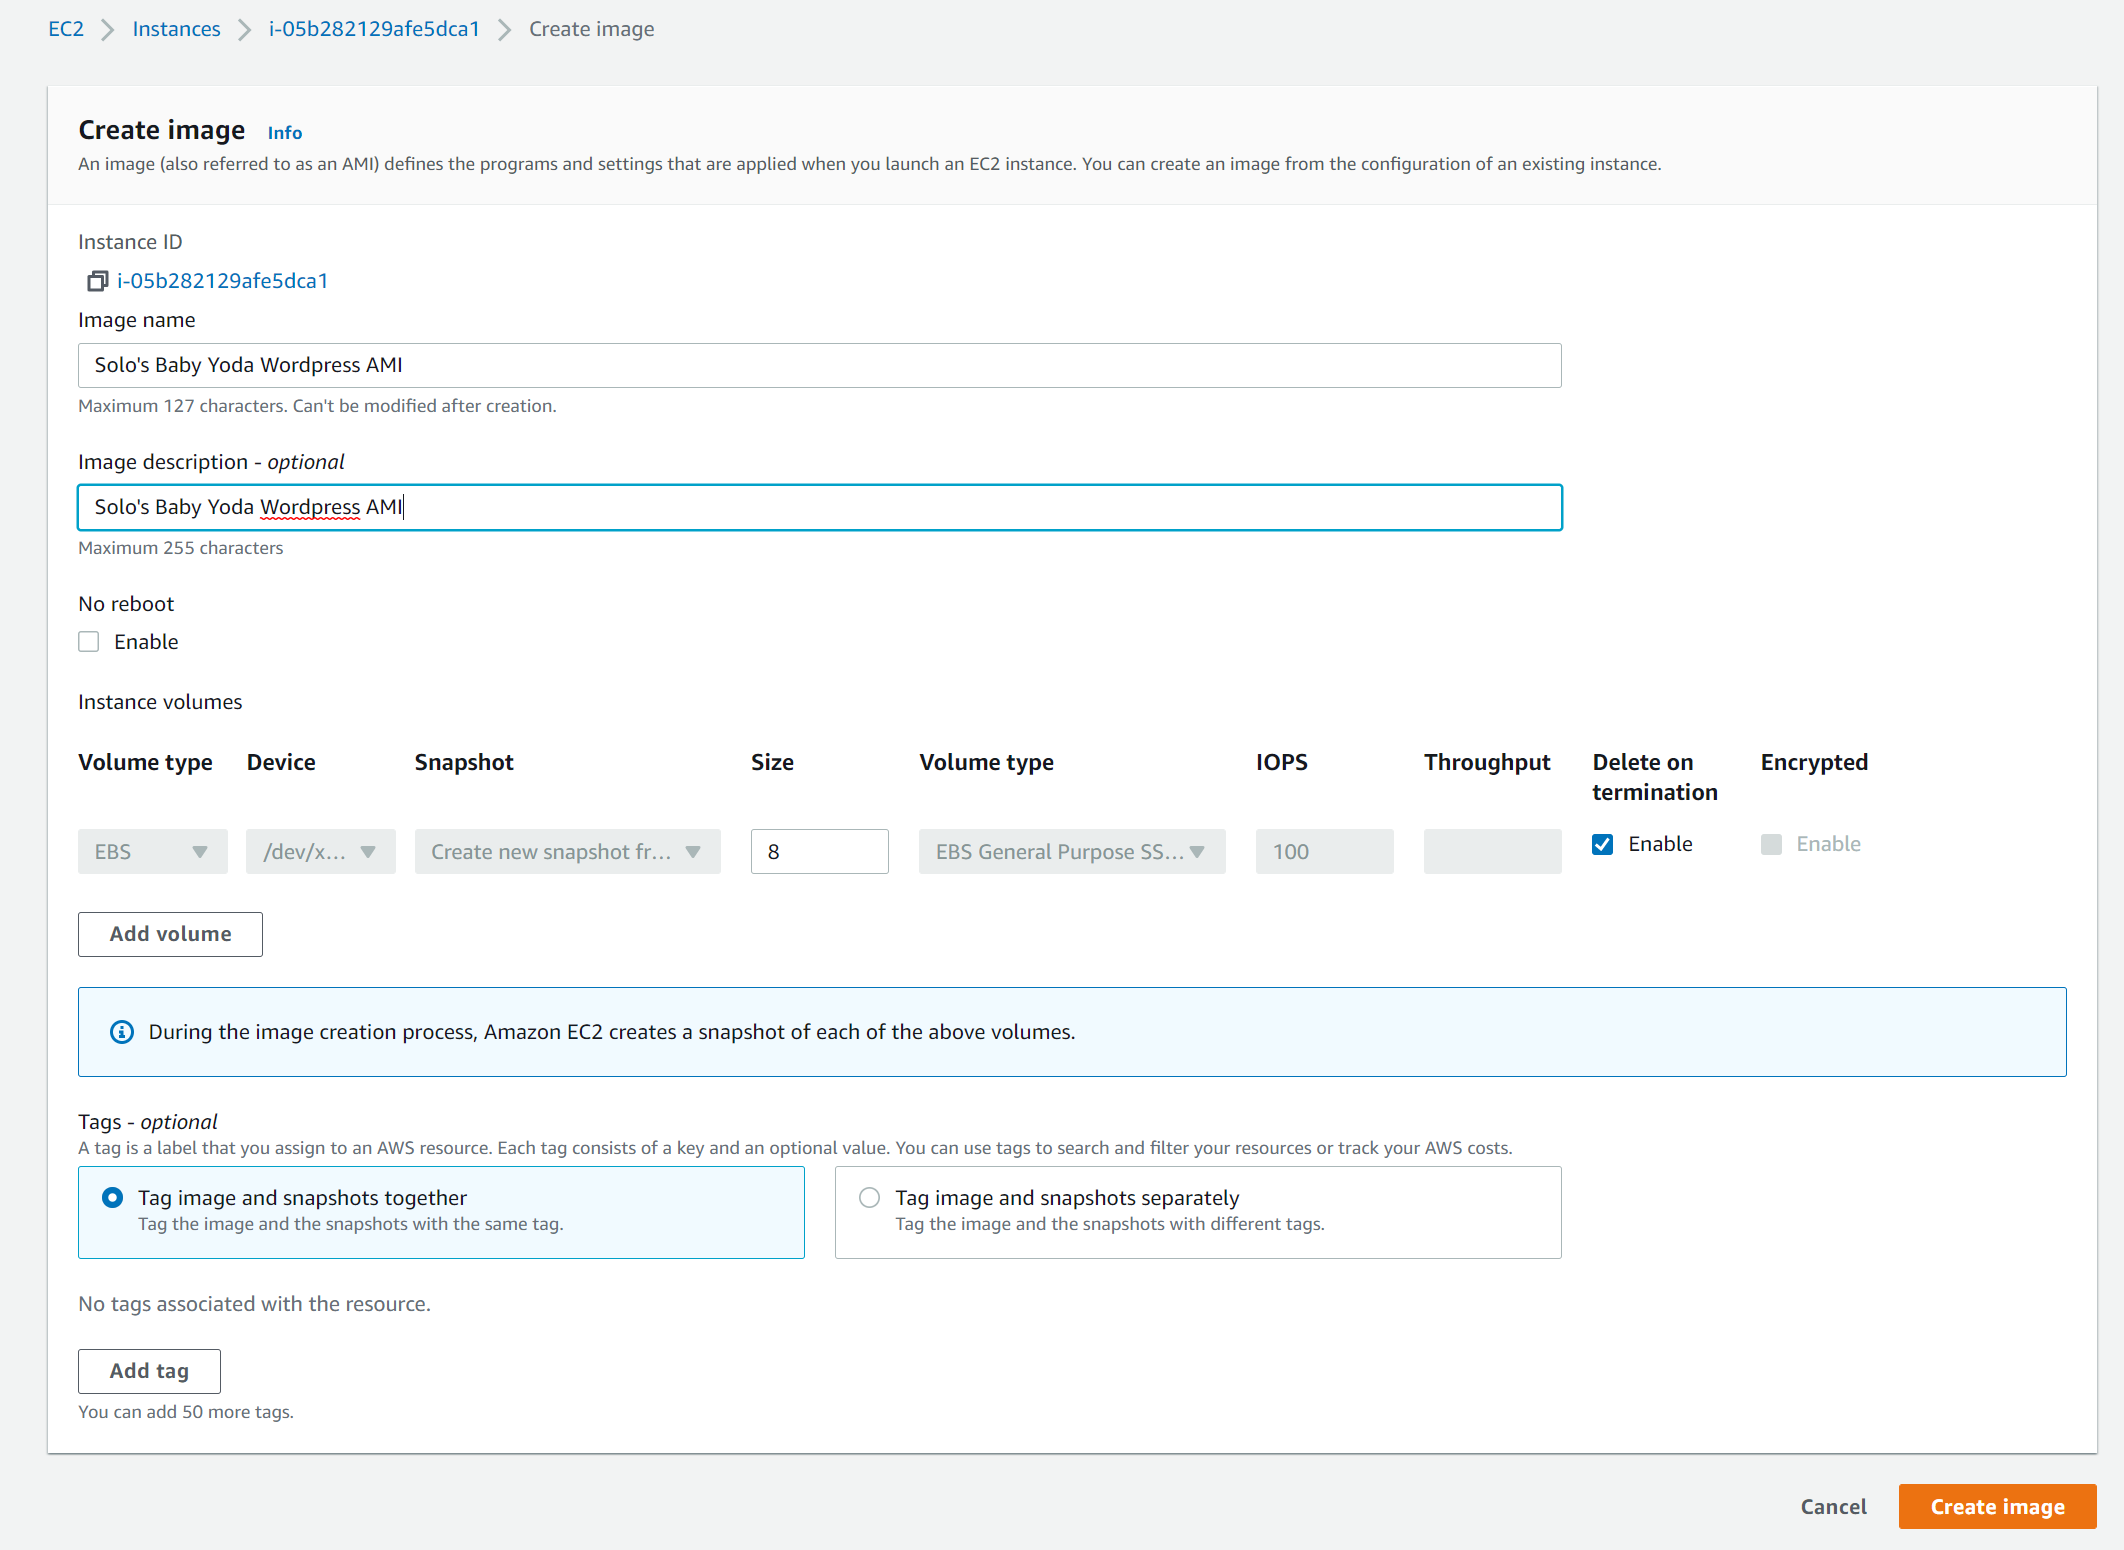
- enter in the name and the description and then click Create image
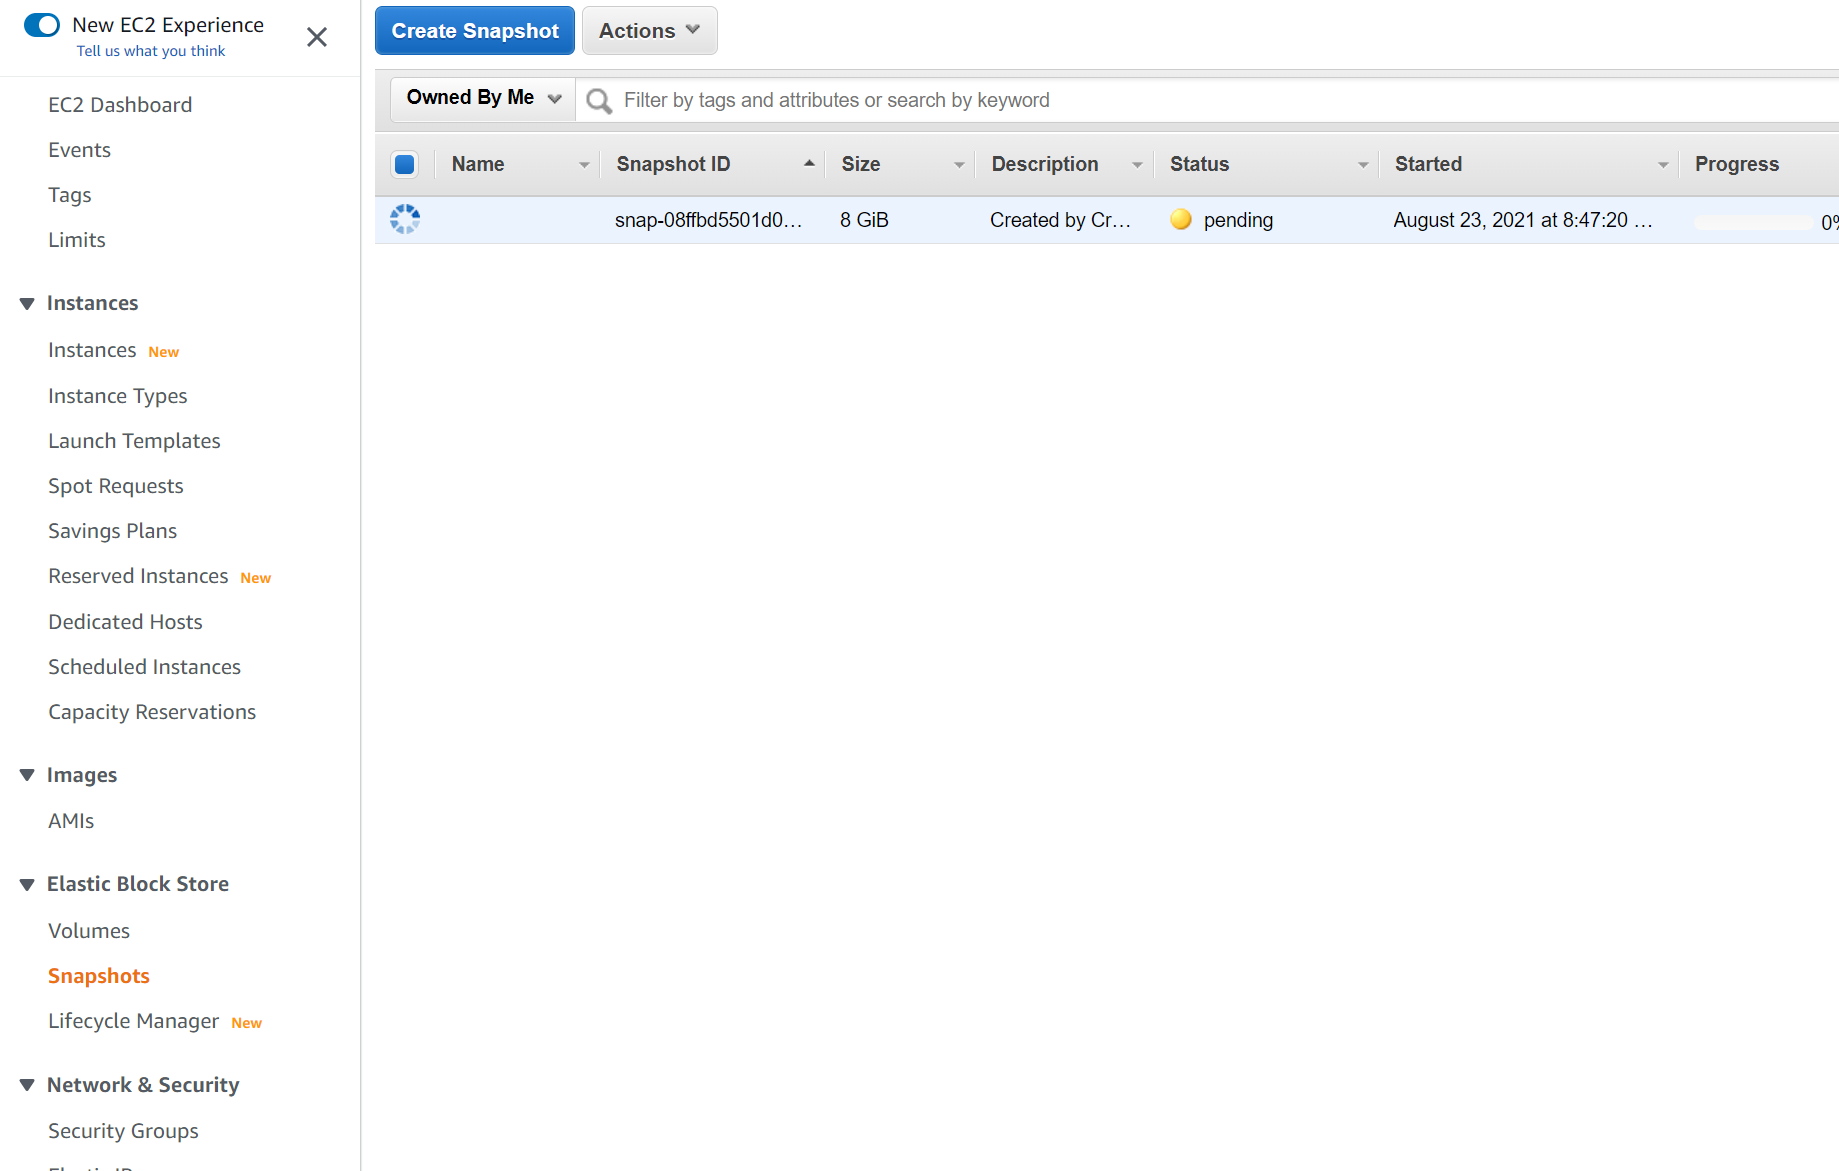
- This will create a snapshot of the EC2 instance.
- This will also create an AMI
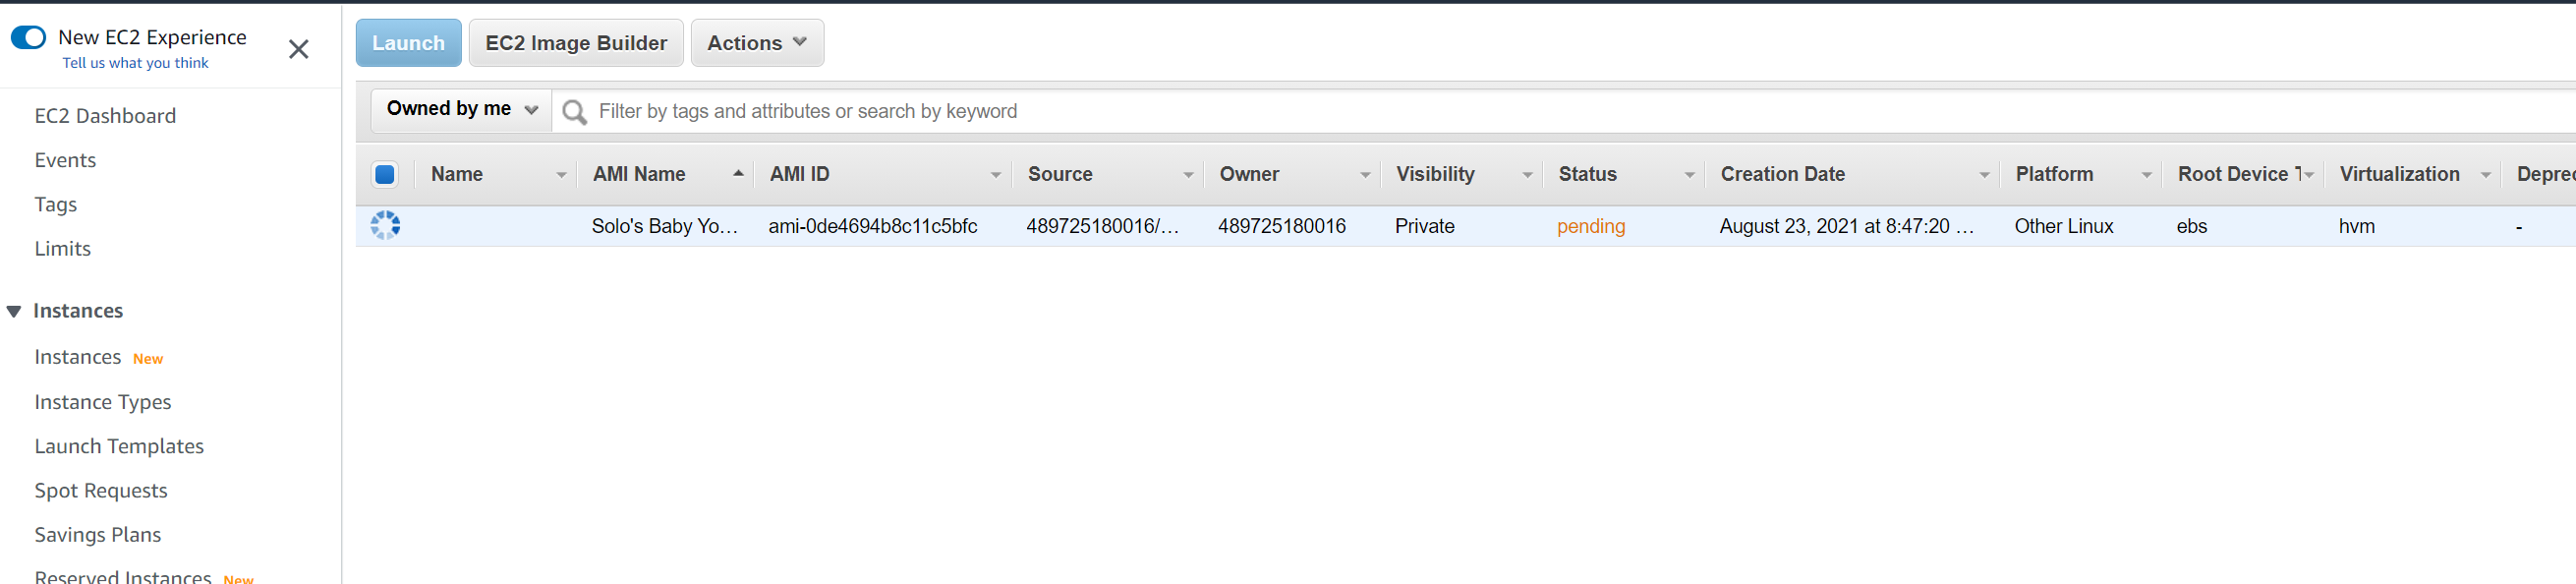

Launching the Instance from the AMI
- Right click on the AMI and select Launch Instance.
- Select the Instance type and then select the security group that you created before.
- Launch the instance and once it boots up, you should be able to see the Wordpress install screen.
Clean Up
Terminate the instances Deregister the AMI Delete the snapshot