[[TOC]]
Default Virtual Private Cloud (VPC)
Build your first EC2 Instance
Linux:
- Navigate to the EC2 Console in AWS.
- Click on Key Pairs on the left
- Create new key pair. Use ppk for Putty or pem for everything else
- Click on Instances on the left.
- Click Launch Instances
- Select the Amazon Linux AMI (usually designated free tier)
- Select the Instance Size (cheat sheet here)
- Configure the instance details. Click Next a. you're going to want to deploy this into the default VPC and one of the default subnets.
- Configure the storage. You can add another volume here if you would like. Click next.
- Ignore the tags if you wish.
- Select the key pair and click Create.
Logging into the Linux instance
There are a couple different ways to log into the Linux EC2 instance.
- Click on the instance and select Connect a. Session Manager b.
Putty:
- needs the ppk file
- enter in the IP and then in settings > SSH > Auth, browse to the key pair and select it.
- log in as ec2-user and you should be logged in.
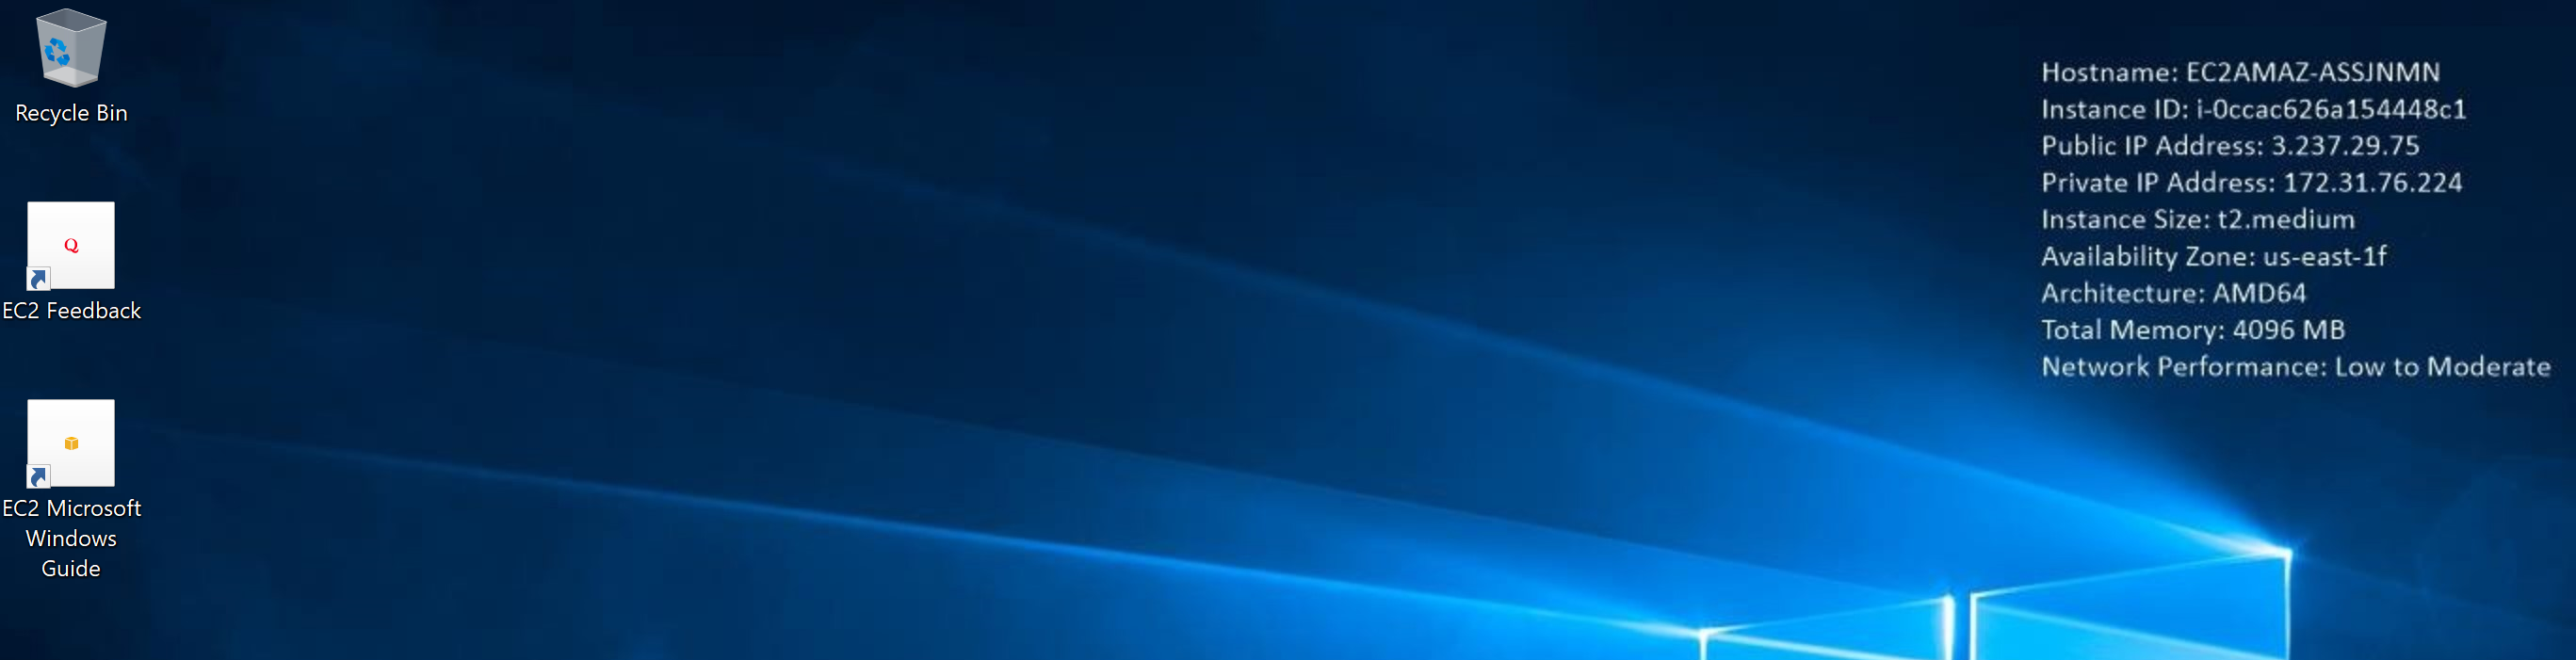
Windows:
- Navigate to the EC2 Console in AWS.
- Click on Key Pairs on the left
- Create new key pair. Use pem because you'll need this to decrypt the admin password
- Click on Instances on the left.
- Click Launch Instances
- Select the Windows Server 2019 AMI that is free tier designated
- Select the Instance Size (cheat sheet here) a. Use a bit bigger one that isn't free tier for better performance. It wont cost that much, plus you have billing alerts set up, right?
- Configure the instance details. Click Next a. you're going to want to deploy this into the default VPC and one of the default subnets.
- Configure the storage. You can add another volume here if you would like. Click next.
- Ignore the tags if you wish.
- Select the key pair and click Create. KA69@xU!-oPiLbiQ(AlSYDKX8WopNoUT
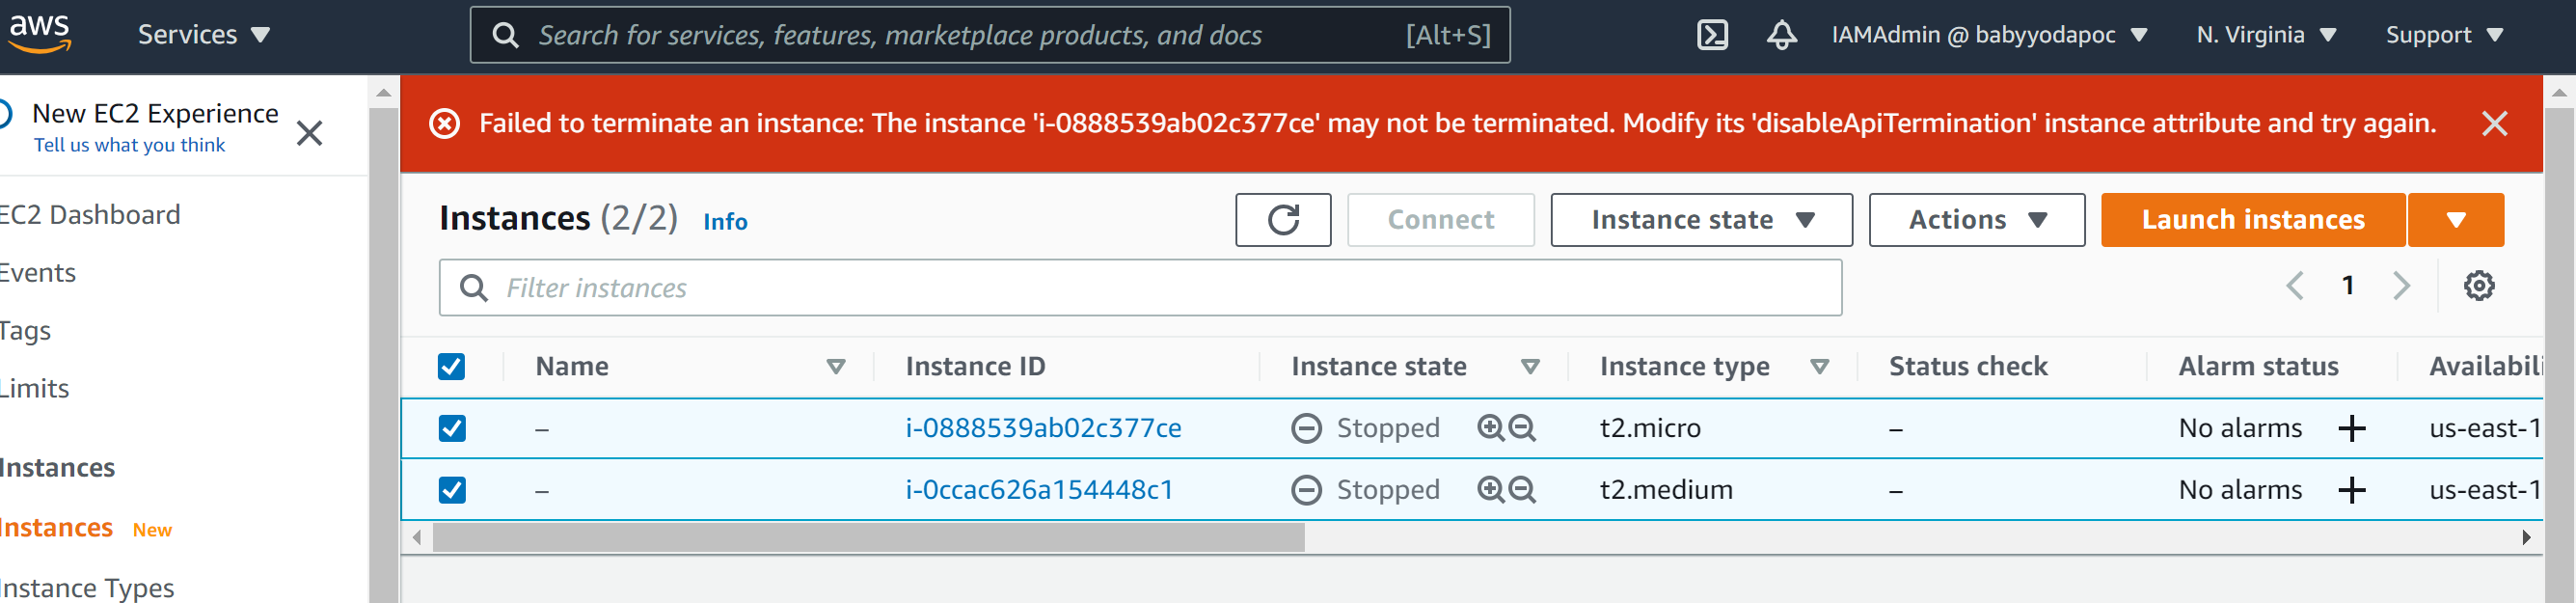
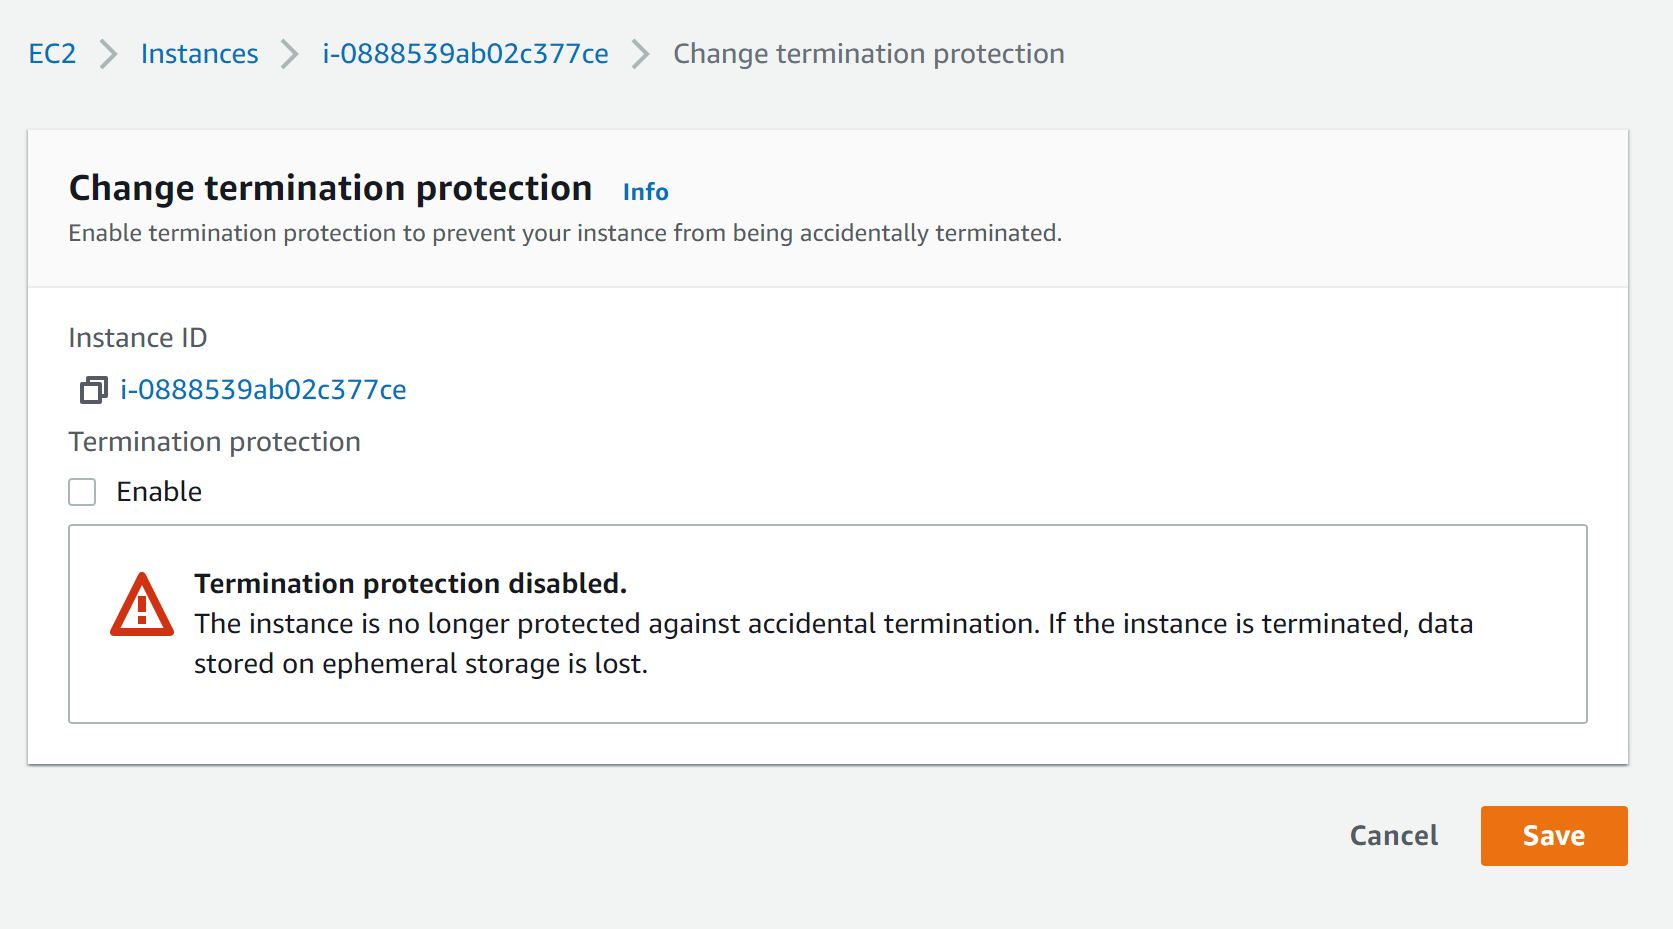
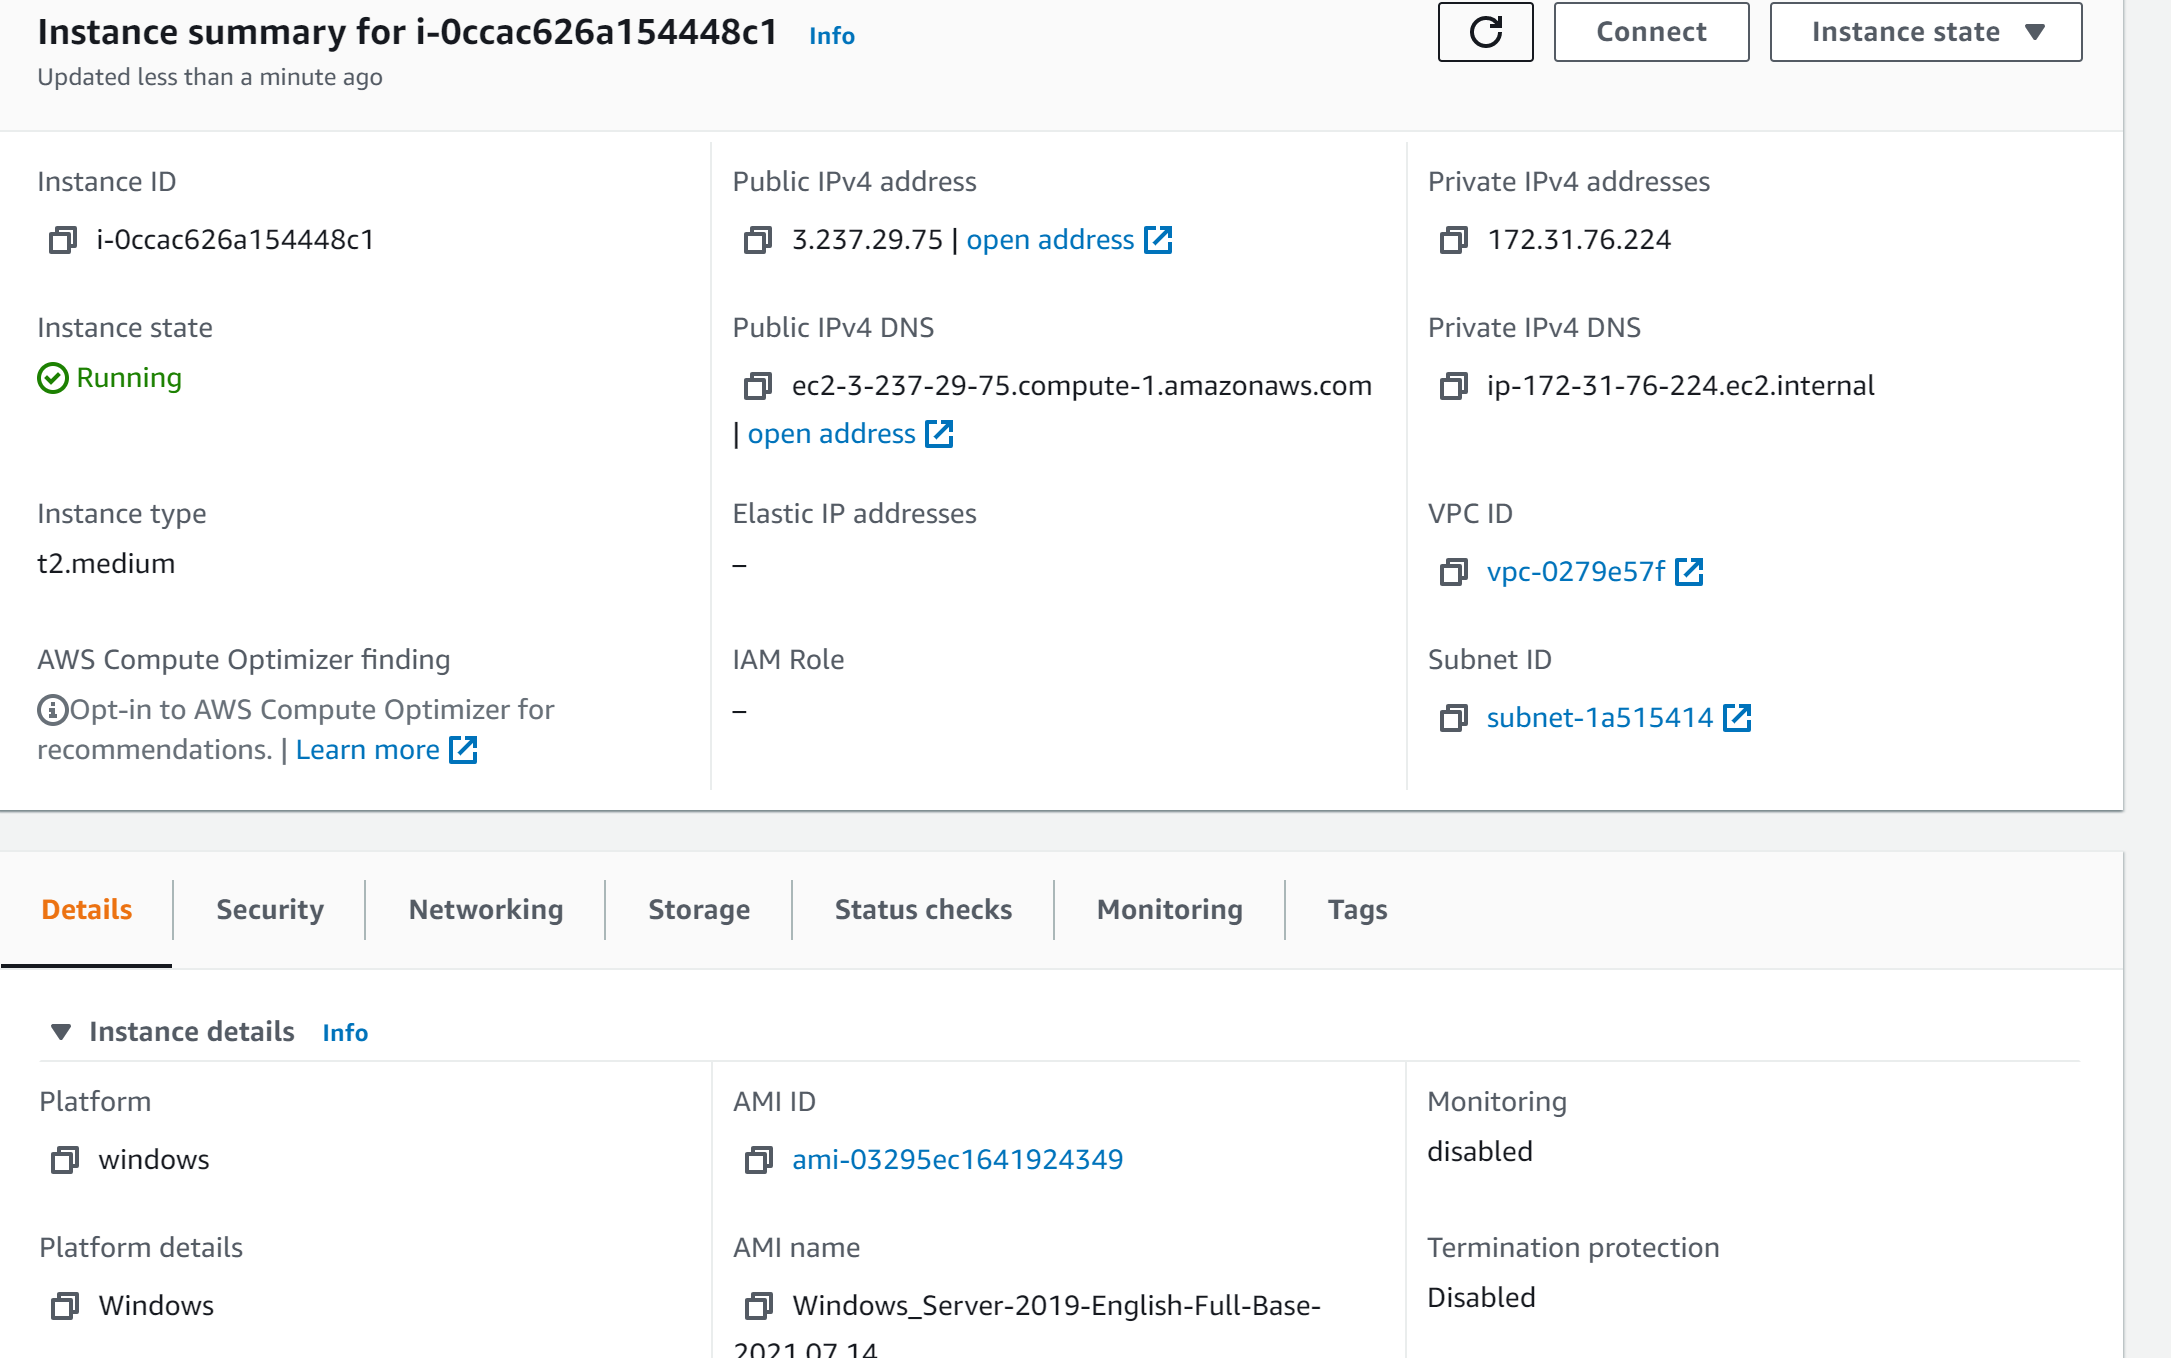 If you have accidental deletion checked:
Build your first S3 Bucket
- Navigate to the S3 Console
- Select Create Bucket
- Uncheck the block all public access and accept responsibility at the bottom.
- Click Create Bucket.
ARN's
Note the ARN under the properties of the bucket See the note on the Common part of the AWS Cheatsheet.
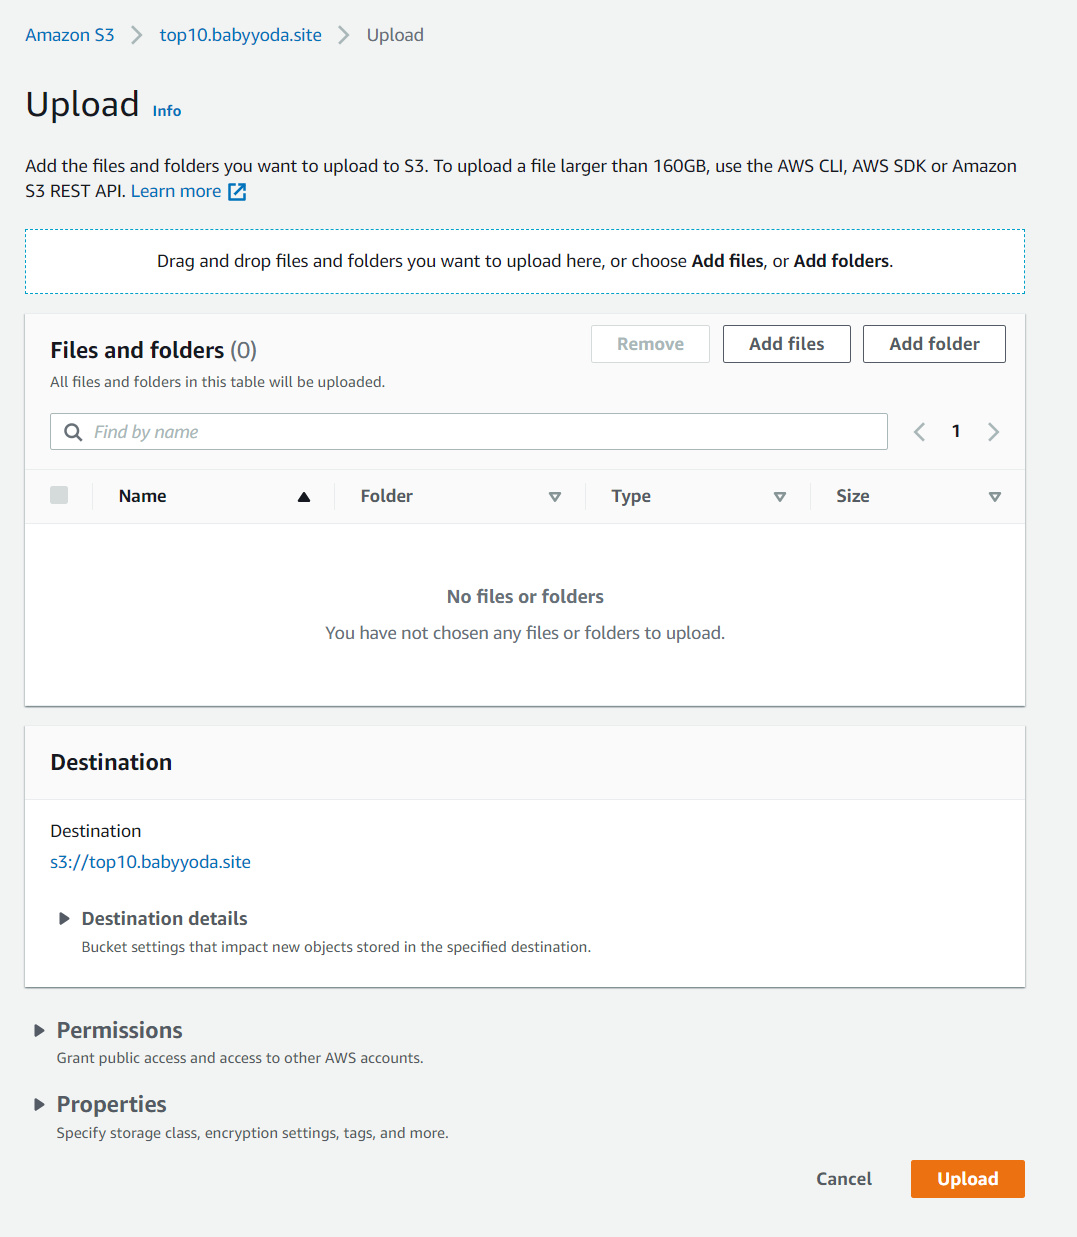
Upload Folders and Files
Easy peasy. If you are uploading a file larger than 160GB, use the CLI, SDK or S3 REST API Can Drag and Drop onto the GUI in the browser or:
- Click on Upload, select
Add Filesand upload - Click on Upload, select
Add foldersand upload.
Interacting with S3
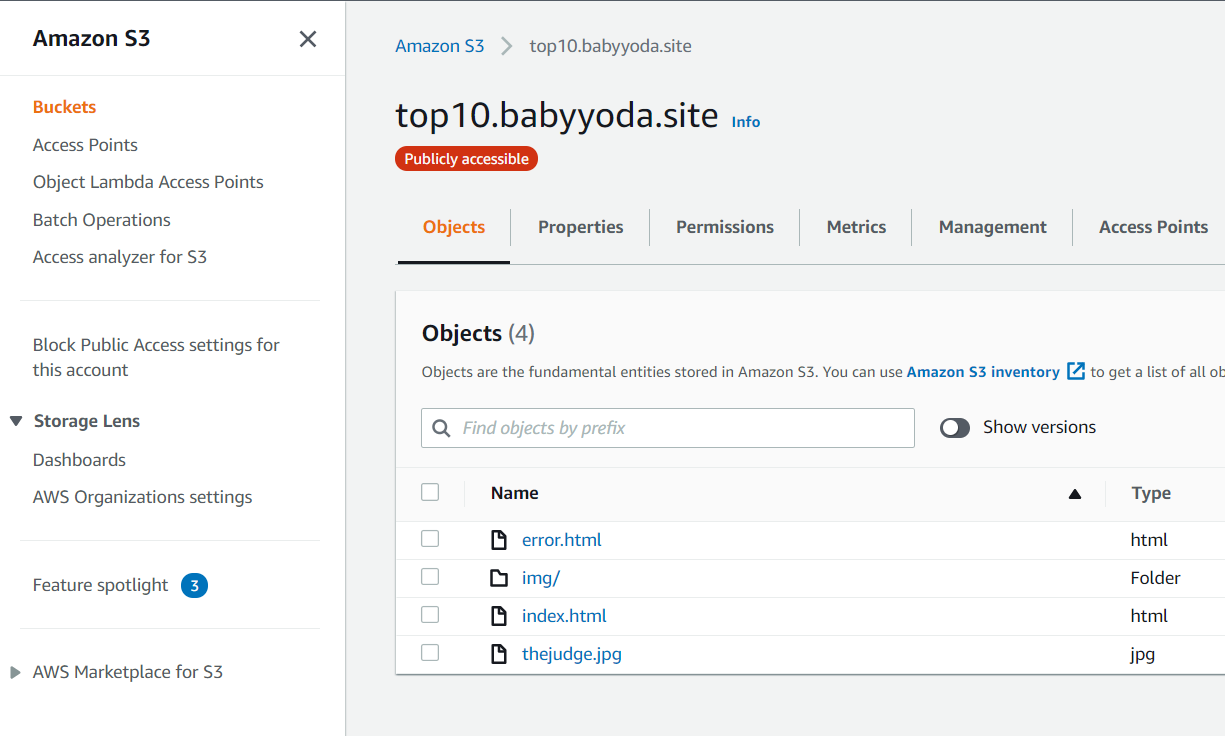
- You can navigate through the "folders" to find the objects that you want to open. You can get links, download them, move them, edit the tags, rename them, delete them from here.
Deleting Bucket
You need to empty the bucket before you can delete the bucket
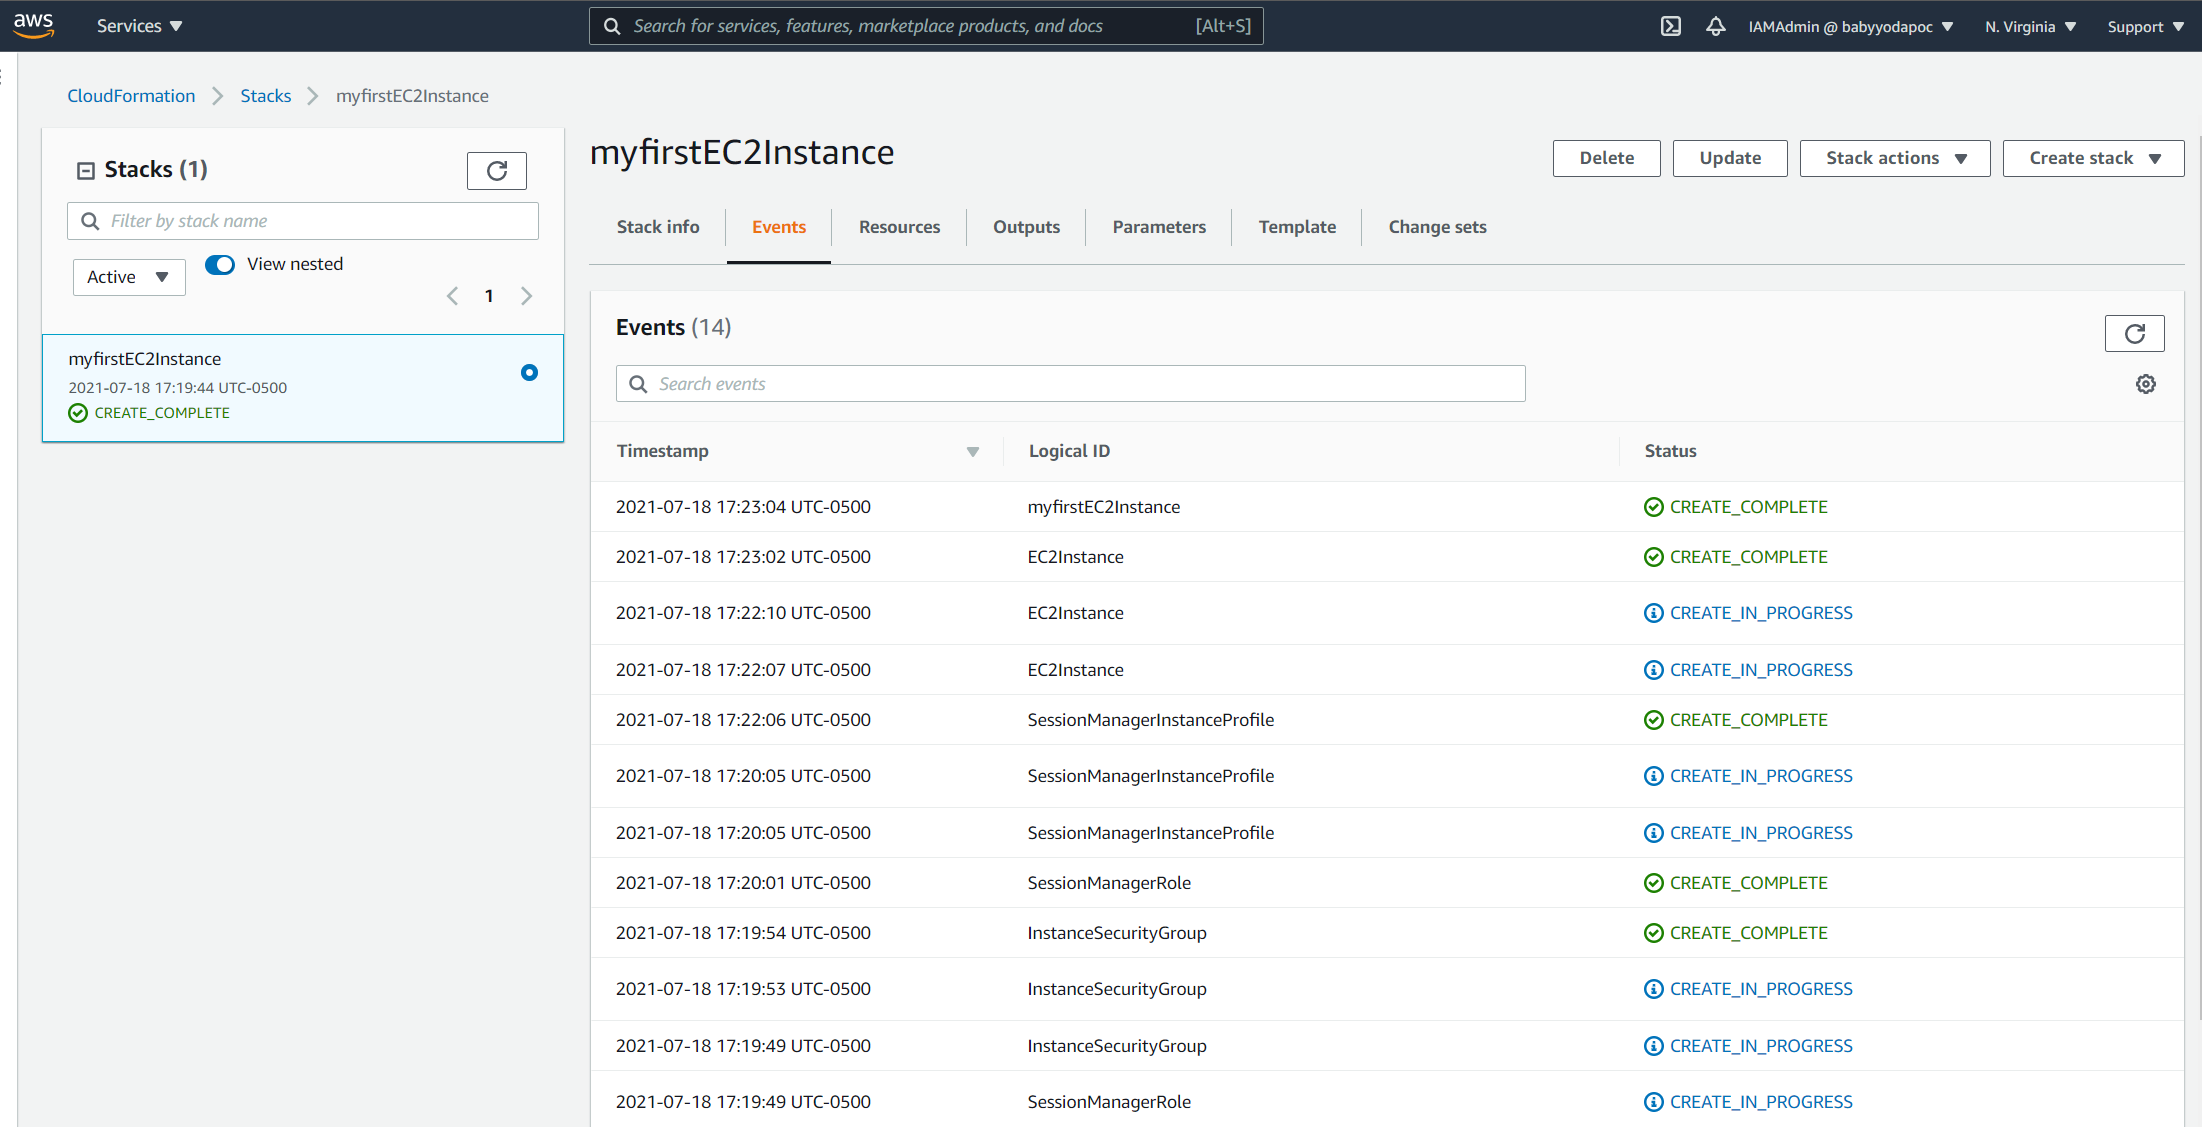
CloudFormation Demo
Creating your first EC2 instance via CloudFormation.
- Navigate to the CloudFormation console.
- Click Create Stack
- Click upload a template file.
- Navigate to your template
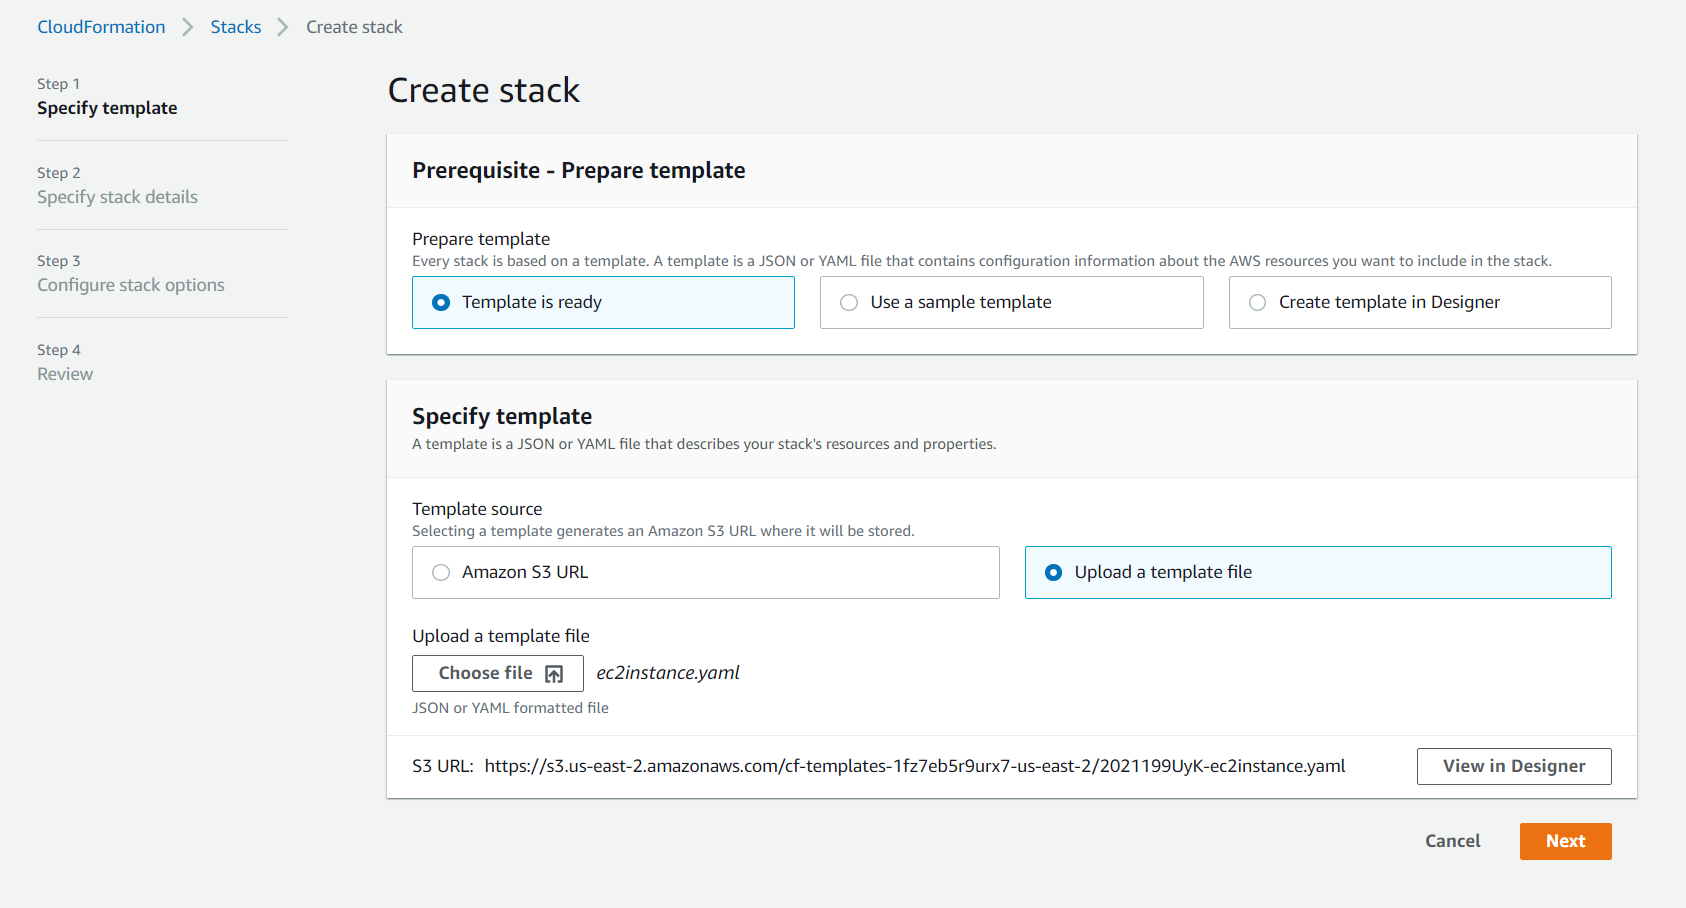
- Click Next
- Enter in your stack name and the parameters.
Template:
Parameters:
  LatestAmiId:
    Type: 'AWS::SSM::Parameter::Value<AWS::EC2::Image::Id>'
    Default: '/aws/service/ami-amazon-linux-latest/amzn2-ami-hvm-x86_64-gp2'
  KeyName:
    Type: AWS::EC2::KeyPair::KeyName
    Description: "Name of an existing SSH Keypair to access the instance"
  SSHandWebLocation:
    Description: The IP address range that can be used to SSH to the EC2 instances
    Type: String
    MinLength: '9'
    MaxLength: '18'
    Default: 0.0.0.0/0
    AllowedPattern: '(\d{1,3})\.(\d{1,3})\.(\d{1,3})\.(\d{1,3})/(\d{1,2})'
    ConstraintDescription: must be a valid IP CIDR range of the form x.x.x.x/x. Default is 0.0.0.0/0 and is less safe.
Resources:
  EC2Instance:
    Type: AWS::EC2::Instance
    Properties:
      KeyName: !Ref KeyName
      InstanceType: "t2.micro"
      ImageId: !Ref LatestAmiId
      IamInstanceProfile: !Ref SessionManagerInstanceProfile
      SecurityGroups:
        - !Ref InstanceSecurityGroup
  InstanceSecurityGroup:
    Type: 'AWS::EC2::SecurityGroup'
    Properties:
      GroupDescription: Enable SSH access via port 22 and 80
      SecurityGroupIngress:
        - IpProtocol: tcp
          FromPort: '22'
          ToPort: '22'
          CidrIp: !Ref SSHandWebLocation
        - IpProtocol: tcp
          FromPort: '80'
          ToPort: '80'
          CidrIp: !Ref SSHandWebLocation
  SessionManagerRole:
    Type: 'AWS::IAM::Role'
    Properties:
      AssumeRolePolicyDocument:
        Version: 2012-10-17
        Statement:
          - Effect: Allow
            Principal:
              Service:
              - ec2.amazonaws.com
            Action:
              - 'sts:AssumeRole'
      Path: /
      ManagedPolicyArns:
        - "arn:aws:iam::aws:policy/AmazonSSMManagedInstanceCore"
  SessionManagerInstanceProfile:
    Type: 'AWS::IAM::InstanceProfile'
    Properties:
      Path: /
      Roles:
        - !Ref SessionManagerRole
Outputs:
  InstanceId:
    Description: InstanceId of the newly created EC2 instance
    Value: !Ref EC2Instance
  AZ:
    Description: Availability Zone of the newly created EC2 instance
    Value: !GetAtt
      - EC2Instance
      - AvailabilityZone
  PublicDNS:
    Description: Public DNSName of the newly created EC2 instance
    Value: !GetAtt
      - EC2Instance
      - PublicDnsName
  PublicIP:
    Description: Public IP address of the newly created EC2 instance
    Value: !GetAtt
      - EC2Instance
      - PublicIp
- Name the stack and then select the keypair from the dropdown. Notice the other two fields are already populated. Click next
- Scroll down and click the Capabilities box that you acknowledge that it creates resources.
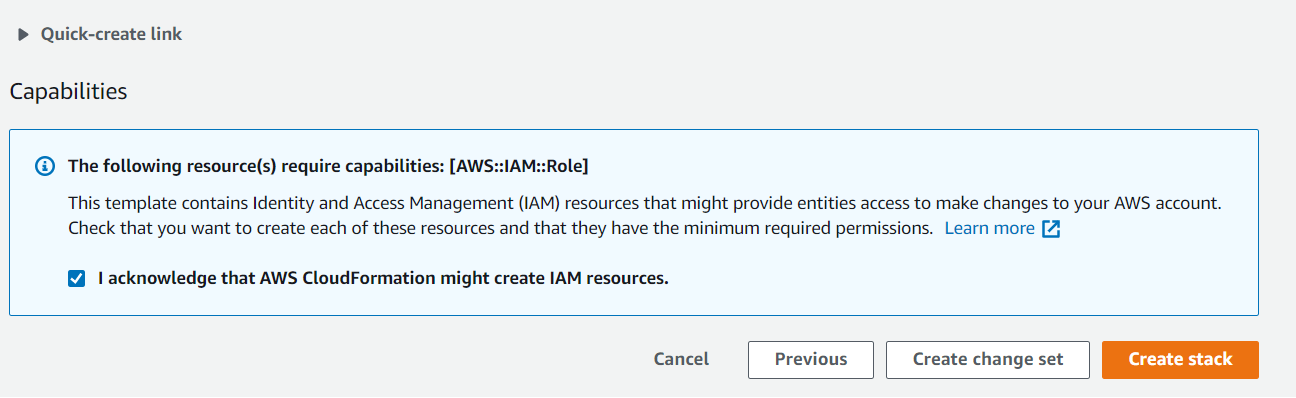
- Click Create Stack.
- Wait for the resources to be created.
Removing the resources
- Back in the CloudFormation console, click on the stack and delete the stack. Deleting the stack also deletes all of the resources.
Simple Monitoring with CloudWatch Demo
- Create an EC2 instance, probably at t2.micro. Amazon Linux x86 64 bit.
- Ensure its set to the default VPC and has a public IP a. Optionally enable detailed monitoring
- Connect to the instance and install Extras package and Stress a. Install Stress
sudo amazon-linux-extras install epel -y
sudo yum install stress -y
- Back in the CloudWatch console, create an alarm based on the CPU Utilisation of the created instance.
- Select the per instance metric, select the instance name and the CPUUtilization Metric.
- Set the CPU Threshold greater than 15%
- Connect to the EC2 Instance
- Run stress 'stress -c 2'
- Wait for alarm to .. alarm
- use ctrl + c to cancel stress
- Wait for alarm to return to ..ok
- Delete the alarm
- Delete the instance
Registering your domain through AWS
- Navigate to the Route53 console
- Click Registered Domains on the left.
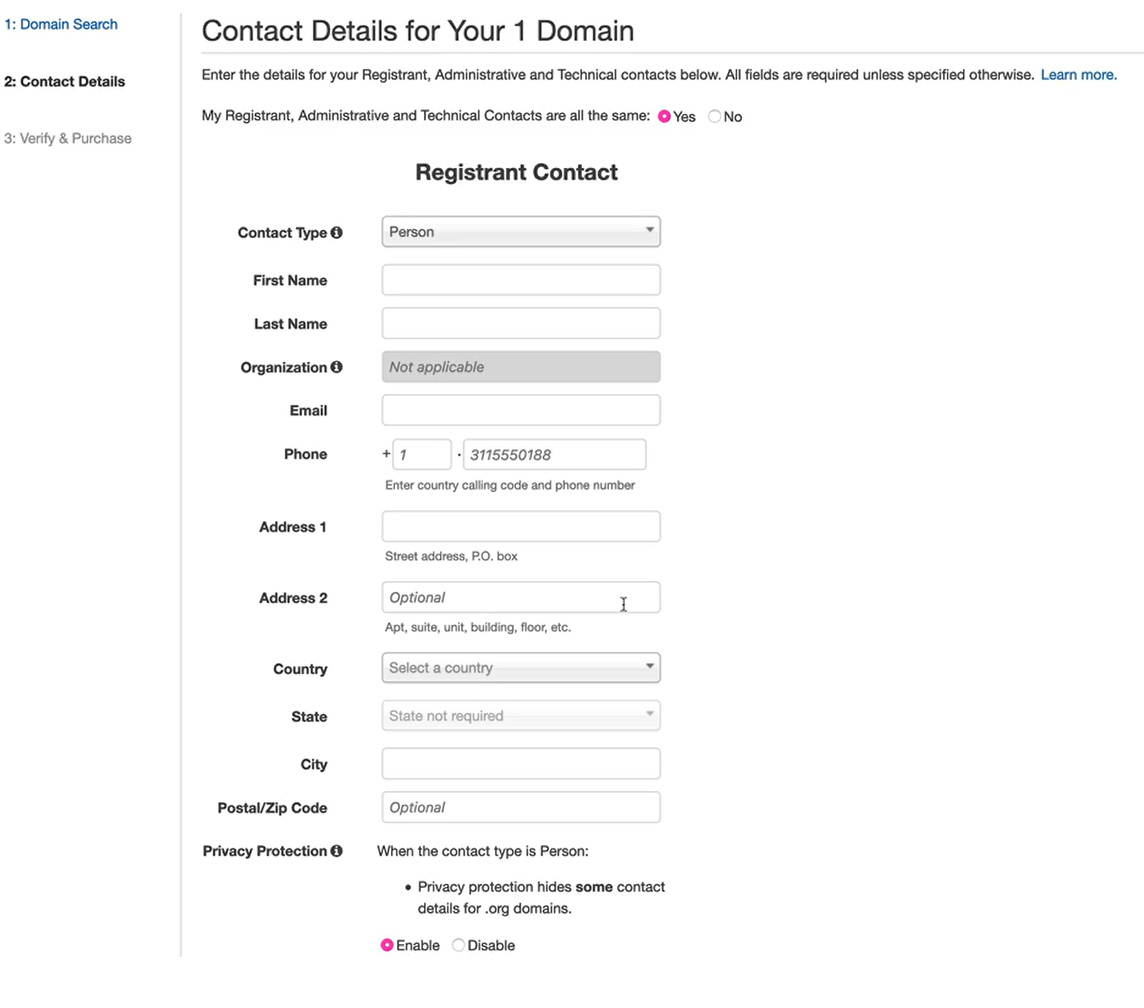
- Check your contact details and accept your terms and conditions
- AWS is now talking to the domain registry for the TLD you ordered this domain from. a. this is making sure that the registrar that is trusted by the TLD sets up and delegates this domain to you.
- Wait for the domain name to load in the registered domains.
- Check the name servers
- Look at the Hosted Zones where your records are going to be hosted.