9. App Security
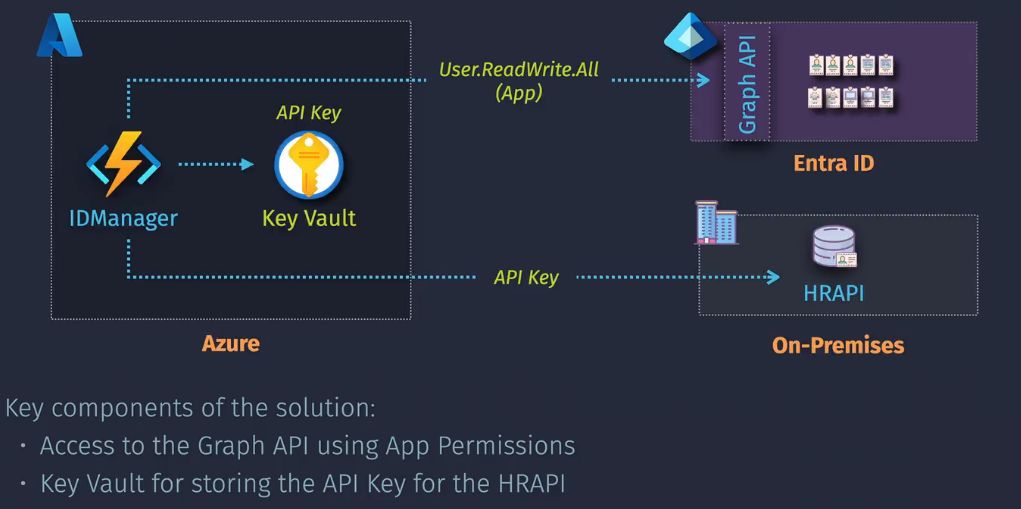
Key Vault
These are used to secure all of the SSL certs, keys, secrets, etc for your application to use.
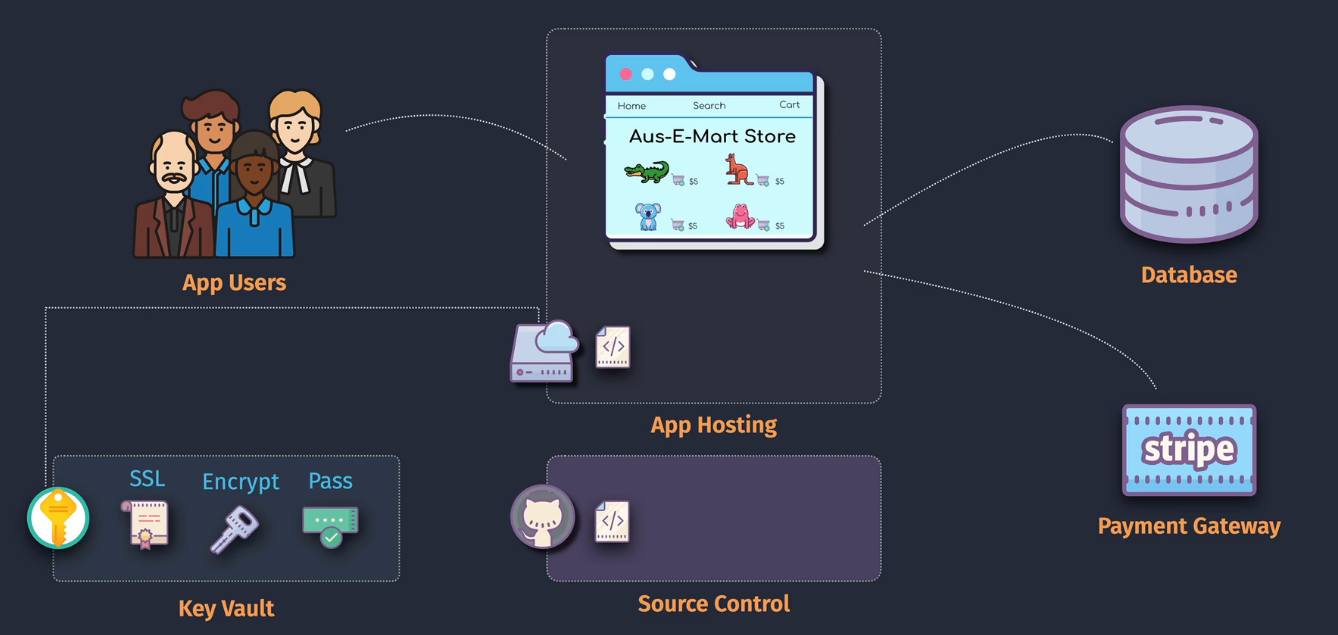
Higher tier will give you a HSM on top of the normal security.
Everything is stored on the Data plane, management and users are configured on the Management plane

- You will need to create an access policy to give access to the data plane...or
- Use Azure RBAC on the data plane.
Considerations
- Only can be accessed via a Entra ID identity
- Managed identities are recommended for apps (vs app reg and secret)
- Protect data with Soft delete (recycle bin) and Purge Protection (time based lock)
Demo: Create, Configure and Use a Key vault
- this will create an ACR, a VM and some related infrastructure
- Create the Keyvault
- set purge protection to off and the soft delete to 7 days.
- RBAC access policy - the one that is recommended
- On the VM, create a system assigned managed identity
- On the KV, go to secrets - you will be unauthorized - this is because you haven't assigned RBAC on the data plane.

- Add your user to the IAM Access Control and you'll be able to access.
- Add your ACR access key to the KV as acr-password
- Add the VM's managed identity as a KV Secrets User role assignment
- Log into the VM via Public IP
- Log in using that managed identity
- Retrieve the KV secret using the commands below
- Logout of Azure.
- Log in using Docker using the command below.
Commands:
- Login to Azure:
az login --identity - Create a variable for ACR name:
acr="youracrname" - Create a variable for Key Vault name:
vault="yourkvname" - Retrieve the password: az keyvault secret show --name acr-password --vault-name $vault --query value -o tsv
- Assign password to variable:
password=$(az keyvault secret show --name acr-password --vault-name $vault --query value -o tsv) - Logout of Azure:
az logout - Optional docker login:
docker login $acr.azurecr.io --username $acr --password $password
Demo: Push a Container to ACR using a KV Secret
- Do the previous demo
- Log into the VM
- Pull down the repo
- Create a docker image and tag the image with the ACR details:
docker build -t $acr.azurecr.io/webstore:latest -f Dockerfile . - Push this to the container registry:
docker push $acr.azurecr.io/webstore:latest - Create a new Container Instance, and attach the ARC and the image.
- Set up the public networking on port 80.
- Access the IP address via browser :)
Note: As a bonus, automate the ^ by using a script.
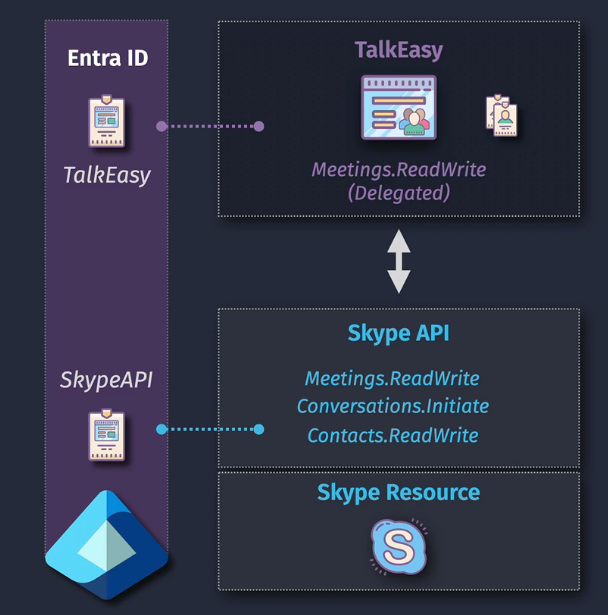
Entra ID Permission and Consent
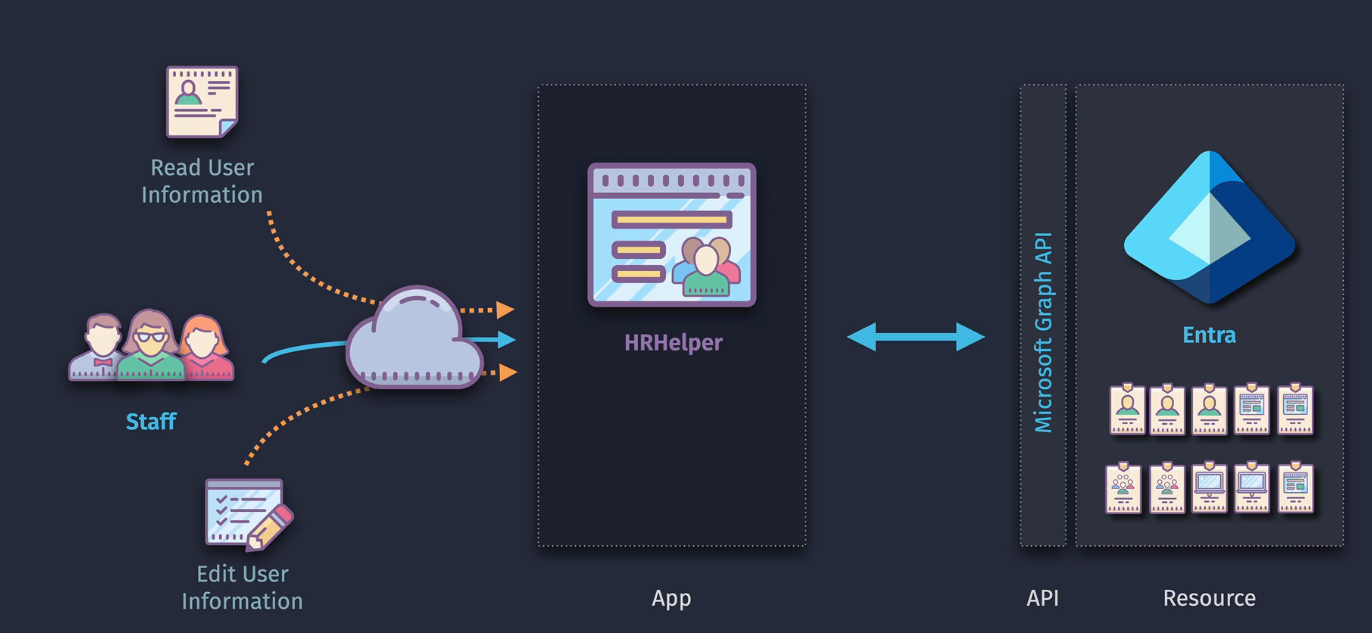
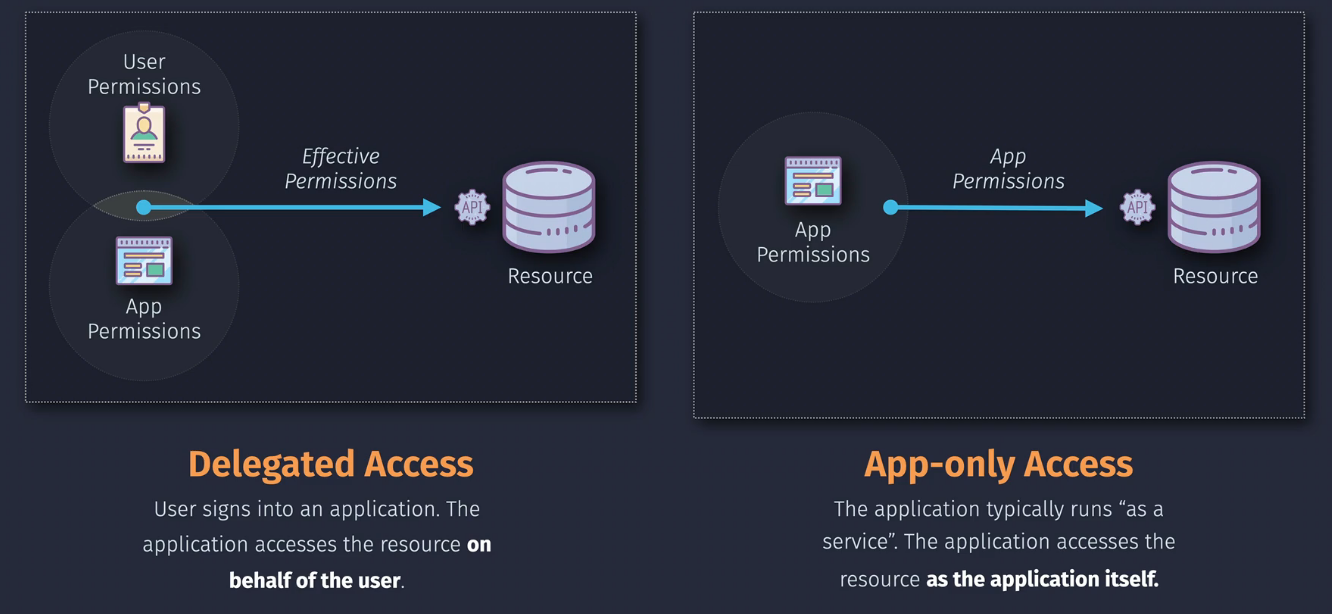
You can either work as the app or work as the user - remember this:
Key components:
App Registration - apps wanting to authenticate via Entra ID to access a resource API Registration - the Web API that exposes its features/data viea Entra ID API Permissions - Actions the API allows to be performed - Delegated or Application
Demo: Configure an app with Delegated Permissions
- Deploy this link here: https://portal.azure.com/#create/Microsoft.Template/uri/https%3A%2F%2Fraw.githubusercontent.com%2Fjamesdplee%2Fcloudlee-click2deploy%2Fmain%2Ftemplates%2Fvm-devtools.json
- Clone down the repo
- Open the dir in VScode
- Enter in these commands:
py -m venv .venv
.venv\scripts\activate
py -m pip install -r requirements.txt
- Create a .env file, entering in your client ID and secret:
## Note: If you are using Azure App Service, go to your app's Configuration,
## and then set the following values into your app's "Application settings".

CLIENT_ID=YOURID
CLIENT_SECRET=YOURSECRET

## The AUTHORITY variable expects a full authority URL.
#
## If you are using an AAD tenent, configure it as
## "https://login.microsoftonline.com/TENANT_GUID"
## or "https://login.microsoftonline.com/subdomain.onmicrosoft.com".
#
## If you are using a CIAM tenant, configure it as "https://subdomain.ciamlogin.com"
#
## Alternatively, leave it undefined if you are building a multi-tenant app in world-wide cloud
AUTHORITY="https://login.microsoftonline.com/YOURDOMAIN.onmicrosoft.com"
- You don't have a client ID or secret, so we'll need to set that up
- Go into Entra ID and register an application.
- Copy the Client ID and create a new Secret and paste it in the .env file.
- Run the app:
py -m flask run --debug --host=localhost --port=8000 - Sign in as a user and realize it needs a permission
- Add the API permissions - delegated and add in User.readwrite.all and then consent to the use as an administrator.
- Log in again.
- Notice that if you don't have the permissions as a user, you won't be able to do what you're allowed to do.
Demo: Configure an app with App Permissions
- Complete the previous demo, but delete the delegated permissions on the API permissions tab.
- Add in the application permissions
- Notice you don't need to log in and you'll be able to do whatever the app needs it to do
Cleanup
Delete the app registrations.
Case Study